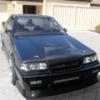
Hr31 Coupe Rb26 (For Now)
Announcements
-
Similar Content
-
Latest Posts
-
I'm looking for some real world experiences/feed back from anyone who has personally ran a EFR7670 with a 1.05 exhaust housing or a .83 I'm leaning towards the .83 because its a street car used mostly for spirited driving in the canyons roads. I"m not looking for big numbers on paper. I want a responsive powerband that will be very linear to 8000 rpm. I dont mind if power remains somewhat flat but dont want power to drop off on top. The turbo I've purchased is a 1.05, although the mounting flange T3 vs T4 and internal vs external waste gates are different on both housings, I not concern about swapping parts or making fabrication mods to get what I want. Based on some of the research I've done with chat gpt, the 1.05 housing seems to be the way to go with slightly more lag and future proofing for more mods but recommends .83 for best response/street car setup. AI doesn't have the same emotions as real people driving a GTR so I think you guys will be able to give me better feed back 😀
-
Surely somebody has one in VIC. Have you asked at any shops? Is this the yearly inspection or did you get a canary?
-
This is where I share pain with you, @Duncan. The move to change so many cooling system pieces to plastic is a killer! Plastic end tanks and a few plastic hose flanges on my car's fail after so little time. Curious about the need for a bigger rad, is that just for long sessions in the summer or because the car generally needs more cooling?
-
So, that is it! It is a pretty expensive process with the ATF costing 50-100 per 5 litres, and a mechanic will probably charge plenty because they don't want to do it. Still, considering how dirty my fluid was at 120,000klm I think it would be worth doing more like every 80,000 to keep the trans happy, they are very expensive to replace. The job is not that hard if you have the specialist tools so you can save a bit of money and do it yourself!
-
OK, onto filling. So I don't really have any pics, but will describe the process as best I can. The USDM workshop manual also covers it from TM-285 onwards. First, make sure the drain plug (17mm) is snug. Not too tight yet because it is coming off again. Note it does have a copper washer that you could replace or anneal (heat up with a blow torch) to seal nicely. Remove the fill plug, which has an inhex (I think it was 6mm but didn't check). Then, screw in the fill fitting, making sure it has a suitable o-ring (mine came without but I think it is meant to be supplied). It is important that you only screw it in hand tight. I didn't get a good pic of it, but the fill plug leads to a tube about 70mm long inside the transmission. This sets the factory level for fluid in the trans (above the join line for the pan!) and will take about 3l to fill. You then need to connect your fluid pump to the fitting via a hose, and pump in whatever amount of fluid you removed (maybe 3 litres, in my case 7 litres). If you put in more than 3l, it will spill out when you remove the fitting, so do quickly and with a drain pan underneath. Once you have pumped in the required amount of clean ATF, you start the engine and run it for 3 minutes to let the fluid circulate. Don't run it longer and if possible check the fluid temp is under 40oC (Ecutek shows Auto Trans Fluid temp now, or you could use an infrared temp gun on the bottom of the pan). The manual stresses the bit about fluid temperature because it expands when hot an might result in an underfil. So from here, the factory manual says to do the "spill and fill" again, and I did. That is, put an oil pan under the drain plug and undo it with a 17mm spanner, then watch your expensive fluid fall back out again, you should get about 3 litres. Then, put the drain plug back in, pump 3 litres back in through the fill plug with the fitting and pump, disconnect the fill fitting and replace the fill plug, start the car and run for another 3 minutes (making sure the temp is still under 40oC). The manual then asks for a 3rd "spill and fill" just like above. I also did that and so had put 13l in by now. This time they want you to keep the engine running and run the transmission through R and D (I hope the wheels are still off the ground!) for a while, and allow the trans temp to get to 40oC, then engine off. Finally, back under the car and undo the fill plug to let the overfill drain out; it will stop running when fluid is at the top of the levelling tube. According to the factory, that is job done! Post that, I reconnected the fill fitting and pumped in an extra 0.5l. AMS says 1.5l overfill is safe, but I started with less to see how it goes, I will add another 1.0 litres later if I'm still not happy with the hot shifts.
-


Recommended Posts
Create an account or sign in to comment
You need to be a member in order to leave a comment
Create an account
Sign up for a new account in our community. It's easy!
Register a new accountSign in
Already have an account? Sign in here.
Sign In Now