Jump to content
SAU Community

Recommended Posts

Make: Nissan

Model: Skyline HCR32

Year: 1993

Color: Black

Engine/Driveline:

Kakimoto Regu 06&R Catback

HPI front pipe

Jjr dump pipe

High flow cat

Drift Panel Filter

Splitfire coilpacks

ASI 52mm alloy radiator

GReddy Profec B spec II (13psi)

FMIC kit

Front lip

Welded r200 diff

Interior/gauges

Nismo gear shift knob

Deep dish steering wheel

Suspension & Brakes:

ISC N1 Coilovers

Cusco castor rods

Kazama tie rod ends

Jjr front upper camber arms

R33 Front Lca's

Power spirit rear camber arms

Hicas lock bar + all hicas line removed

alloy subframe bushes

Dba cross drilled and slotted front disc's

Dba vented rear disc's

Bendix ultimate pads F&R

Chassis & Clutch:

Excedy HD clutch

Nismo reinforced clutch pedal bracket

GTR front strut brace

Cusco rear strut brace

Wheels & Tyres:

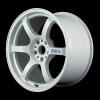
Gramlights 57D 17x9 +22

F Kumho Ku36 235/45R17

Gt radial 235/45R17

picked this up a few months back with some good plans for it and here is a quick run down on the progress so far.

Took it for a good run out to dubbo with the missus to see the zoo as soon as i got it....took some photos on panorama at bathurst..

DUBBO002.jpg

DUBBO014.jpg

DUBBO013.jpg[/b]

after returning from dubbo i instlled a Greddy Profec B spec II and a FMIC

skyline003.jpg

running 13psi through it at the moment, does need to be properly set up but im awaiting a few more parts until then..

added some more better quality pics of the exhaust and wheels

IMG_0119.jpg

IMG_0114.jpg

IMG_0121.jpg

with my chunky sidewalled Kumho put the wheel through the gaurd so needed a new one...got that sorted quick

IMG_0381final.jpg

IMG_0391final.jpg

next up was a diff weld..my standard diff was terrible and would single leg alot...so i fixed it

IMG_0381final.jpg

IMG_0391final.jpg

next i fitted my aero bunnings lip...

Bar off

IMG_0229.jpg

up close

IMG_0231.jpg

finished product

IMG_0249final.jpg

thats how it stands ATM..

i have currently a list of things waiting to go on...

*nismo Power brace

*oil pressure, temp and water temp guages.

*looking at my turbo options

* 550cc injectors

*power FC

ill keep the updates flowing

Link to comment
https://www.sau.com.au/forums/topic/360639-kyles-r32-gtst-build/
Share on other sites

hey mate

nice clean ride and i like the gramlights for somthing different. they suit it.

im a big fan of the garden edging. on one of the bars i used it on i added some brackets to kick the rear out to blen in with the wheels a little.

example

DSC03210.jpg

yeha everyone loves the bunnings lip.....so cheap for the results it is great....

i like the bracket idea DJrift....as they do pull in quite a bit......i guess it shows the wheel width of a bit....

plans for the car is to be of a all rounder.....i really really enjoy drifting so that will be the main focus.......70% drift, 29% circuit 1% drag..

ill only go to the drags with a few friends for some fun....i would love to slide it every oppurtunity i get......

little update

ok lowered it a little more in the front.....about 2 cms...not much....but it was just a trial so i know how much adjustment on the coilover gives me how much more low in regards to body moving downward....

here are some quick pics...

big updates coming....

IMG_0343final.jpg

IMG_0360finalJPG.jpg

  • 2 weeks later...

It's running well. Needs injectors and PFC installed and tuned. Is gangsta now. On actuator boost it runs better then the standard turbo on 14psi.

Is fun.

The modified water line is a bit dodgy ATM. Had to cut the original water line and clamp the new flexible line to it. Needs a flare.

It's running well. Needs injectors and PFC installed and tuned. Is gangsta now. On actuator boost it runs better then the standard turbo on 14psi.

Is fun.

The modified water line is a bit dodgy ATM. Had to cut the original water line and clamp the new flexible line to it. Needs a flare.

Have a look at Nistune...Ap-Engineering RB20 PFC's are pretty rare these days

thanks man....

painted some things in teh bay today, to generally clean it up.... was going to do the fuel pump but im a bit lazy....will do that a weekend im off work.....

painted slu...i mean strut brace...(GTR item, horrible red, so fixed that) also my cooler core and piping got a little lick of paint....

here are a few pictures

IMG_0640.jpg

IMG_0635.jpg

IMG_0630.jpg

Edited by XkyleX
  • 2 months later...

Alright haven't updated in a little bit.

Sold a few bits and pieces off. Including PFC, AFM and injectors. Needed the money for a overseas trip me and my girl are going on.

On another note. Car is booked for unigroup this coming Friday. For a timing and boost tune.

If your interested in buying my gram lights get at me as I'm currency considering selling them and getting some r33 GTR wheels.

Create an account or sign in to comment

You need to be a member in order to leave a comment

Create an account

Sign up for a new account in our community. It's easy!

Register a new account

Sign in

Already have an account? Sign in here.

Sign In Now


  • Similar Content

  • Latest Posts

    • Which solenoid? Why was it changed? Again, why was this done? ...well, these wear..but ultimately, why was it changed? Did you reset the idle voltage level after fitment? I'm just a tad confused ~ the flash code doesn't allude to these items being faulty, so in my mind the only reason to change these things, would be some drive-ability issue....and if that's the case, what was the problem? Those questions aside, check if the dropping resistor is OK ...should be 11~14 ohms (TCU doesn't throw a flash code for this) ~ also, these TCU designs have full time power (to keep fault code RAM alive), and I think that'll throw a logic code (as opposed to the 10 hardware codes), if that power is missing (or the ram has gone bad in the TCU, which you can check..but that's another story here perhaps).
    • Question for people who "know stuff" I am looking at doing the new intake like the one in the picture (the pictured is designed for the OEM TB and intake plenum), this design has the filter behind the front bar, but, the filter sits where the OEM duct heads into the front bar, and the standard aperture when the OEM ducting is removed allows the filter to pulled back out of the front bar into the engine bay for servicing, a simple blanking plate is used to seal the aperture behind the filter This will require a 45° silicone hose from the TB, like the alloy pipe that is currently there, to another 45° silicone hose to get a straight run to the aperture in the front bar Question: how will it effect the tune if I move the MAF about 100-150mm forward, the red is around where my MAF is currently, and the green would be where it would end up Like this This is the hole the filter goes through  Ends up like this LOL..Cheers    
    • Despite the level up question, actually I do know what that is....it is a pressure sender wire.  So check out around the oil filter for an oil pressure sender, or maybe fuel pressure near the filter or on the engine. Possibly but less likely coolant pressure sensor because they tend to be combined temp/pressure senders if you have one. Could also be brake pressure (in a brake line somewhere pre ABS) but maybe I'm the only one that has that on a skyline.
    • Pull codes via the self-diagnosis procedure. As far as I can tell this is just a sign of transmission issues but not a code unto itself.
    • Hi All, putting the engine back together and everything is perfect except have this plug left over.. any ideas what it is for and where it goes? Is on cold side under the intake plenum *note not a stock plug, as everything has been modified Cheers
×
×
  • Create New...