Jump to content
SAU Community

Recommended Posts

Just heard from the mechanic, went in to Kutsi for a tune today. It's the first real test of the engine since I got it, and it all ran well made 282kw at the rear wheels. Hopefully getting a photo of the dyno charts tomorrow when it's picked up :D

  • Like 1

...not bad, nice delivery by the look of the print out.

Thanks mate, it's as smooth as I could hope for. Will be interesting to drive it for the first time, haven't driven in almost a year and it has close to twice the power of the last car I had at the track... Just glad the poor thing didn't blow up on the dyno and sounded healthy, it's the first real test of the engine since I've owned it.

Can anyone shed light on the ridiculous 1713NM figure? I'm obviously missing something here?

Thats an awesome power graph, should be really good to drive. That torque figure is at the wheels after gearing (altered by gearbox and final drive), it is rarely accurate (ratios have to be properly dialled in to the dyno) if it was in first for example you'd have the same power but like 5000nm torque.

Your real torque figure looks to be about 430nm at the wheels @ ~6100rpm

This is based off reading your graph and the formula: watts-torque-conversion-formula.jpg


It's a bit 'low' because the rpm is so high, but from how linear your delivery is, it would be safe to say your torque curve would be quite flat, it would have similar torque to its peak at just off spooling at ~ 3500rpm.

Anyway, looks awesome - cant wait to see it going around baskerville.

his is based off reading your graph and the formula: watts-torque-conversion-formula.jpg

Ah, knew it must have been something like that but had a look around and couldn't see what I was looking for (obviously looking in the wrong place). I'll have to map it out a bit further and get some more figures out of it :)

Thanks! Can't wait to get it out to the track

Okay, I was curious about exactly what my torque curve would look like, so I found some spare time to screw around with some code. Spent an afternoon and built a web based solution which will track the power curve from the only shitty picture I have of the dyno sheet. This tracked line then transforms itself into a graph with multiple points along the rev range, and plots out torque/kw from the equation that Dan posted up (thanks buddy).

Though the image is shitty, this is surprisingly accurate and ended up coming to the exact same amount of peak kw as the dyno chart (282kw) at the right RPM and follows the curve perfectly from the start. The major benefit being that it gives a hell of a lot more information (exact differences between ranges etc) and also adds the torque curve information I was looking for.

Anyway, a picture is worth a thousand words.

In a matter of seconds, it turned this:

post-67169-0-14632000-1370521394_thumb.png

Into this:

post-67169-0-93524000-1370521352_thumb.png

Torque curve looks good, not amazingly high but very steady.

Pretty happy with the result, but want to get a better image to work with because this one is slightly wonky and absolutely shitting me. The RPM is listed along the x axis, but isn't shown in this screenshot, but the exact amount is also listed when hovering over the torque/kw values (as shown). I feel it's much more readable information now though :D

If anyone thinks this may be useful, drop me a message and let me know. I can make this publicly available and quite usable with about a days worth of work (I think..)

Edited by Clandestine

Went and saw the car today, just needs a harness, battery and a few extra bits and pieces. Picked up a full set of tyres from TWN at an awesome price when I got back to tassie (thanks zoidbergmerc!) so it's pretty much ready to go. Will need to look into redoing some of the roof, will put up some details and explain once I have pics. Hopefully getting to the track by Thursday or Friday.

Also, it looks like I accidentally bought a car trailer... Pick it up tomorrow afternoon, will post some more info then :D

you're most welcome on the tyres :)

Why don't you tell all the nice people how you went on Friday at the track!! :D

(Shameless plug, tyreswithnowelly.com )

Edited by zoidbergmerc

you're most welcome on the tyres :)

Why don't you tell all the nice people how you went on Friday at the track!! :D

(Shameless plug, tyreswithnowelly.com )

I will! I just need to find some time to get it done, I haven't even told y'all about the trailer or anything. Will try to find some time this afternoon and get a few pics up :D

As Peter mentioned, I got out to the track finally on Friday!

I was initially just going to hire a trailer, but I went looking for car trailers with the parents as the car is stored at their place they want to be able to move it easily. They've been looking for a couple of months, and they're ridiculously expensive second hand, seems everyone is selling a crappy wooden base trailer capable of carrying a small chicken for 3k+. Though they were a bit pricier, we ended up having a look at the AzCustom trailers, and dropped in a deposit the same day we saw it.

The trailer has the new tie downs over the front wheels, and the normal awesomeness of these trailers being super low, massively long ramps and electric brakes. The extra cash was definitely worth it, the car drives straight on, you can easily open the doors, and with the new tie downs it's loaded in about a minute. Awesome work by AzCustom, and a big thanks to Tas Mobile Mechanics for not only wiring it all up (in the cold, and in the rain) but also fixing the wiring in the tow car so the electric brakes actually work!

Getting the new tyres fitted on the sexy beast

post-67169-0-37944900-1371547936_thumb.jpg

We noticed pretty quickly that though the brakes work well, without the weight of a car on it the front wheels of the trailer are actually off the ground, so the brakes don't work at all :( We have bought a dropped tow bar for the Pajero now, but it was obviously built for lower cars to tow it. When the car is on the back of the trailer it all levels out nicely, and the trailer towed really nicely, even up my parents ridiculously steep driveway which had basically turned to mud with the rain. We have a few modifications we want to make to the trailer, will keep you posted as we get them underway.

Once we got the new tyres fitted, we took it back to dads workshop and got a few last things fitted up.

post-67169-0-66402800-1371547946_thumb.jpg

post-67169-0-34040500-1371547956_thumb.jpg

New GPS lap timer fitted up - this didn't take long but it's f**king awesome

post-67169-0-24843800-1371549971_thumb.jpg

All loaded up and ready to go to the track.

post-67169-0-48832900-1371547965_thumb.jpg

post-67169-0-70183700-1371552255_thumb.jpg

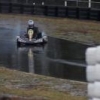
It was great to finally get back to the track, it had been over a year since I was last there and I was pretty rusty. After a quick warm up and a chat with Des (in which there was a slightly strong suggestion that going off the track was a f**king terribly bad idea) I got straight out there to get used to the new car.

The car sounds f**king amazing under boost, power comes on nice and smooth, and it brakes like a motherf**ker. Unfortunately it was raining on and off, almost dried up a few times but didn't get more than a small path to play with for a few minutes, but it was awesome all the same. Up the back hill there was no traction in 3rd or 4th if I wasn't careful with the throttle, and even with me feathering the throttle down the back straight in the rain it added a solid 30km over the top speed I ever reached in my R33 in the dry.

By the way, thanks to Bushy for the lend of the wipers! I would have been stuck in the pits most of the day if I didn't have them, and they're an absolute bitch to find at short notice.

I had a bit of trouble with turn in on this first run, with the car understeering in the wet toward the outer edges of the track, but I get the feeling if I was a bit more liberal with the go pedal this probably would have sorted itself out. This was basically a testing day so I went pretty easy, I didn't really want to change the setup until we get it in the dry where I feel a bit more confident about tyre temperature and pressures to start with. I definitely felt that the only thing letting the car down was me worrying about sliding off the track on the first day, a bit more confidence and track time and this car should be able to do some damned good things.

The GPS lap timer turned out to be an awesome investment, the splits were handy even though I wasn't going for an overall time, and I have top speeds, speed traps and lines through the corners for the day to review later. Very impressed. Worth checking out at http://racechrono.com.au/

All in all, a very successful day :D Nothing broke! I have some video but haven't uploaded it anywhere yet, I'll get onto that over the next few days.

post-67169-0-47620500-1371552250_thumb.jpg

Create an account or sign in to comment

You need to be a member in order to leave a comment

Create an account

Sign up for a new account in our community. It's easy!

Register a new account

Sign in

Already have an account? Sign in here.

Sign In Now


  • Similar Content

  • Latest Posts

    • Power is fed to the ECU when the ignition switch is switched to IGN, at terminal 58. That same wire also connects to the ECCS relay to provide both the coil power and the contact side. When the ECU sees power at 58 it switches 16 to earth, which pulls the ECCS relay on, which feeds main power into the ECU and also to a bunch of other things. None of this is directly involved in the fuel pump - it just has to happen first. The ECU will pull terminal 18 to earth when it wants the fuel pump to run. This allows the fuel pump relay to pull in, which switches power on into the rest of the fuel pump control equipment. The fuel pump control regulator is controlled from terminal 104 on the ECU and is switched high or low depending on whether the ECU thinks the pump needs to run high or low. (I don't know which way around that is, and it really doesn't matter right now). The fuel pump control reg is really just a resistor that controls how the power through the pump goes to earth. Either straight to earth, or via the resistor. This part doesn't matter much to us today. The power to the fuel pump relay comes from one of the switched wires from the IGN switch and fusebox that is not shown off to the left of this page. That power runs the fuel pump relay coil and a number of other engine peripherals. Those peripherals don't really matter. All that matters is that there should be power available at the relay when the key is in the right position. At least - I think it's switched. If it's not switched, then power will be there all the time. Either way, if you don't have power there when you need it (ie, key on) then it won't work. The input-output switching side of the relay gains its power from a line similar (but not the same as) the one that feeds the ECU. SO I presume that is switched. Again, if there is not power there when you need it, then you have to look upstream. And... the upshot of all that? There is no "ground" at the fuel pump relay. Where you say: and say that pin 1 Black/Pink is ground, that is not true. The ECU trigger is AF73, is black/pink, and is the "ground". When the ECU says it is. The Blue/White wire is the "constant" 12V to power the relay's coil. And when I say "constant", I mean it may well only be on when the key is on. As I said above. So, when the ECU says not to be running the pump (which is any time after about 3s of switching on, with no crank signal or engine speed yet), then you should see 12V at both 1 and 2. Because the 12V will be all the way up to the ECU terminal 18, waiting to be switched to ground. When the ECU switches the fuel pump on, then AF73 should go to ~0V, having been switched to ground and the voltage drop now occurring over the relay coil. 3 & 5 are easy. 5 is the other "constant" 12V, that may or may not be constant but will very much want to be there when the key is on. Same as above. 3 goes to the pump. There should never be 12V visible at 3 unless the relay is pulled in. As to where the immobiliser might have been spliced into all this.... It will either have to be on wire AF70 or AF71, whichever is most accessible near the alarm. Given that all those wires run from the engine bay fusebox or the ECU, via the driver's area to the rear of the car, it could really be either. AF70 will be the same colour from the appropriate fuse all the way to the pump. If it has been cut and is dangling, you should be able to see that  in that area somewhere. Same with AF71.   You really should be able to force the pump to run. Just jump 12V onto AF72 and it should go. That will prove that the pump itself is willing to go along with you when you sort out the upstream. You really should be able to force the fuel pump relay on. Just short AF73 to earth when the key is on. If the pump runs, then the relay is fine, and all the power up to both inputs on the relay is fine. If it doesn't run (and given that you checked the relay itself actually works) then one or both of AF70 and AF71 are not bringing power to the game.
    • @PranK can you elaborate further on the Colorlock Dye? The website has a lot of options. I'm sure you've done all the research. I have old genuine leather seats that I have bought various refurbing creams and such, but never a dye. Any info on how long it lasts? Does it wash out? Is it a hassle? What product do I actually need? Am I just buying this kit and following the steps the page advises or something else? https://www.colourlockaustralia.com.au/colourlock-leather-repair-kit-dye.html
    • These going to fit over the big brakes? I'd be reeeeeeeeaaaall hesitant to believe so.
    • The leather work properly stunned me. Again, I am thankful that the leather was in such good condition. I'm not sure what the indent is at the top of the passenger seat. Like somebody was sitting in it with a golf ball between their shoulders. The wheels are more grey than silver now and missing a lot of gloss.  Here's one with nice silver wheels.
    • It's amazing how well the works on the leather seats. Looks mint. Looking forward to see how you go with the wheels. They do suit the car! Gutter rash is easy to fix, but I'm curious about getting the colour done.
×
×
  • Create New...