Jump to content
SAU Community

Recommended Posts

Hey

So the day started at 8am at DVS JEZ's workshop with fitting the injectors, fuel pump and chucking some new spark plugs in.

After spending an hour or so we couldn't work out why my HKS 700cc injectors were holding back the tune.

I googled for a while and then found out in fact I was actually sold 555cc injectors.

So the tuning starts again.

We then found that the actuator Stao provides with his SS1PU's is a 20psi actuator haha so no less then that for me.

Tuning away again all of a sudden the boost dropped off to 12 psi and the turbo starts working overtime.

Checked the hosing and found that one of the joiners had actually split so DVS was nice enough to cut up a pipe and weld a new joiner.

We then got some well awaited results and she managed to pull a respectable 250rwkw before it pinged.

I told DVS to back the tune off to a safe level because I already was worried about running 20psi through it.

After 13 hours on a Sunday spent dropping injector rings into the abyss and everything that can go wrong going wrong we were done!

e31c3673.jpg

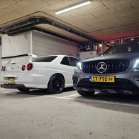
23e27b94.jpg

Link to comment
https://www.sau.com.au/forums/topic/395980-my-tune-results/
Share on other sites

  • Replies 51
  • Created
  • Last Reply

Top Posters In This Topic

Everything always takes about twice as long as its initially expected to, this much I have learned owning a skyline and doing most of the work yourself.. Great result considering the boost issues though!

Edited by Mitcho_7
Link to comment
https://www.sau.com.au/forums/topic/395980-my-tune-results/#findComment-6290869
Share on other sites

Okay guys I will post up in here so everyone can get an idea.

So the costs were.

Injectors - $650

Intake - $250

Pump - $200

Turbo - $1600

R32 ECU - $100

Window Switch - $100 (controls Cam timing because 32 ecu cant)

Nistune Chip - $250

Z32 AFM - $130

Tune - $650

Extra pipes etc - $150

Total = $4080 give or take a few hundred wasted on stupid things

Link to comment
https://www.sau.com.au/forums/topic/395980-my-tune-results/#findComment-6292202
Share on other sites

Mother f**ker lol.

For those of you chasing a fantastic street setup - do what Kasko has done.

For those of you wishing to see what money looks like when you add a source of ignition, ie a flame - do what I did :P

Off the top of my head, prices not 100% accurate:

Turbo - $1480

Dump/front pipe - $190

Injectors - $1200

Fuel pump - $190

Coilpacks - $520

ECU - $1850

misc (includes intake pipe, exhaust mods, catch can, all installations of parts supplied, gaskets and misc parts, lots and lots and lots of f**king around, and tune) - roughly $4000

rough total - $9430

hmmm.

However my setup is good to crack well into the low 300kw depending on how happy the dyno is hahaha.

I'm slightly jealous of Kasko, mostly because of how cheap his setup was compared to mine....but also slightly because of how fun it must be to drive

Link to comment
https://www.sau.com.au/forums/topic/395980-my-tune-results/#findComment-6292264
Share on other sites

But you have to look at this as well Troy

Car came with splitfires and a full 3.5" straight through setup.

Fun to drive haha this thing is insane to drive

Once I get the Slight clutch slip sorted it will have no problem cherping 2nd

Also Troy I tested out your theory about controlling boost with your right foot and I think in a week or so I will have it down

Link to comment
https://www.sau.com.au/forums/topic/395980-my-tune-results/#findComment-6292293
Share on other sites

Trozzle, what ecu are you using? Must be a haltech or something similar at that price!

I have a similar list of parts to kasko + a clutch on top and price wise its pretty similar. However, I haven't started putting things in yet Or had a tune so the budget could easily blow out...

Link to comment
https://www.sau.com.au/forums/topic/395980-my-tune-results/#findComment-6292298
Share on other sites

But you have to look at this as well Troy

Car came with splitfires and a full 3.5" straight through setup.

Fun to drive haha this thing is insane to drive

Once I get the Slight clutch slip sorted it will have no problem cherping 2nd

Also Troy I tested out your theory about controlling boost with your right foot and I think in a week or so I will have it down

You'll have to take me for a spin lol....though I still owe taking you for a spin in mine. I can guarantee there's a noticeable difference between how our cars lay down power though, I'd like to see which I like more ;)

Unfortunately though, the 2 things I had to buy that you didn't are some of the "cheaper" parts :P

And yeah you'll learn to control boost with your right foot. Whether you'll give a shit about doing it or not is another thing ;) trust me, if you had a high/low boost setup, you'd never use low boost anyway :D

Trozzle, what ecu are you using? Must be a haltech or something similar at that price!

I have a similar list of parts to kasko + a clutch on top and price wise its pretty similar. However, I haven't started putting things in yet Or had a tune so the budget could easily blow out...

I'm running the ViPEC v44 plug n play heh, hence the price and lack of "z32 AFM" in my purchases.

Link to comment
https://www.sau.com.au/forums/topic/395980-my-tune-results/#findComment-6292311
Share on other sites

Man...

You guys forget all those little things.. some arent cheap.

Ive recently spent about a grand just on boost control, gauges and a few other things like a catch can and hoses n sht.

think of al the tiny thing like cable ties, tape, connectors, heatwrap, hoseclamps, sprays etc etc.

And dont forget the exe stuff thats not engine related like suspension

Unless your car is really stock, its had heaps of cash spent on it.

But like the teacher says at the start of that Twised Sister video "What are you gonna do with your life!"

banana.gif

Good build dude.

Link to comment
https://www.sau.com.au/forums/topic/395980-my-tune-results/#findComment-6292596
Share on other sites

Create an account or sign in to comment

You need to be a member in order to leave a comment

Create an account

Sign up for a new account in our community. It's easy!

Register a new account

Sign in

Already have an account? Sign in here.

Sign In Now


  • Similar Content

  • Latest Posts

    • Hi, is the HKS  Tower Bar still available ? negotiable ? 🤔
    • From there, it is really just test and assemble. Plug the adapter cables from the unit into the back of the screen, then the other side to the car harness. Don't forget all the other plugs too! Run the cables behind the unit and screw it back into place (4 screws) and you should now have 3 cables to run from the top screen to the android unit. I ran them along the DS of the other AV units in the gap between their backets and the console, and used some corrugated tubing on the sharp edges of the bracket so the wires were safe. Plug the centre console and lower screen in temporarily and turn the car to ACC, the AV should fire up as normal. Hold the back button for 3 sec and Android should appear on the top screen. You need to set the input to Aux for audio (more on that later). I put the unit under the AC duct in the centre console, with the wifi antenna on top of the AC duct near the shifter, the bluetooth antenna on the AC duct under the centre console The GPS unit on top of the DS to AC duct; they all seem to work OK there are are out of the way. Neat cable routing is a pain. For the drive recorder I mounted it near the rear view mirror and run the cable in the headlining, across the a pillar and then down the inside of the a pillar seal to the DS lower dash. From there it goes across and to one USB input for the unit. The second USB input is attached to the ECUtec OBD dongle and the 3rd goes to the USB bulkhead connected I added in the centre console. This is how the centre console looks "tidied" up Note I didn't install the provided speaker, didn't use the 2.5mm IPod in line or the piggyback loom for the Ipod or change any DIP switches; they seem to only be required if you need to use the Ipod input rather than the AUX input. That's it, install done, I'll follow up with a separate post on how the unit works, but in summary it retains all factory functions and inputs (so I still use my phone to the car for calls), reverse still works like factory etc.
    • Place the new daughterboard in the case and mount it using the 3 small black rivets provided, and reconnect the 3 factory ribbon cables to the new board Then, use the 3 piggyback cables from the daughterboard into the factory board on top (there are stand offs in the case to keep them apart. and remember to reconnect the antenna and rear cover fan wires. 1 screw to hold the motherboard in place. Before closing the case, make a hole in the sticker covering a hole in the case and run the cable for the android unit into the plug there. The video forgot this step, so did I, so will you probably. Then redo the 4 screws on back, 2 each top and bottom, 3 each side and put the 2 brackets back on.....all ready to go and not that tricky really.      
    • Onto the android unit. You need to remove the top screen because there is a daughterboard to put inside the case. Each side vent pops out from clips; start at the bottom and carefully remove upwards (use a trim remover tool to avoid breaking anything). Then the lower screen and controls come out, 4 screws, a couple of clips (including 3 flimsy ones at the top) and 3 plugs on the rear. Then the upper screen, 4 screws and a bunch of plugs and she is out. From there, remove the mounting brackets (2 screws each), 4 screws on the rear, 2 screws top and bottom and 3 screws holding in the small plates on each side. When you remove the back cover (tight fit), watch out for the power cable for the fan, I removed it so I could put the back aside. The mainboard is held in by 1 screw in the middle, 1 aerial at the top and 3 ribbon cables. If you've ever done any laptop stuff the ribbon cables are OK to work with, just pop up the retainer and they slide out. If you are not familiar just grab a 12 year old from an iphone factory, they will know how it works The case should now look like this:
    • Switching the console was tricky. First there were 6 screws to remove, and also the little adapter loom and its screws had to come out. Also don't forget to remove the 2 screws holding the central locking receiver. Then there are 4 clips on either side....these were very tight in this case and needed careful persuading with a long flat screw driver....some force required but not enough to break them...this was probably the fiddliest part of the whole job. In my case I needed both the wiring loom and the central locking receiver module to swap across to the new one. That was it for the console, so "assembly is the reverse of disassembly"
×
×
  • Create New...