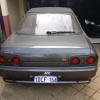
Torana Lx Gtr Hatch, Lots Of Pictures
Announcements
-
Similar Content
-
Latest Posts
-
By Chris_Guthrie · Posted
Any recommendations on a decent replacement manifold that doesnt break the bank or require additional mods for the stock turbo setup? I figure if I'm going to pull the manifold off anyway to fix the studs might as well replace it. -
By Chris_Guthrie · Posted
So I checked the turbo out today. Very minimum play at all just enough for the oil to take up when it's running. I did find an exhaust leak at the manifold. 1 stud all the way in the front is missing and the one all the way in the back is broken off. Front has visible signs of an exhaust leak. I'll fix that soon but that's not my problem still. I also found that the nipple coming off the turbo had the hose capped off and a hose ran from the j-pipe by the bov going to the wastegate. I removed that hose and capped that nipple and put the turbo nipple hose back on the wastegate. There was a ton of oil residue all through the charge side of the intercooler piping going to the throttle bodg. I'm thinking that's from the pcv. Doesn't seem to be coming from the turbo that was all clean on the pipes side. Haven't had a chance to check fuel pressure yet, haven't had time been having to pull a lot of doubles at work. I did pick up some carb cleaner to clean the iacv but wanted to make sure I had a fresh gasket in case the old one rips when I pull it off. I'm waiting on a MAF that was supposed to be here today but delayed to Monday. Have a double Monday and Friday and work all of next weekend so going to try to find some time in the middle of the week to try that out. Did about a 10m trip around the block today and towards the end the issues were coming back. Fingers crossed on this MAF but if not just going to throw a fuel pressure gauge in and see where I'm at. Did notice today that I can definitely hear the injectors pulsing. Very audible clicking coming from them. Assuming that's normal? Should also mean CAS is functioning somewhat properly. After it warmed up when I started it the intermittent misfires came in again. Did start doing that before it was fully warmed up. -
This morning I carefully reinstalled the manifold and started looking at a couple of things I need to do. Heat wrap arrived sometime today so I popped into the shed with the missus dishwashing gloves and started wrapping the first half of the dump and the screamer/plumb back. Once I do the second half I'll be able to final fit the turbo and exhaust up. Also pulled the harness out today and started terminating it at the ECU end. A connector is done, just need to run the remaining wires that arent in the harness - 12v, gnd and couple I/O
-
By Dose Pipe Sutututu · Posted
A31 is pretty much the same thing without HiAIDS I mean CAS, no improvement lol. Not to late to send it. -
Thanks for all the replies! I also wanted to ask if wheels that were fitted on Ford Falcons would fit the 350GTs as well? In the area I'm at there aren't that many options for secondhand wheels and new ones here are way out of my budget. From what I've seen, most of the wheels that are available that were fitted on Ford Falcons have an offset of +33 to +36, with a centre bore of 70.5mm whereas the stock 350GT's ones are 66mm, can't seem to find any hubcentric rings that fit that difference though.
-


Recommended Posts
Create an account or sign in to comment
You need to be a member in order to leave a comment
Create an account
Sign up for a new account in our community. It's easy!
Register a new accountSign in
Already have an account? Sign in here.
Sign In Now