Jump to content
SAU Community

Recommended Posts

So my Origin boot lip and roof wing arrived from Japan via Streeter this week, yay!

What's the recommended way to prep these things? It's glossy black FRP, I saw somewhere that a light sand, primer and paint (maybe two coats) is all you need, is that right?

What about mounting them? Double sided tape, polyurethane, sikaflex, something else - what do you use? I'd prefer something that can come off a couple of years later without ruining the paint/glass..

The roof wing is a solid fit against the rear glass, the boot lip is ok but may need a bit of sanding in the middle to sit tight.

With the colour, I'm thinking of going gloss black for both, to kind of complement my matte black front lip (and the awse weather shields :) :

11905068066_c6f0822022_z.jpg

This is pretty close to what I'm after (from JDMST):

post-35403-12695160632106637524.jpg

The alternative is body colour, it's classier but I kind of like the drift look above:

mg6597edit.jpg

What says you?

You should be fine to use sikaflex or some similar adhesive. Grab a caramel wheel to get it off when/if you want to get the sikaflex off.

I used a wheel on (at least) 5 year old sikaflex that was hardened and it worked a treat.

Bought mine for $15 off ebay.

You should be fine to use sikaflex or some similar adhesive. Grab a caramel wheel to get it off when/if you want to get the sikaflex off.

I used a wheel on (at least) 5 year old sikaflex that was hardened and it worked a treat.

Bought mine for $15 off ebay.

Thanks mate.

Any suggestions on how to prep and paint the FRP material properly?

  • 2 weeks later...

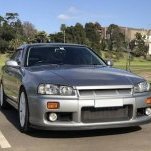
Managed to get this done over the weekend, the prep was a bit tedious and I managed to get Sikaflex all over the place when mounting but it turned out alright. I might do a proper write up later on. Here's some quick shots prior to any wash/wax/polish, I'm hoping to get a bit more gloss once that's done:

EDIT: Does anyone know where to get a decent high mount brake light for the rear window? I don't think a parcel shelf one will work as it's obscured by the rear wiper...?

12285182773_2cce8a79ae_c.jpg

12285182153_c16020d2dc_c.jpg

12285452044_7a749139f2_c.jpg

Edited by V28VX37
  • Like 2

I plastidipped my weather shields, one of those wings would tie in nicely in black

Good idea, did you have to pull them out for that?

I'm thinking black bonnet now too, although that could be a step too far...

Good idea, did you have to pull them out for that?

I'm thinking black bonnet now too, although that could be a step too far...

Nah just masked it up with newspaper and tape post-493-13922029314971_thumb.jpgpost-493-13922029469582_thumb.jpg

  • Like 1

Not bad!

Turns out I didn't do the best job with sikaflexing the boot lip and it started coming apart at one end :/ Anyhow I pulled it off and spent an afternoon cleaning up the polyurethane ... and ended up painting the lip body colour whilst it was off the car :) It's yet to go back on, will post a photo once it's done.

Some photos below of how the boot lip looks after I changed my mind about the colour.

Couple of tips for anyone wanting to mount theirs properly:

  • Make sure the fit is good before priming and painting. I ended up sanding back the inside middle section for a better fit before repainting the whole thing...
  • Do not go anywhere near the edges with Sikaflex. On the first go I went maybe 10-15mm from the edges and a fair bit squirted out, it's a prick to clean. Second time 20mm or so away and it was pretty good all around. Also, do not try this on a 40 degree day like I did the first time around, it will not cure properly.
  • Second time I used 2 ratchet straps to pull the lip forwards and down at each end, plus a plank sideways across the whole lip, held down but clamps at each end. Let it sit for 48 hours. Much better.
  • Oh and I didn't find any way to get a proper glossy finish at home (black or coloured, with or without clear coat), I reckon you need to bake the paint for that. Oh well.

12631914064_94296993c4_c.jpg

12631915134_01270c5200_c.jpg

  • Like 2
  • 1 month later...

Thanks guys! Yeah definitely test for fitment before mounting, much quicker than fitting it twice...

Mine's stayed on perfectly for two months now. Here's a behind the scenes shot, I let it sit like this for 48 hours to cure properly:

13892957373_d4692873d1_z.jpg

  • Like 3

Create an account or sign in to comment

You need to be a member in order to leave a comment

Create an account

Sign up for a new account in our community. It's easy!

Register a new account

Sign in

Already have an account? Sign in here.

Sign In Now


  • Similar Content

  • Latest Posts

    • Ok I get you. But isn’t the butterfly intake a headache with the +T?  see this is my plan so far but please advise me into the right direction.  Nistune Ecu, 1000cc Bosch injectors, TD05 or TD06 Kinugawa turbo using stock rb25det exhuast manifold, walbro fuel pump unsure of model I think it’s 450/460, spitfire coils and sparks to suit and a R35 MAF sensor and boost sensor.    I was thinking maybe do a cheap eBay plenum $400-500 or try find a stock det neo intake. I think I’d port match it so it’s getting the full capacity but open to advice please.  Thanks 
    • The issue now is the 'fuel cut' while driving, and when it happend, it does not stall. This, I did not test the fuel pressure while driving as I cannot with a fuel pressure gauge. I do have Nistune logs, yes. I have also replaced the MAF Sensor.   Also related to the FPG Fuel Hanger – I just realized that I need a Deutsch Crimp Tool to crimp some cables for the FPG Fuel Hanger. Need to purchase additional cables as the kit only included 2, which are for the float. FPG has not responded to my emails so far since purchasing. I thought about taking it to someone and having it done professionally, but I am reluctant since everyone I took it to messed up in some way.  
    • There's a good German place in Brisbane if youre up for the drive 😛
    • The German place in Cabramatta was rock solid, fresh pretzel cooked to order back then. Then it went all quiet, after all the poker machines were removed, then I believe it closed for good. I did drive past the other week and noticed outdoor lighting a big screen, but no idea what is there now.  
    • Yeah I suspect even if you hold airmass per cycle/cylinder constant if you get too far away from stock you're still going to have problems running the factory tune within the bounds of the factory load scale. Cams, different displacement/rod ratio, etc. I'm just lucky that the GTIII-SS with wastegate boost + CA compliance cats is pretty much equivalent to stock turbos. When I have actual space I can finally get it tuned and modify the fuel system for flex fuel to 100% handle any detonation concerns when cranking the boost to whatever those dinky turbos can put out.
×
×
  • Create New...