Jump to content
SAU Community

Recommended Posts

Got a little bit done on the holidays.

Got the side mount ducting on. PITA process or fit, attempt fit front bar, mark, remove, trim, repeat. Got it done tho.

CF foglight ducts from Powertrix in the US finish off the front nicely.

Got it all back together and went for a test drive. Returned home to find brake fluid all over my left rear wheel. Caliper seal gone. Swapped caliper out for a spare I had at home and I'll order a seal kit to put through the spare pair and then swap them in.

Also finished relocating my windscreen washer bottle to the boot with the battery. Factory location is right behind the drivers side IC so it had to go. Ended up getting a generic bottle/pump combo due to its small size.

Only issue now is with the mass of water in the line from boot to front and hard braking, the windscreen gets a wash lol

Took it on a cruise on a stinking hot day (up and down a mountain) and everything ran sweet. Temps great, brakes work.

I think it is fairly ready for a tune now. Toshi is coming up later in the month I think :D

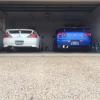
Oh, also washed it for the first time since Easter.

20141230_193637_zpscdkfxo34.jpg

20141230_144759_zpsxd7o3ocj.jpg

20141230_144959_zpsne7c8f57.jpg

20141231_113557_zpsh4hkzdwv.jpg

Funnily enough I extended the original line. Being a 2+2 tho the stock res is in front of and below the jets. 2+0 has res in rear guard so I am going to chase one down. Aparantly they have a spring and ball valve

  • Like 1
  • 4 weeks later...

Just a bit of an update. Had Toshi up on Friday last week for a tune post piping, IC and ignition 'upgrades'.

We tuned on the street and then too it to a dyno for a quick run. Result was 616hp @ 24.5PSI on BP 98 straight off the bat.

Pretty happy, but on the dyno, maintaining load above 6000rpm the mix was getting leaner and leaner. Running out of fuel. 044 surge tank pump not up to the task so need something bigger.

20150130_150550_zpsminijcxu.jpg

  • Like 1
  • 3 weeks later...

Another small update.

Turns out that due to an old nistune address file, the VTC was not working during the tune. Long story, but I have since rectified. Comes on alot sooner which is great. The curve would be heaps fatter if I ran it on the dyno again.

Just put in an order for a new loom and an AEM 380L pump to replace the 044 (supposedly a direct replacement as the AEM was designed as an 044 upgrade). Remains to be seen. Sux getting stung by poor AUD tho.

Hopefully I can get the new pump and new loom in before end of March. Shouldn't need much of a re-tune, just a few logs to make sure AFR is fine.

Also have a car PC/touchscreen to go in which was previously (very briefly) installed into Cara's zed. Was too complicated for her so changed it out and has sat ever since. Plan for it is to have nistune and various tunes at my fingertips, as well as data logging/diagnostics in car, without having to carry the laptop around.

Also have some bodywork to be done when my mate Al gets time. Have a stock (modified) vented bonnet from my red zed, and 2 pairs of skirts to be painted (genuine TBO and genuine Greddy). Then I'll decide which ones I like best to be installed.

Keeping mod list current.

ENGINE/EXHAUST

Engine modifications

Block bored 20 thou oversize, decked and o ringed, fitted with forged ACL race pistons and rings

Scat H beam conrods, fitted with ACL race bearings

Crankshaft linished and deflashed oilways

Modified oil pump for greater flow

Heads have received a lot of work with machining, porting and polishing, cc’d, flow tested

1mm oversize Ferrea valves

Competition valve springs

Compression set at 8.5-1.

Inlet manifold has been match ported to the heads and the upper plenum.

JECS 1000cc injectors

Sard fuel pressure regulator and gauge

In tank Sard fuel pump

Custom surge tank and AEM 380L pump fitted underneath the car

Custom fuel cooler,

Braided fuel lines

Motorsports connection fuel filter

Battery has been moved to the boot area sealed in a battery box fitted with an isolation switch

Windscreen washer relocaded to the boot with the battery as it was in the way of the side mount cooler

Selin twin AFM translator

Twin Apexi power air filters

Series two power transistor unit

Spitfire coilpacks

HKS DLI Ignition Amp

Engine earthing kit

Modified crankcase ventilation with catch can

2 x GTX 28/63 ball bearing turbos

BDE (Brett Dempsey Engineering) slimline engine mounts to allow for:

Complete 2.5in intake to turbo to intercooler to throttle body piping upgrade

Massive 2.5 inch in and out side mount intercoolers

Propper ducting for the coolers

Blitz dual SBC controller

(Jim Wolf Technology) JWT 400+ wild Cams

BDE (Brett Dempsy Engineering) modified Intake Cam gears

Tomei adjustable exhaust cam gears

A new set of hydraulic lifters fitted with shims has the motor running nice and quiet

Turbosmart, BOV’s

Ross Racing harmonic balancer

Gates blue belts turning the equipment over.

Engine management is by Nistune

56mm Alloy Radiator

72 plate external oil cooler

BEE*R rev limiter

RARE Final Flag polished throttle cable cover (1 actually have 2 of these)

Exhaust

Custom 5 bolt, divorced dump pipes

AMS exhaust manifolds

3” system through hi flow cats, and pair of Varex adjustable Mufflers

DRIVELINE

UAS six button single plate clutch

X-Treme chrome molly lightened flywheel

Chrome molly one piece tailshaft.

Richmond leader diff gears of 4.11 ratio

SUSPENSION

Bilstein PSS9’s coilovers

Powertrix front upper control arms

Powertrix front lower tension rods

Tune Agent rear camber

Tune Agent traction arms

Energy suspension bushings all round

Nissan front strut brace, one of only two in Australia

UAS HICAS lock out

BRAKES

Front,Stop Tech ST-40 calipers big brake kit

332 mm slotted, curved vein rotors

Braided stainless brake lines

Ferodo 2500 pads

Rear, Reliance Edge 297mm slotted rotors

Ferodo pads

Stone shields have been removed and tubular ducting has been fitted for extra cooling

WHEELS and TYRES

18x9 and 18x10 Gram Lights 57F-Pro

245/265 Achillies 123

Also available is a pair of stock 16” wheels fitted with Mickey Thompson ET street radials for those nights at the drag strip

EXTERIOR

2000 model urethane front bar

Powertrix Carbon foglight ducts

2000 rear tail lights

Modified rear center panel with light up '300ZX'

UAS fiberglass vented bonnet

Modified nose panel

UAS rear wing

UAS enclosed rear bar fitted with Perspex diffusers.

Ab-flug Areo mirrors

Custom made Miracle Zed Motors vented air guides for improved cooling to the radiator.

A HID headlights

INTERIOR

Recaro SR3 driver and passenger seats on Z32 recaro rails

Stock gauges have been replaced with el panels giving various shades of blue

Defi triple set, oil, water temp and pressure

Pivot boost gauge

Apexi turbo timer

Twin AEM wideband AFR gauges

Boarder racing gauge hood

Kenwood head unit with four kenwood 5” speakers

Terrano chrome door handles

Leather 300zx logo handbrake boot

Leather 300zx logo shift boot

2000 model gear knob

Leather trimmed doorcards, glovebox, center console etc

616hp @ 24PSI on BP 98 (cause E85 is cheating).

Edited by MagicMikeZ32
  • 3 months later...

This thread is definitely lacking in the images department. :)

FINE! Haven't had a chance to do anything the last few months, with a 9week old ;)

Pics are from a downshift thing in late March from memory.

FB_IMG_1427532450083_zpsfisyx9hx.jpg

FB_IMG_1427532471761_zpscr7tbvqw.jpg

FB_IMG_1427538764148_zpsjblbxcbb.jpg

FB_IMG_1427532459967_zps2sed6iec.jpg

  • Like 2

Yeah I am a fan :) Good quality, super light (18x10's are about 9kgs), and correct offsets for big rubber. A mate recently put 305's on the rear of his zed with same width and offsets. Front could do with a little less offset tho.

  • Like 1
  • 3 months later...

Ok so I haven't done a god dam thing to this car. Actually that's a lie I did chuck the new loom in.

Did buy an OS Giken twin plate the other week. It will go in over the next couple of weeks. Engine coming out to replace exhaust mani gaskets anyway so clutch upgrade while it's out. Nothing wrong with the current clutch at current power, but I will be doing e85 upgrades also which the existing clutch prob won't like.

Have shitloads to do before Easter Zedfest:

Engine out

Gaskets in

Clutch in

Engine back in

Dash Out to re-install air con

Car Pc

Dash back in

ECU upgrade

Fuel System upgrade/overhaul

Tune

Bonnet and Skirts painted/installed

Also need to finish off Cara's zed before Easter too :(

In car stuff updated (mods and retrim of sub boxes and create an amp cover)

Air Con compressor replacement (started this on Sat)

Re-retrim of some interrior panels

Fix a terrible power steering leak

Think that's about it. #f*kinh8zeds

Create an account or sign in to comment

You need to be a member in order to leave a comment

Create an account

Sign up for a new account in our community. It's easy!

Register a new account

Sign in

Already have an account? Sign in here.

Sign In Now


  • Similar Content

  • Latest Posts

    • Hi, is the HKS  Tower Bar still available ? negotiable ? 🤔
    • From there, it is really just test and assemble. Plug the adapter cables from the unit into the back of the screen, then the other side to the car harness. Don't forget all the other plugs too! Run the cables behind the unit and screw it back into place (4 screws) and you should now have 3 cables to run from the top screen to the android unit. I ran them along the DS of the other AV units in the gap between their backets and the console, and used some corrugated tubing on the sharp edges of the bracket so the wires were safe. Plug the centre console and lower screen in temporarily and turn the car to ACC, the AV should fire up as normal. Hold the back button for 3 sec and Android should appear on the top screen. You need to set the input to Aux for audio (more on that later). I put the unit under the AC duct in the centre console, with the wifi antenna on top of the AC duct near the shifter, the bluetooth antenna on the AC duct under the centre console The GPS unit on top of the DS to AC duct; they all seem to work OK there are are out of the way. Neat cable routing is a pain. For the drive recorder I mounted it near the rear view mirror and run the cable in the headlining, across the a pillar and then down the inside of the a pillar seal to the DS lower dash. From there it goes across and to one USB input for the unit. The second USB input is attached to the ECUtec OBD dongle and the 3rd goes to the USB bulkhead connected I added in the centre console. This is how the centre console looks "tidied" up Note I didn't install the provided speaker, didn't use the 2.5mm IPod in line or the piggyback loom for the Ipod or change any DIP switches; they seem to only be required if you need to use the Ipod input rather than the AUX input. That's it, install done, I'll follow up with a separate post on how the unit works, but in summary it retains all factory functions and inputs (so I still use my phone to the car for calls), reverse still works like factory etc.
    • Place the new daughterboard in the case and mount it using the 3 small black rivets provided, and reconnect the 3 factory ribbon cables to the new board Then, use the 3 piggyback cables from the daughterboard into the factory board on top (there are stand offs in the case to keep them apart. and remember to reconnect the antenna and rear cover fan wires. 1 screw to hold the motherboard in place. Before closing the case, make a hole in the sticker covering a hole in the case and run the cable for the android unit into the plug there. The video forgot this step, so did I, so will you probably. Then redo the 4 screws on back, 2 each top and bottom, 3 each side and put the 2 brackets back on.....all ready to go and not that tricky really.      
    • Onto the android unit. You need to remove the top screen because there is a daughterboard to put inside the case. Each side vent pops out from clips; start at the bottom and carefully remove upwards (use a trim remover tool to avoid breaking anything). Then the lower screen and controls come out, 4 screws, a couple of clips (including 3 flimsy ones at the top) and 3 plugs on the rear. Then the upper screen, 4 screws and a bunch of plugs and she is out. From there, remove the mounting brackets (2 screws each), 4 screws on the rear, 2 screws top and bottom and 3 screws holding in the small plates on each side. When you remove the back cover (tight fit), watch out for the power cable for the fan, I removed it so I could put the back aside. The mainboard is held in by 1 screw in the middle, 1 aerial at the top and 3 ribbon cables. If you've ever done any laptop stuff the ribbon cables are OK to work with, just pop up the retainer and they slide out. If you are not familiar just grab a 12 year old from an iphone factory, they will know how it works The case should now look like this:
    • Switching the console was tricky. First there were 6 screws to remove, and also the little adapter loom and its screws had to come out. Also don't forget to remove the 2 screws holding the central locking receiver. Then there are 4 clips on either side....these were very tight in this case and needed careful persuading with a long flat screw driver....some force required but not enough to break them...this was probably the fiddliest part of the whole job. In my case I needed both the wiring loom and the central locking receiver module to swap across to the new one. That was it for the console, so "assembly is the reverse of disassembly"
×
×
  • Create New...