Jump to content
SAU Community

Recommended Posts

Hey guys, update time again :yes:

So today I bought the last piece's of the puzzle that I need for my head rebuild

The Black Pearl will hopefully be done this weekend! That is if we don't run into an issues and if my Water Pump arrives :dry: I ordered it last week and still have not received it :down:

So in this update we have:

- Exhaust Manifold Studs w Washers and Brass Nuts to hold em in place

post-104024-0-46728700-1438165900_thumb.jpg

post-104024-0-63001800-1438165919_thumb.jpg

post-104024-0-17376000-1438165911_thumb.jpg

_________________________________________________________________

- Timing Belt Oil Seal Kit + Timing Belt Tensioner's

post-104024-0-03952000-1438166018_thumb.jpg

_________________________________________________________________

- Permaseal Turbo Gasket Kit

post-104024-0-55741900-1438166053_thumb.jpg

_________________________________________________________________

- 10l of Penrite Radiator Coolant

post-104024-0-29158700-1438166137_thumb.jpg

_________________________________________________________________

- Penrite 10w40 10|Tenths Racing Oil + Filter

post-104024-0-51765500-1438166208_thumb.jpg

_________________________________________________________________

I'm officially ready for this weekend! I hope my Water Pump arrives tomorrow or Friday :(

Either way I will let you guys know what happens!

Until then :action-smiley-069:

  • Like 1

Hello loyal readers! :action-smiley-069:

So, AWESOME news, my Water Pump arrived this morning! Courtesy of Kudos Motorsports

post-104024-0-20301900-1438261773_thumb.jpg

_________________________________________________________________________

post-104024-0-11345300-1438261776_thumb.jpg

_________________________________________________________________________

This weekend will go ahead!

I am dedicating Saturday and Sunday to this job, so hopefully come Sunday The Black Pearl will finally be running again :yes:

Starting @ 9am Saturday, on my team I have a qualified mechanic and a good mate who has recently just done this exact same job with his dad (Also a qualified mechanic), So I know this job is in good hands :D

I will be taking footage via Go Pro and will upload these right here for you :thumbsup:

Until then!

:thanks: for reading this far

  • Like 2
  • 3 months later...

I bet you guys never thought you'd hear from me again :thumbsup:

However, as I've said somewhere on this thread, you can't get rid of me that easy :no:

So, a lot has happened but at the same time, not much has happened. So, we did complete the head-swap, HOWEVER, little did I know, this was the start of a nightmare for me :unhappy:

So... Head swap was done but when the car had it's first start it was making a very bad noise. I feared the worst (Bottom end damage), however luckily it wasn't.

For weeks, we were trying to figure out what this noise was. We checked timing, all sensors, everything! But to no avail

So, I ended up towing my car to PZP. $987 later and we found out the reason for this is because the lifters had not been bled properly

I got the car back from PZP last week, however there is still the slightest lifter noise occurring. PZP had advised me the car needed to be driven for 2 weeks to try and get oil up into the lifters and then the sound should go away.

So, I did just that! I took it for a nice drive on Saturday :D However, this noise got louder :/

So, I think I am going to take the car back to PZP on Saturday to advise them of this. When I got the car back, PZP advised if the noise does not go away, the next step is taking the head off..

At this point I'm thinking an engine swap will be a cheaper option than what re-taking the head off will cost :geek:

But at the same time, I don't want to buy another engine and then have more issues, so I'm stuck between a rock and a hard place :unsure:

Opinions would be great!

Until next update :miner:

- J

So how bad is the noise now. If it's not that bad u could probably just put up with it. You could also try different oils thicker or thinner depending on what's in it now and see if it changes at all. Hard to say without being there to hear it properly. I used to have an sr20 with lifter tick. I still thrashed its guts out for 2-3 years without issue.

I dont know where $987 comes from cause wouldnt they just have to put a feeler guage under the cam lobes to see that the lifters arn't pumped up? must be $900/hr at that place..

They may have cleaned things a little too well at the engine shop, cause the lifters and the lifter bore rely on tight clearances which on older engines help to cover up with carbon, this why its not good to clean old engines i reckon..

You could try removing the lifters and see for yourself if they can pump up, I changed some LS1 lifters not long ago, they were brand new and hard as, but when put in car they were good till things got hot then sounded terrible so most likely the bore was worn cause its alluminium, this is a possibility...

Edited by AngryRB
  • 1 month later...

You could try removing the lifters and see for yourself if they can pump up, I changed some LS1 lifters not long ago, they were brand new and hard as, but when put in car they were good till things got hot then sounded terrible so most likely the bore was worn cause its alluminium, this is a possibility...

-----------

Hey Angry, I ended up removing the Lifters and then manually bleeding my original Lifters to install, it worked but then this happened -_- (see below update)

Update time:

Put Lifter-Free in The Black Pearl to try and get rid of the terrible Lifter sound, took it for a quick drive to the servo afterwards. All went well and the ticking went away! Yaaaay! Or so I thought -_-

Since the noise went away, I went for a drive to stretch the cars legs finally. Got 10 minutes down the road and saw some steam coming from my bonnet.

Pulled over immediately and saw coolant had gone everywhere ? if you look at the picture, you can see the cause of this is my Water Pump pretty much snapping...

So, now need to get a new Water Pump and off to HyperDrive she goes to get fixed. I hope this is the last time...

post-104024-0-92793500-1452609239_thumb.jpg

Edited by MC-WOSHY
  • 3 weeks later...

Wow. That sucks. How tight was the belt?

Pretty tight for that to occur haha. I didn't do it, my mate did. Didn't blame him though as I knew the risks etc before getting the work done

------------------------------------------

Who tightened the belt? thats a pretty easy DIY job..

Same as above :P

------------------------------------------

Hey just read through this whole thread, awesome work bud, I guess we all get a bit of bad luck sometimes but keep at it.

should have my own series 1 r33 within the next couple of weeks, so just doing research now.

Cheers man, glad you like the build so far! Lot of work and money has gone into this car :D And a lot more to come (read my update below). Awesome! going to make a build thread too??

------------------------------------------

Hmm lifter tick and a broken water pump, its fun to learn but cheaper sometimes to get a good workshop to do the work...

Yep, totally agree! Prior to this I did all the work via HyperDrive, this was the first time I tried myself. Let me tell you know, that's never happening again! Going back to letting professional's do the work :)

Ok guys,

Sorry about the lack of updates on the update front. Had some bills come up, recently sold my Pulsar and just brought a GQ Patrol (Gee I love Nissan's), which needed a few things.

Never fear though, the Skyline has/will never miss out on the love!

Genuine Water Pump take 2:

post-104024-0-88013400-1454587008_thumb.jpg

Car goes into HyperDrive next week to have the new Water Pump fitted :D They are also checking the engine out to make sure everything is fine. Hopefully and I mean HOPEFULLY this all goes well. I would love nothing more than being able to drive the darn thing for more than 10 minute's! In the last 6 months I've driven it twice, which is a lot less for my liking. So I'm hoping next week I can start hitting consistent boooooost :banana:

Providing all goes well with this, The Black Pearl will be getting some love as a reward ;)

- Z32 AFM

- GReddy PRofec OLED

- 950cc DeatschWerks Injectors

- 6Boost Manifold (Low-Mount)

- Garrett GTX3076R w .82 Rear Housing

- HyperDrive Tune

Can't wait for that, will take me a couple of months to save up as I'm paying for it all up front.. But waiting and slowly accumulating the parts is half the fun right? :yes:

More on that after next week though, need to make sure The Black Pearl pulls through this Water Pump installation without any further issues

Until then guys, thanks for reading! :action-smiley-069:

After driving a GQ patrol, the skyline will feel like a 10second car lol... mine has become a museum piece for the last year :yes:

Yep... you are dead right Mark! Now just need to make it 10secs ;)

That's no good, what's being done to her!?

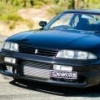
Bit dusty, but..... SHE'S BACK! :bunny:


Running healthy now, so that only means one thing... UPGRADES! :w00t:


Keep an eye on this space :yes:


Would like to give a shout-out to HyperDrive in WA, they did an awesome job for a fair price, couldn't recommend more! :D


post-104024-0-54453200-1455098657_thumb.jpg


  • Like 1

Yep... you are dead right Mark! Now just need to make it 10secs ;)

That's no good, what's being done to her!?

she's got a dirty 30 with neo head in her, lol... need pipes fabricated and then tuned and she'll be proper angry :mrt:

look forward to your future upgrades, good looking R33. :thumbsup:

she's got a dirty 30 with neo head in her, lol... need pipes fabricated and then tuned and she'll be proper angry :mrt:

look forward to your future upgrades, good looking R33. :thumbsup:

Ooooh, I like! Similar to what I want to do, but I'm torn between doing it for the 33 or my dream car (34R).

Cheers mate, really good to see people have been giving the thread a following (like yourself), you've still been following from the early days! :worship:

Thanks mate, appreciate the kind words! Not done on the look of it yet, still little bit's to take care of.. eg:

- Coilovers (STD Coilover's is what I'm getting)

- Enkei RPF1 (In Blaaaaack) - 18X9.5 +15

- Whiteline Sway-Bars (Front & Rear)

- Front & Rear Strut Bar

At that point I'll be happy with the outside, will just be little thing's to tidy up like seals etc

But that's all part of the journey! :cool:

Edited by MC-WOSHY

Create an account or sign in to comment

You need to be a member in order to leave a comment

Create an account

Sign up for a new account in our community. It's easy!

Register a new account

Sign in

Already have an account? Sign in here.

Sign In Now


  • Similar Content

  • Latest Posts

    • Did this end up working? Did you take some pictures?
    • And finally, the front lower mount. It was doubly weird. Firstly, the lower mount is held in with a bracket that has 3 bolts (it also acts as the steering lock stop), and then a nut on the shock lower mount itself. So, remove the 3x 14mm head bolts , then the 17mm nut that holds the shock in. From there, you can't actually remove the shock from the lower mount bolt (took me a while to work that out....) Sadly I don't have a pic of the other side, but the swaybar mounts to the same bolt that holds the shock in. You need to push that swaybar mount/bolt back so the shock can be pulled out past the lower control arm.  In this pic you can see the bolt partly pushed back, but it had to go further than that to release the shock. Once the shock is out, putting the new one in is "reverse of disassembly". Put the top of the shock through at least one hole and put a nut on loosely to hold it in place. Put the lower end in place and push the swaybar mount / shock bolt back in place, then loosely attach the other 2 top nuts. Bolt the bracket back in place with the 14mm head bolts and finally put the nut onto the lower bolt. Done....you have new suspension on your v37!
    • And now to the front.  No pics of the 3 nuts holding the front struts on, they are easy to spot. Undo 2 and leave the closest one on loosely. Underneath we have to deal with the wiring again, but this time its worse because the plug is behind the guard liner. You'll have to decide how much of the guard liner to remove, I undid the lower liner's top, inside and lower clips, but didn't pull it full off the guard. Same issue undoing the plug as at the rear, you need to firmly push the release clip from below while equally firmly gripping the plug body and pulling it out of  the socket. I used my fancy electrical disconnect pliers to get in there There is also one clip for the wiring, unlike at the rear I could not get behind it so just had to lever it up and out.....not in great condition to re-use in future.
    • Onto the rear lower shock mount. It's worth starting with a decent degrease to remove 10+ years of road grime, and perhaps also spray a penetrating oil on the shock lower nut. Don't forget to include the shock wiring and plug in the clean.... Deal with the wiring first; you need to release 2 clips where the wiring goes into the bracket (use long nose pliers behind the bracket to compress the clip so you can reuse it), and the rubber mount slides out, then release the plug.  I found it very hard to unplug, from underneath you can compress the tab with a screwdriver or similar, and gently but firmly pull the plug out of the socket (regular pliers may help but don't put too much pressure on the plastic. The lower mount is straightforward, 17mm nut and you can pull the shock out. As I wasn't putting a standard shock back in, I gave the car side wiring socket a generous gob of dialectric grease to keep crap out in the future. Putting the new shock in is straightforward, feed it into at least 1 of the bolt holes at the top and reach around to put a nut on it to hold it up. Then put on the other 2 top nuts loosely and put the shock onto the lower mounting bolt (you may need to lift the hub a little if the new shock is shorter). Tighten the lower nut and 3 upper nuts and you are done. In my case the BC Racing shocks came assembled for the fronts, but the rears needed to re-use the factory strut tops. For that you need spring compressors to take the pressure off the top nut (they are compressed enough when the spring can move between the top and bottom spring seats. Then a 17mm ring spanner to undo the nut while using an 8mm open spanner to stop the shaft turning (or, if you are really lucky you might get it off with a rattle gun).
    • You will now be able to lift the parcel shelf trim enough to get to the shock cover bolts; if you need to full remove the parcel shelf trim for some reason you also remove the escutcheons around the rear seat release and you will have to unplug the high stop light wiring from the boot. Next up is removal of the bracket; 6 nuts and a bolt Good news, you've finally got to the strut top! Remove the dust cover and the 3 shock mount nuts (perhaps leave 1 on lightly for now....) Same on the other side, but easier now you've done it all before
×
×
  • Create New...