Jump to content
SAU Community

Recommended Posts

Damn, I didn't know there were that many nice cars in Canberra.

having only moved back to Canberra 4 months ago after being away for 6 years I noticed how canberra's car scene has improved (still too many lancer with evo kits for my taste though)

better put up pics of my cars just in case people spot me and willing to give a wave.

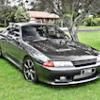
Here is the R32 GTR I got back in mar 2005.

Newfront45.jpg

NewBack45.jpg

Not modified too much (Power FC next on the list)

Dec 1989 R32 GTR

Apexi AVC-D ( 1bar)

Apexi Multi-checker

Twin HKS pod filter

Twin HKS Super Blow Off Valve

3.5 inch cat back exhaust (unknown)

Blistein shocks (way too hard for Sydney)

Cusco rear strut

Juran front strut

ARC low GT wing (currently off due to defect)

Atessa controller

White Volks TE37 17x9+15

Ventus R-S2 245/45R17 (makes the odo alittle out 200mtrs/5kms)

Pivot Turbo timer

Momo Spider steering wheel (CF look)

8 ball type gear knob (CF look)

Nismo 320km/h speedo

HKS Boost gauge

Cheap water temp, oil pressure, boost(psi) gauge (soon to be replaced by some Defi ones as soon as I get off my ass and move the air cond unit somewhere else)

Cheap Earthing kit (don't think it does anything at all)

Good black wired alarm/immobilzer (obvious not mentioning brand)

Changed to GTS-T headlights

how good does white with white wheels look...want to swap lol....

well heres a couple of mine...

post-19779-1167521861.jpg

post-19779-1167522337.jpg

ok FINNALLY got my act together and posted properly

R32 Gts-t :wave:

Subaru Graphite Black Paint

Sideskirts

17" Koya Drifteks BLACK

N1 ? Headlights

Clear indicators

FMIC

3" Exhaust + dump +cat

Sard FPR

Walbro Fuel Pump

Greddy Profec II (10psi)

Apexi Power-FC

Std. Internals

Std. Turbo

Power ???KWs

Kyb Susp.

DBA 4000 Slotted Rotors

TJ32.jpg

Always keepin an eye out for other lines.

Oh and incase anyone wonders about my name......my other toy FJ20 :woot:

1600.jpg

  • 4 weeks later...
Nice. Love blue 350s. I work at Lennock and whenever a 350 comes in it's always boring grey pewter >__<

haha, that or Orange!! I bought my car from lennock, back in the days when Neville Bruce was there, top bloke..need to come in soon to buy extended warranty...

Update, lol

AB Flug body kit and steering wheel

Volk's 18's 235 and 265's on rear

Olims fully adjustable suspension

rose butted front wheels

Cusco front and rear strut bar

Splitfire coil pack.

Custom Front mount with heat shield piping.

apexi pod

Apexi exhaust system from dump

apexi BOV

4" magic Cat

CF bonnet

Remaped Nerve essential ECU

HKS 25/30 turbo woot 18psi at 2800rpm

Ratchet cusco locker

Organic 1500kg clutch

Walbro 500hp pump

malpassi Reg

Blue light dash

Apexi RSM

Greedy Turbo timer

Greedy boost gauge

Rebuilt Gearbox

Exhaust manifold gasket changed and bolts upgraded.

240rwkw of super response 2 stroke motor cross bike on roids boost.

DBA4000 slotted fronts

Braided Break lines / clutch.

Soon to come... maybe Apexi safcII and EBC then I am doing nothing more.

Edited by race_snooze
Update, lol

AB Flug body kit and steering wheel

Volk's 18's 235 and 265's on rear

Olims fully adjustable suspension

rose butted front wheels

Cusco front and rear strut bar

Splitfire coil pack.

Custom Front mount with heat shield piping.

apexi pod

Apexi exhaust system from dump

4" magic Cat

CF bonnet

Remaped Nerve essential ECU

HKS 25/30 turbo woot 18psi at 2800rpm

Ratchet cusco locker

Organic 1500kg clutch

Walbro 500hp pump

malpassi Reg

Blue light dash

Apexi RSM

Greedy Turbo timer

Greedy boost gauge

Rebuilt Gearbox

Exhaust manifold gasket changed and bolts upgraded.

240rwkw of super response 2 stroke motor cross bike on roids boost.

DBA4000 slotted fronts

Braided Break lines / clutch.

Soon to come... maybe Apexi safcII and EBC then I am doing nothing more.

Where's the pics? Even thught it's a R33 I still want to see :ninja:

Create an account or sign in to comment

You need to be a member in order to leave a comment

Create an account

Sign up for a new account in our community. It's easy!

Register a new account

Sign in

Already have an account? Sign in here.

Sign In Now


  • Similar Content

  • Latest Posts

    • And now to the front.  No pics of the 3 nuts holding the front struts on, they are easy to spot. Undo 2 and leave the closest one on loosely. Underneath we have to deal with the wiring again, but this time its worse because the plug is behind the guard liner. You'll have to decide how much of the guard liner to remove, I undid the lower liner's top, inside and lower clips, but didn't pull it full off the guard. Same issue undoing the plug as at the rear, you need to firmly push the release clip from below while equally firmly gripping the plug body and pulling it out of  the socket. I used my fancy electrical disconnect pliers to get in there There is also one clip for the wiring, unlike at the rear I could not get behind it so just had to lever it up and out.....not in great condition to re-use in future.
    • Onto the rear lower shock mount. It's worth starting with a decent degrease to remove 10+ years of road grime, and perhaps also spray a penetrating oil on the shock lower nut. Don't forget to include the shock wiring and plug in the clean.... Deal with the wiring first; you need to release 2 clips where the wiring goes into the bracket (use long nose pliers behind the bracket to compress the clip so you can reuse it), and the rubber mount slides out, then release the plug.  I found it very hard to unplug, from underneath you can compress the tab with a screwdriver or similar, and gently but firmly pull the plug out of the socket (regular pliers may help but don't put too much pressure on the plastic. The lower mount is straightforward, 17mm nut and you can pull the shock out. As I wasn't putting a standard shock back in, I gave the car side wiring socket a generous gob of dialectric grease to keep crap out in the future. Putting the new shock in is straightforward, feed it into at least 1 of the bolt holes at the top and reach around to put a nut on it to hold it up. Then put on the other 2 top nuts loosely and put the shock onto the lower mounting bolt (you may need to lift the hub a little if the new shock is shorter). Tighten the lower nut and 3 upper nuts and you are done.  
    • You will now be able to lift the parcel shelf trim enough to get to the shock cover bolts; if you need to full remove the parcel shelf trim for some reason you also remove the escutcheons around the rear seat release and you will have to unplug the high stop light wiring from the boot. Next up is removal of the bracket; 6 nuts and a bolt Good news, you've finally got to the strut top! Remove the dust cover and the 3 shock mount nuts (perhaps leave 1 on lightly for now....) Same on the other side, but easier now you've done it all before
    • OK, so a bunch of trim needs to come off to get to the rear shock top mounts. Once the seat is out of the way, the plastic trim needs to come off. Remove 2 clips at the top then slide the trim towards the centre of the car to clear the lower clip Next you need to be able to lift the parcel shelf, which means you need to remove the mid dark trim around the door, and then the upper light trim above the parcel shelf. The mid trim has a clip in the middle to remove first, then lift the lowest trim off the top of the mid trim (unclips). At the top there is a hidden clip on the inner side to release first by pulling inwards, then the main clip releases by pulling the top towards the front of the car. The door seal comes off with the trim, just put them aside. The the lighter upper trim, this is easy to break to top clips so take it carefully. There is a hidden clip towards the bottom and another in the middle to release first by pulling inwards. Once they are out, there are 3 clips along the rear windscreen side of the panel that are hard to get under. This is what the rear of the panel looks like to assist:
    • Yes. Autos typically work from the speed sensor on the pinion shaft of the diff. I also think that even if you have a proper speed sensor for the bog manual in the manual box, that the signal it outputs is not compatible with the auto dash anyway. You should consult that manual (the book, not the gearbox).
×
×
  • Create New...