Jump to content
SAU Community

Recommended Posts

Hey everyone,

I've always wanted to start a thread and constantly update it over the years with new mods etc, then look back at the progress and see how far it's come. So here it is!

DSC02127.thumb.jpg.d230511bcfe8a7fad466267c209c71e8.jpg

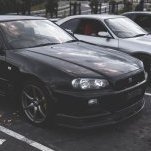
This is my 2001 Skyline R34 GTR. It was a grade 4B at the auctions and was exported on the 2nd of March 2018. I later purchased it from a local dealer here in Sydney on the 21st of December 2018 as a nice little Christmas present to myself. 


20181217_171244.thumb.jpg.b74c8d2e87bb7d01480a8e3d3f2a1bea.jpg

(Picking it up from the dealer)


20181217_171300.thumb.jpg.e143dc99c3bcd7f68b705ebdcf086b58.jpg


20181221_175939.thumb.jpg.4ccba7596af2ff7d141dda32d87363cc.jpg

(Bringing her home)


20181221_175958.thumb.jpg.4f8dee4d3ec55898296578ec2fedea20.jpg

As you could imagine I was ecstatic about finally owning a car I have only dreamed about. Although I did pay a premium price for it, it was worth every penny to me (and that's all that really matters).

Theres not much to say about it really. It is a base model and had absolutely no modifications done to it, but that will slowly change over time as you guys will see in this thread! That same weekend I bought a new Kenwood head unit and Alpine speakers to replace the factory speakers and crappy aftermarket head unit that was already in the car. At the time I didn't think of taking any photos of the install but I don't think that is too interesting anyways haha.

After about two months of owning the car, it was time to find a good exhaust system so I could listen to that RB26 in all of it's glory! I found someone selling some near new HKS front pipes, high-flow cat and Tomei Expreme Ti cat-back which I jumped on straight away and got myself a bargain!

Then around mid-June 2019 I got myself a brand new NISMO Intercooler off a member on this forum, installed it and colour matched the front lip to the rest of the car.

DSC06546.thumb.jpg.b21e7be1920d79731975ca08dbd4ebb8.jpg

Fast forward to last weekend where I replaced the factory clutch and duel-mass flywheel for a NISMO twin plate and boy does that clutch feel so good. I'm not going to be chasing 1000hp like most GTR's in Sydney, but this clutch install should be overkill for the power level I want out of it.


20200718_095149.thumb.jpg.b1e0a906d29d5a7b67aeecd9f4820eb5.jpg

(Pulling the clutch out at my work. Definitely not something I wanted to do on my garage floor and my boss was kind enough to let me come in on the weekend and use a hoist so I could replace it)


20200726_144056.thumb.jpg.440d327ba50a0a6635ddeba89ec1dcf3.jpg

(Stock clutch ready to be replaced)


20200718_100501.thumb.jpg.9a98444ba0b91e20c95129aa6fd84b66.jpg

(Definitely needs a good clean up in there)


20200726_144042.thumb.jpg.18932667883a7dfb2386c36dea1a0739.jpg

(New clutch, rear main seal and spigot bearing installed)


20200718_110812.thumb.jpg.9b85280490dc79da24e7dc1d6017d9ef.jpg

(Bell housing cleaned up nicely with new release bearing)

Really impressed with how easy it is to use the NISMO twin plate. Feels just like the stock one with a bit more bite. Anyways, that's a quick catch up of what life has been like for the past year and a half of ownership. More exciting things to come! I hope you guys enjoy the journey with me. Until next time ✌️

  • Like 9
Link to comment
https://www.sau.com.au/forums/topic/480835-my-bnr34-build-journal/
Share on other sites

23 hours ago, oski said:

Hey everyone,

I've always wanted to start a thread and constantly update it over the years with new mods etc, then look back at the progress and see how far it's come. So here it is!

DSC02127.thumb.jpg.d230511bcfe8a7fad466267c209c71e8.jpg

This is my 2001 Skyline R34 GTR. It was a grade 4B at the auctions and was exported on the 2nd of March 2018. I later purchased it from a local dealer here in Sydney on the 21st of December 2018 as a nice little Christmas present to myself. 


20181217_171244.thumb.jpg.b74c8d2e87bb7d01480a8e3d3f2a1bea.jpg

(Picking it up from the dealer)


20181217_171300.thumb.jpg.e143dc99c3bcd7f68b705ebdcf086b58.jpg


20181221_175939.thumb.jpg.4ccba7596af2ff7d141dda32d87363cc.jpg

(Bringing her home)


20181221_175958.thumb.jpg.4f8dee4d3ec55898296578ec2fedea20.jpg

As you could imagine I was ecstatic about finally owning a car I have only dreamed about. Although I did pay a premium price for it, it was worth every penny to me (and that's all that really matters).

Theres not much to say about it really. It is a base model and had absolutely no modifications done to it, but that will slowly change over time as you guys will see in this thread! That same weekend I bought a new Kenwood head unit and Alpine speakers to replace the factory speakers and crappy aftermarket head unit that was already in the car. At the time I didn't think of taking any photos of the install but I don't think that is too interesting anyways haha.

After about two months of owning the car, it was time to find a good exhaust system so I could listen to that RB26 in all of it's glory! I found someone selling some near new HKS front pipes, high-flow cat and Tomei Expreme Ti cat-back which I jumped on straight away and got myself a bargain!

Then around mid-June 2019 I got myself a brand new NISMO Intercooler off a member on this forum, installed it and colour matched the front lip to the rest of the car.

DSC06546.thumb.jpg.b21e7be1920d79731975ca08dbd4ebb8.jpg

Fast forward to last weekend where I replaced the factory clutch and duel-mass flywheel for a NISMO twin plate and boy does that clutch feel so good. I'm not going to be chasing 1000hp like most GTR's in Sydney, but this clutch install should be overkill for the power level I want out of it.


20200718_095149.thumb.jpg.b1e0a906d29d5a7b67aeecd9f4820eb5.jpg

(Pulling the clutch out at my work. Definitely not something I wanted to do on my garage floor and my boss was kind enough to let me come in on the weekend and use a hoist so I could replace it)


20200726_144056.thumb.jpg.440d327ba50a0a6635ddeba89ec1dcf3.jpg

(Stock clutch ready to be replaced)


20200718_100501.thumb.jpg.9a98444ba0b91e20c95129aa6fd84b66.jpg

(Definitely needs a good clean up in there)


20200726_144042.thumb.jpg.18932667883a7dfb2386c36dea1a0739.jpg

(New clutch, rear main seal and spigot bearing installed)


20200718_110812.thumb.jpg.9b85280490dc79da24e7dc1d6017d9ef.jpg

(Bell housing cleaned up nicely with new release bearing)

Really impressed with how easy it is to use the NISMO twin plate. Feels just like the stock one with a bit more bite. Anyways, that's a quick catch up of what life has been like for the past year and a half of ownership. More exciting things to come! I hope you guys enjoy the journey with me. Until next time ✌️


Great looking car mate! Very tasteful mods so far.

Hopefully I can be a proud owner of one of these one day.. currently building my 32 gtr.

  • Like 1
  • 3 months later...

Quick little update,

I screwed up the paint on my car... 🙃 don't worry, there's a happy ending to this!


So turtle wax have come out with a black polish that is ceramic infused and I decided to give it a go. However, before giving the car a quick polish I gave it a wash and went over it with a clay bar (and clay lube!) only to find it left horrendous marks on the paint after drying.

20201018_114355.thumb.jpg.7bf4cec03dd7110b2389f75df49be324.jpg 20201018_170054.thumb.jpg.c697c1b3f16f4b290bc37a69188b6252.jpg20201018_170137.thumb.jpg.b3b2625dc8e6a85faad05b1f3a1c54dd.jpg


What was supposed to be a day of me treating the car to a nice clean inside and out, along with a light polish to make her pop again quickly turned into my worst nightmare. I went over it with the turtle wax polish but the scratches were too deep and needed a heavier cut to get them out. I neither had the tools or the skill for the job so it was time to send it to someone who actually knows what they're doing...and here is the result!


20201101_180630.thumb.jpg.9ef3e77e3983416ab483538a3011647b.jpg20201101_180842.thumb.jpg.20b44388cffed563e858f911f99c76e2.jpg20201101_180849.thumb.jpg.7dd1faff33e2adc1b9ec2cdb9640bfb4.jpg


Stage 2 paint correction with ceramic coating and boy is this thing glossy!! Not a single swirl mark left behind and unbelievably smooth to the touch. Plus the added protection should make cleaning this a breeze. I'll get some more photos of it in the sun but I am so happy with the result! More news coming in the next couple of weeks 🤫🤔


Edited by oski
  • Like 1
  • 5 months later...
On 01/11/2020 at 10:35 PM, oski said:

More news coming in the next couple of weeks 🤫🤔


I lied. It's been almost 6 months 😅

I finally got a new set of wheels for the ol' girl! 2020 Nismo LMGT4 in omori black 19x10.5 +15. I ordered these wheels back in August 2020 and didn't receive them until the end of January 2021! Although I may have lost my patience towards the end of that it definitely was worth the wait.

IMG_0212.thumb.jpg.6b97ad989c87f2c30eca6e0fcaf250e7.jpgIMG_0217.thumb.jpg.a09b67a762c107e59b27738ca4835f03.jpg

I wrapped them in some Michelin Pilot Sport 4s 275/30/19 and I think they completely transformed the car! Decided to go take some photos of the car out in the city lights and damn she looks good 😍 

DSC09978-Edit-2.thumb.JPG.9524c93f8226a904beafc4a62bc3c8d2.JPGDSC09963-Edit-2.thumb.JPG.58f30a85a2bc73c76f021f8d1e8099c9.JPGDSC09986-Edit-2.thumb.JPG.d95523afb0ceecad0ffe0ceee9b2f006.JPGDSC09988-Edit-2.thumb.JPG.f7bc008480df9290c965d0ff8ac60ac3.JPG

Shameless plug; if you like what you see follow me on instagram @ oski.gtr or my photography page @ ockn.photo

Edited by oski
  • Like 2

Create an account or sign in to comment

You need to be a member in order to leave a comment

Create an account

Sign up for a new account in our community. It's easy!

Register a new account

Sign in

Already have an account? Sign in here.

Sign In Now


  • Similar Content

  • Latest Posts

    • Thought I would get some advice from others on this situation.    Relevant info: R33 GTS25t Link G4x ECU Walbro 255LPH w/ OEM FP Relay (No relay mod) Scenario: I accidentally messed up my old AVS S5 (rev.1) at the start of the year and the cars been immobilised. Also the siren BBU has completely failed; so I decided to upgrade it.  I got a newer AVS S5 (rev.2?) installed on Friday. The guy removed the old one and its immobilisers. Tried to start it; the car cranks but doesnt start.  The new one was installed and all the alarm functions seem to be working as they should; still wouldn't start Went to bed; got up on Friday morning and decided to have a look into the no start problem. Found the car completely dead.  Charged the battery; plugged it back in and found the brake lights were stuck on.  Unplugging the brake pedal switch the lights turn off. Plug it back in and theyre stuck on again. I tested the switch (continuity test and resistance); all looks good (0-1kohm).  On talking to AVS; found its because of the rubber stopper on the brake pedal; sure enough the middle of it is missing so have ordered a new one. One of those wear items; which was confusing what was going on However when I try unplugging the STOP Light fuses (under the dash and under the hood) the brake light still stays on. Should those fuses not cut the brake light circuit?  I then checked the ECU; FP Speed Error.  Testing the pump again; I can hear the relay clicking every time I switch it to ON. I unplugged the pump and put the multimeter across the plug. No continuity; im seeing 0.6V (ECU signal?) and when it switches the relay I think its like 20mA or 200mA). Not seeing 12.4V / 7-9A. As far as I know; the Fuel Pump was wired through one of the immobiliser relays on the old alarm.  He pulled some thick gauged harness out with the old alarm wiring; which looks to me like it was to bridge connections into the immobilisers? Before it got immobilised it was running just fine.  Im at a loss to why the FP is getting no voltage; I thought maybe the FP was faulty (even though I havent even done 50km on the new pump) but no voltage at the harness plug.  Questions: Could it be he didnt reconnect the fuel pump when testing it after the old alarm removal (before installing the new alarm)?  Is this a case of bridging to the brake lights instead of the fuel pump circuit? It's a bit beyond me as I dont do a lot with electrical; so have tried my best to diagnose what I think seems to make sense.  Seeking advice if theres for sure an issue with the alarm install to get him back here; or if I do infact, need an auto electrician to diagnose it. 
    • Then, shorten them by 1cm, drop the car back down and have a visual look (or even better, use a spirit level across the wheel to see if you have less camber than before. You still want something like 1.5 for road use. Alternatively, if you have adjustable rear ride height (I assume you do if you have extreme camber wear), raise the suspension back to standard height until you can get it all aligned properly. Finally, keep in mind that wear on the inside of the tyre can be for incorrect toe, not just camber
    • I know I have to get a wheel alignment but until then I just need to bring the rear tyres in a bit they're wearing to the belt on the inside and brand new on the outside edge. I did shorten the arms a bit but got it wrong now after a few klms the Slip and VDC lights come on. I'd just like to get it to a point where I can drive for another week or two before getting an alignment. I've had to pay a lot of other stuff recently so doing it myself is my only option 
    • You just need a wheel alignment after, so just set them to the same as current and drive to the shop. As there are 2 upper links it may also be worth adding adjustable upper front links at the same time; these reduce bump steer when you move the camber (note that setting those correctly takes a lot longer as you have to recheck the camber at each length of the toe arm, through a range of movement, so you could just ignore that unless the handling becomes unpredictable)
    • I got adjustable after market rear camber arm to replace the stock one's because got sick of having to buy new rear tyres every few months. Can anyone please let me know what the best adjustment length would be. I don't have the old ones anymore to get measurements. I'm guessing the stock measurement minus a few mm would do it. Please any help on replacing them would be fantastic I've watched the YouTube clips but no-one talks about how long to set the camber arm to.
×
×
  • Create New...