Jump to content
SAU Community

Painting Your Brake Calipers


paulr33

Recommended Posts

  • Replies 155
  • Created
  • Last Reply

Top Posters In This Topic

Top Posters In This Topic

Posted Images

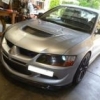
thanks for the advice guys, i have read a few thread on here regarding painting brake calipers anodizing etc, the paint looks a bit better today it has now a nice shine finish to it. So should i go over the paint on it now in the dulicolour Mc100 ground coat then hit it again with MC 200, or should i just try a few more coats of th mc200? regards hame. here is a recent picture.

hi,

i suspect you were trying to do this ?

http://paulr33.skylinesaustralia.com/photo...ar/IMGP1049.JPG

http://paulr33.skylinesaustralia.com/photo...ar/IMGP1047.JPG

http://paulr33.skylinesaustralia.com/photo...r/IMG_7448_.jpg

that was done by myself with the calipers actually on the car

the rears i even left the wheels on and sprayed em (lots of newspaper)

the fronts i just took the wheels off - using VHT gold caliper paint (ive got the part code somewhere)

to do a front set one can is more than enough, you should use id say 2/3 maybe 3/4 for a front set of calipers - a full can is too much

===========================================================================

make sure you have

VHT brake caliper paint

masking tape

newspaper

sandpaper - rought & fine

time & patients

1. start again

2. be patient

3. sand back the calipers using some rough sand paper - its like $0.50 a sheet from autobarn

get some rough grit and some soft grit. sand the calipers all over. you DONT have to remove the whole colour but just roughen it up

if its done correctly the colour on the caliper should feel smooth, almost like rubbing on plastic. should take no more than 5 minutes to do a whole caliper

ie: dont do it for 2 hours and remove all of the colour - there is no need

4. mask everything else that isnt getting painted. make sure you mask up the pads, pistons, lines etc.

use masking tape and newspaper to help you do this - should take 10 minutes tops

4a dont spray the calipers facing down - it wont work and will suck

ideally have the calipers up around wheel height so you can face the can at them on a even level

facing the spray can down will affect the paint and how it applies - tie them to a close line or something with some string or something strong

5. spray the calipers but take your time - this should take about 6 hours all up

do a quick pass off the caliper holding the can at LEAST 20cms-30cms away from the caliper - practice on some cardboard first (or something white)

do one quick pass in 1 single direct (dont stop, dont change direction, dont pause) iyou should pass across the caliper in about 2 seconds - steady even pace dont wobble etc

do a quick pass the first time, youll hardly see the colour. go back the other way, again a single pass, dont pause or stop or worry about bits missed etc

5a wait 1 hour. repeat again a quick pass, one way, then back again the other way after a full pass - nice and short, 2 seconds tops. the colour will get darker each time

wait another 2 hours. repeat. you should about 3-4 repeats of this process. each time do a single pass, nice and quick. even. dont pause/stop etc

a car has about 6 coat of paint on it so try and arrange for the same ish

6. wait 24 hours at least for them to dry properly - if they are in your garage etc make sure they are covered away from dust / shit in the wind etc

if you want to do the NISSAN in a different colour do the same but at step 2 apply some vasoline to the NISSAN text gently (dont go over the edges etc)

so that when its fully dried 24 hours later you can wipe off the vasoline and the colour will come off too - it would be a good idea to sand this back so its clear steel colour before paiting

then you can mask the rest of the caliper after 24 hours and spray the NISSAN in another colour - again use newspaper and masking tape

Link to comment
Share on other sites

Another good method for getting rid of paint is an el-cheapo wooden handled stiff wire brush that you can buy from bunnings for 8 cents (almost)

Also, spray liberally with grease and wax remover to clean the calipers before spraying, and don't touch them after the Wax and Grease removed has dried.

This is what I used and it worked really well.

Link to comment
Share on other sites

cheers guys, thanks for the input i will be going out to buy the gold VHT stuff today, however i was told and there is alot of bad comments on here saying stay away from the VHT brake caliper paint. i like the finish the duplicolour metalcast paint gives as it is a gloss. will i be getting the same result with the VHT gold??

Regards Hame

Link to comment
Share on other sites

vht is fine mate i use it without a problem,

thanx DECMI8, i have applied the first 2 coats and i am so far overly pleased with the results, i will post up some pictures when they fully done. i happy with the colour of VHT, does anyone use a clear gloss on them??

hame :(

Link to comment
Share on other sites

  • 4 weeks later...

So, I decided a few weeks ago to paint my brembo brakes on my GTR. They were all chipped due to stones, it is a 1996 after all. The last 2 years on NZ roads probably did more damage then it's entire life in Japan :)

To begin, mask off everything, and wash down the calipers with hot soapy water.

You'll need some Brembo stencils. Any shop that makes decals will be able to do this for you.

Paint Stripper

0kwikstrip.JPG

Brembo Stencils

1_1.JPG

After the first application of the stipper

1Firststrip.JPG

You may need to apply the stripper several times to clean off the factory paint.

2strip.JPG

5strip.JPG

After all the paint is off, sand back the calipers with 400 grit wet and dry

FRONT

6rtsprayf.JPG

REAR

7rtsprayf2.JPG

8rtspayr.JPG

You can either use hi temp paint or caliper paint. I've gone with a metallic charcoal. 2 coats should do the trick

FRONT

9paintedf.JPG

REAR

91paintingr.JPG

Important !!!!!!!!!!!!!!!!!!!!!!!!!!!!!!

LET THE PAINT CURE FOR A FEW DAYS BEFORE YOU PROCEED

The stencil may damage the paint if you don't

Attach the stencil mask

92mask.JPG

Peel back the top protection of the stencil mask.

92mask2.JPG

Ready to spray the logo

FRONT

93logospayf.JPG

REAR

94logor.JPG

About 3 coats are nessary as the metallic charcoal is quite dark. Hi Temp White

96frontcoat1.JPG

97frontdone.JPG

You can apply a clear coat for a more glossy finish and extra protection.

FRONT

98frontdone1.JPG

REAR

99reardone1.JPG

It takes a few days for the paint to cure properly so, best to avoid driving for a few days if you can.

Edited by Fanta R33GTR
Link to comment
Share on other sites

  • 2 months later...

some good results guys :)

Im looking at doing mine soon!

ill be using the metalcast blue as i just sprayed my strut bar with it and the colours mad.

My cars white so blue should look good im just wondering how do you guys rekon the blue will look behind chrome wheels?

Link to comment
Share on other sites

  • 1 month later...

hey im just about 2 under take this on my car. i have red and gold paints 2 use but not sure wich way 2 go wether to go gold with red nissan logo or the other way round. wat i want 2 know is how have u painted the nissan logo different colour 2 the factory and then the other colour. the way im thinking of doing it is 2 paint the nissan logo first then paint the caliper in the other colour then sand back the nissan dogo till i get the other colour back is thins how people have done it as both cans r pressure pack. thanks in advance.

Link to comment
Share on other sites

hey im just about 2 under take this on my car. i have red and gold paints 2 use but not sure wich way 2 go wether to go gold with red nissan logo or the other way round. wat i want 2 know is how have u painted the nissan logo different colour 2 the factory and then the other colour. the way im thinking of doing it is 2 paint the nissan logo first then paint the caliper in the other colour then sand back the nissan dogo till i get the other colour back is thins how people have done it as both cans r pressure pack. thanks in advance.

I tried the sanding back method and didn't rate it. If you're going to put a decent (ie. long lasting) coat of paint on the caliper, it'll take you all week to sand back and probably still look like crap.

I recommend painting the entire caliper in the logo colour, then mask the logo (it's not that hard! :P), and then go with your final colour, unmask, then gloss top coat. The result will be longer lasting and look professional.

Take your time masking too. You'll be grateful for the extra minute you spent to get the masking done just right, when you're looking at the calipers six months later. :D

Link to comment
Share on other sites

  • 2 weeks later...

I did this today with red paint as my calipers where already red but faded and looked like junk.

i took the wheels off and then sanded it with corse sand paper i got from work hehe, the used really fine wet/dry paper i also got from work. and the after i done that i prepsoled the whole area to get rid of dust and rubbing down mess. then masked it all up and went ahead and sprayed them.

i must say they look hell better now.

Link to comment
Share on other sites

Create an account or sign in to comment

You need to be a member in order to leave a comment

Create an account

Sign up for a new account in our community. It's easy!

Register a new account

Sign in

Already have an account? Sign in here.

Sign In Now


  • Similar Content

  • Latest Posts

    • This morning I carefully reinstalled the manifold and started looking at a couple of things I need to do.  Heat wrap arrived sometime today so I popped into the shed with the missus dishwashing gloves and started wrapping the first half of the dump and the screamer/plumb back.  Once I do the second half I'll be able to final fit the turbo and exhaust up.  Also pulled the harness out today and started terminating it at the ECU end. A connector is done, just need to run the remaining wires that arent in the harness - 12v, gnd and couple I/O
    • A31 is pretty much the same thing without HiAIDS I mean CAS, no improvement lol. Not to late to send it.
    • Thanks for all the replies! I also wanted to ask if wheels that were fitted on Ford Falcons would fit the 350GTs as well? In the area I'm at there aren't that many options for secondhand wheels and new ones here are way out of my budget. From what I've seen, most of the wheels that are available that were fitted on Ford Falcons have an offset of +33 to +36, with a centre bore of 70.5mm whereas the stock 350GT's ones are 66mm, can't seem to find any hubcentric rings that fit that difference though. 
    • 215/45/18 tyres are probably a little on the low side compared to the factory tyre, it should be closer to a 245/45/19, which will get you about an extra 11mm of height, and should make you speedo read a bit closer to reality. 245/45/19s will be a bit too far the other way and you risk a speeding ticket as your speedo might read slower than your actual speed.  245/40/19s would be correct if you are going to 19in rims, they will give you a similar total diameter to the 245/45/18 tyres.  
    • That's something I forgot to put in my list. The aggressive anti-squat in R32 is a f**king menace. I still need to decide if I'm going to drag the subframe out of my car and weld in the GKTech corrector kit. The main reason to dither is the need to switch to spherical joints in the lower arm to account for the twist induced in the rear pivot caused by lowering the front pivot. And yes...we do put better subframes in R32s, and I wish I'd gotten an S14 one instead of an A31 when I did the "take off and nuke it from orbit" HICAS delete all those years ago.
×
×
  • Create New...