Jump to content
SAU Community

Recommended Posts

Went past Bezerkly Automotive in Wollongong this afternoon and saw Stuart's R32 back from Profab with it's shiny new 8-point roll cage. Can't wait to see this thing in action. GTR rear guards going on next - it's next stop is the panel shop where it will have the guards grafted on to the skinny arse of the gtst and cop a fresh coat of undiscovered colour! :wub:

post-695-1152778148.jpg

post-695-1152778167.jpg

post-695-1152778183.jpg

post-695-1152778201.jpg

post-695-1152778216.jpg

post-695-1152778233.jpg

post-695-1152778253.jpg

post-695-1152778268.jpg

post-695-1152778285.jpg

post-695-1152778299.jpg

Link to comment
https://www.sau.com.au/forums/topic/125999-in-the-build-whale-eater-32/
Share on other sites

Restricted to 28x9" slick in oz mod, Have GTR rear cradle assy fitted so ill see how that goes, will have to do alot of spring and shock testing to get it working well. Looking at re-valving front struts. Running a 2 speed glide built by Protrans. Brakes are all standard, 2 spot rear and 4 spot front, car had slotted rotors on it. Trying to keep weight down to 2500 pounds, give me a chance against those rotarys. Thats about it really, its nothing out of the ordinary, i just think Adrian got a bit excited.

whats it goin to be used for? drag car? track? street....? what other details are there for the car so far, transmission, suspension/brakes/wheels/tyre set up?

have some parts for sale listed in for sale section for those that might be interested. heaps of interior stuff and some mechanical.

Restricted to 28x9" slick in oz mod, Have GTR rear cradle assy fitted so ill see how that goes, will have to do alot of spring and shock testing to get it working well. Looking at re-valving front struts. Running a 2 speed glide built by Protrans. Brakes are all standard, 2 spot rear and 4 spot front, car had slotted rotors on it. Trying to keep weight down to 2500 pounds, give me a chance against those rotarys. Thats about it really, its nothing out of the ordinary, i just think Adrian got a bit excited.
  • 3 weeks later...

Roll cage was done by Pro Fab in Wollongong. It is a 8 point Molly cage. also includes rear strut brase bar and front dash cross bar. Cost $2900 fitted. they have to come and finish the seat support and parachute bracket. Its a bit hard to see from the pics but there was a huge amount of work done on the floor to mount the cage on boxes and plates. Took the best part of a week. Yeh getting exited now that it is starting to take shape.

Looks awesome mate you must be excited. If you dont mind me asking how much was the roll cage fabrication/installation?? PM me if you dont wanna post it in here.

Thanks

post-20078-1154385254.jpg

post-20078-1154385374.jpg

post-20078-1154385502.jpg

Edited by BezerkR32

They would do the cage different for street use, the side intrusion bars would be removable, and it would all have to be fitted with roof lining and pillar & door trims, would be 6 point, not 8 so you could sit people in the back etc etc but can be done.. Quick street car 10.99 or quicker?

Shit that isnt too bad at all. I was thinking 5g or more,:D could you get that with an engineers certificate for it without too much drama? (street use)

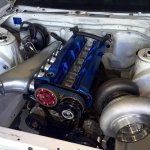
Few pics of engine & transmission dummy up, had to cut small section of transmission tunnel on passenger side. Had a few sets of engine mounts lying around, unfortunately cant remember what was what but they bolted directly to RB30 block and to crossmember perfect. Got a bit lucky. I think they are RB25 mounts. Just have to finish rear crossmember then get shaft made.

post-20078-1154735240.jpg

post-20078-1154735332.jpg

post-20078-1154735423.jpg

Create an account or sign in to comment

You need to be a member in order to leave a comment

Create an account

Sign up for a new account in our community. It's easy!

Register a new account

Sign in

Already have an account? Sign in here.

Sign In Now


  • Similar Content

  • Latest Posts

    • Lets say I wanted to buy this, specifically for this purpose. How do I actually perform the function. Can I still buy a Consult-1? Am I about to be burned by the fact my car is a 2000 model Series 2 R34 and thus will be some stupid other system? Do I just need this -> https://obd2australia.com.au/product/nissan-consult-14-pin-to-usb-ddl-diagnostic-interface-with-ftdi-ft232r-chip/ And with what software?
    • That's probably OK. That's a face to face compression joint between two surfaces with the clamping load provided by those bolts. So.... it's unlikely that the bolts will end up feeling that load in shear, unless the clamping surfaces are not large enough, bolts not got enough tension on them, etc etc to prevent the two faces from moving wrt each other. Which... I would hope the designers have considered, seeing as it's probably one of the most important things the upright has to do apart from resist collapsing in its own right. But yes, it would definitely be worth asking them what their safety factor on that part of the design was. I tend to think that the casting, being a casting, is not necessarily the strongest bit of material in the world. It's about an inch square, and when you think about the loads that are being put into it, you have to wonder what safety factor the Nissan boys (and every other OEM engineer who has designed all the millions of other uprights that look essentially the same) used to account for defective casting, aging, severe impacts on the wheel, etc etc. 
    • Those bolts would be orders of magnitude stronger that cast aluminium though.  And its mainly clamping force, not shear they are dealing with?
    • Except all that twisting force that is breaking a cast piece, appears to be going through 4 bolts in the picture Johnny posted of the BryPar one...
    • The smart approach is to use the gearbox loom from the manual car. Makes it a lot easier - just plugs into the switches on the box and plugs into the main loom up near the fusebox. Then you only need to deal with bypassing the inhibit switch. The other approach requires you to use the wiring diagram to identify those wires by colour and location, perhaps even indulging in a little multimeter action to trace them end to end to make sure, and then.... you will have the answers you need. The R34 wiring diagram is available on-line (no, I do not have a link to it myself - I would have to do a search if I wasn't able to go to the copy I have at home).
×
×
  • Create New...