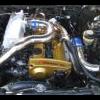
Jump to content
SAU Community

Recommended Posts

hey all, curious to see how this works out considering the cheap price!

my father owns a race car shop in sydney and we have modified a few plenums before, eg: rb30 rb25 and made custom ones to.

on a rb25 race car, the customer was after the xf throttle body on the front of the plenum. we separated the 2halves and made an aluminium top for it and machined up a block to suit the xf throttle body, all in all, we made runners to weld inside the custom top section! lots of stuffing around to get flow as even as possible, and lots of time and calculations involved! huge job.

although customer was happy in the end as it bolted straight up and we just moved a couple of vacuum hoses around, lost 70cm of cooler piping, and increased curve/less lag on the dyno, by about 10%. so it came on boost a little quicker!

cant wait to see the results, as im sure with some tidying up, and a little tlc (match porting) with a die grinder, could get these (cheap) plenums flowing just as good as the (genuine) ones! if your not scraed to cut it open and weld in a couple of air flow dividers, i honestly believe it will work alot better than the greddy units!

best of luck with this little project, and if you require any help, feel free to pm mate! thanks all, look forward to seeing the results!

cheers, Garth

  • 3 weeks later...
  • Replies 55
  • Created
  • Last Reply

Top Posters In This Topic

Well yes i have got a few updates the plenum itself looked pretty ordinary on the outside the inside wasnt too bad at all the runners themselves well looked not too bad although there was a big long piece of aluminium slag on the inside of the plenum uptowards the rear of it which i have recently cut out and have cleaned the inside of the runners with the little burr remover brush thing you use with the die grinder, I have also recieved the q45 throttle body aswell for a very very decent price of 245 delivered from the US and this itself was in remarkable condition, At the moment what is really stalling me is Damn bills, which arent too much of a hassel but trying to find a Flow bench Just and i say this JUST to measure consitancy of airflow through each runner up here in SE QLD, this will give me a better indication of use whether or not to go forth or just say to hell with it go the Original Greddy As seems to be that the problem lies usually in runner design of these plenums Hence lean cyls.

One big notice on these is the lack of available sized Vaccum fittings for the various and numerous hoses, Not really the lack but mainly finding the right sized ones as i have found the holes not to be the best of size, so some work still needs to go into this ie Tap and Die.

The water holes werent in the best of shape with alot of slag bits well everywhere so have also cleaned these up extensively with the die grinder, And to finish it off i would still recommend the head face of the plenum to be milled so its straight, not saying it isnt but you cant be too sure.

So far not much else to say apart from the q45 bolts straight to it no adapter required for them, injectors and fuel rail areas look good.

Not only i have cams coming soon so will go forth with that before this project as i still need a place where i can get better diagnostics on this manifold, At this stage, would still have to confirm id go with Nismo, hypertune, and original greddy plenums as these designs usually come with most bits well greddy ones do, esp the vaccum fittings and bolts which at importing prices at the moment would be your far better option as you wouldnt have to go through the pain of the work, But to close out this matter i would rather need confirmation of runner flow % differences to be utmost happy.

Hope that helps

I have got to ask, Am i wrong in saying it is possible JUST to flow test the manifold without the head? It has to be!... Plus those qld people help me out with flow bench testing for manifolds up ere for me, Im Having damn trouble trying to find one.

I'm doing the same thing for my RB30, I got my plenum today and it was what I was expecting for $250 delivered. I took to a few of the ports with a dremel and they came up beautiful, the only thing I'm worried about it not being able to reach into the back of the plenum to clean it up a bit more. I'm getting the face machined flat because it will definitely leak if I put it on as is.

Some pics -

post-28866-1178004879.jpg

post-28866-1178004932.jpg

post-28866-1178004961.jpg

I'm doing the same thing for my RB30, I got my plenum today and it was what I was expecting for $250 delivered. I took to a few of the ports with a dremel and they came up beautiful, the only thing I'm worried about it not being able to reach into the back of the plenum to clean it up a bit more. I'm getting the face machined flat because it will definitely leak if I put it on as is.

Some pics -

I havnt had a look at one of these but boy they must be darn rough to be any worse than the so called real thing. I am disgusted at the casting quality on mine.

its such an integral part, it would be like using fake chinese injectors

do you really want to risk it ?

I wouldn't really class it as the same risk as using crappy injectors. It's the exact same dimensions as an original Greddy plenum, its only the casting quality that differs. If they went to the effort of sticking them in a CNC machine and cleaning them up I'm sure they'd be worth another $500 at least... but they don't so thats where the dremel comes in. The manifold isn't under a lot of thermal stress like the exhaust side either. To me, the risk is acceptable.

Pics of an original would be awesome, I'd hope they'd be a fair bit better than a copy.

oh please noel post pics of inside and close ups of your Original greddy plenum :)

Get off your lazy arse and come have a looksee Adam. Heck you drive down the coast for absolutely no reason whatsoever.

Heres a good excuse for ya. :)

just to throw it into the mix - even though it is the RB26 original Greddy plenum:

Garage Saurus have cut axially in the direction of the runners and inserted diversion plates along the plenum (i.e. perpendicular to flow of air into the plenum), I assume to redistribute the flow to the cylinders. Do people think this will be necessary in this instance - there must have been a difference in cylinder flow, or else why do it?

I was almost goin to buy one of these and then i heard the bad rap. I got a custom made one for a price i couldnt say no to and told if anything goes wrong (like the weld cracking etc) to take it back and they'll fix it up for me. It also has velocity stacks inside.

Do the greddy and copy greddy ones have the velocity stacks?

post-28112-1178087729.jpg

The water holes werent in the best of shape with alot of slag bits well everywhere so have also cleaned these up extensively with the die grinder

I'd advise pressure testing these as well as I've heard horror stories of them cracking and hydrolocking the motor.

The problem most often stated is uneven distribution of air to the cylinders.

I've heard of really keen workshops having a special exhaust manifold with 6 widebands to test the afr of each indivdual cylinder to check things like this. I guess it'd be a pretty expensive way to test though.

I'll quote from a mag

Its all too easy to look at an inlet manifold and figure that its primary function is one of flow. Getting air into an engine is part of it, but to simplify the operation of an inlet manifold in such a crude way is to understand only a fraction of what it is designed to achieve.

Rather, the inlet manifold on any late-model fuel injected engine is actually a tuned chamber designed to take advantage of a phenomenon known as the Hermoltz frequency. If u could actually see inside the inlet manifold, you'd be able to note that the air doesn't simply rush into the cylinder head, it instead pulses back and forth in unison with the opening and closing of the valves, forming a big column of vibrating air.

Optimising the vibration of the air to get the very best cylinder fill possible is one thing engineers chase more than any other. This is what makes power, gives excellent economy and the sharp throttle response expected of a modern car. Its also something undone by those oblivious to the hours of manifold testing performed at the factory.

So what i reckon that means is spend money on something that is designed and tested.... Not something that looks the goods from the outside.. and a rough job at that.

So you're wishing you didn't spend your money a huge ass bling camber :P

Create an account or sign in to comment

You need to be a member in order to leave a comment

Create an account

Sign up for a new account in our community. It's easy!

Register a new account

Sign in

Already have an account? Sign in here.

Sign In Now


  • Similar Content

  • Latest Posts

    • Even more fun, leave all the ADAS stuff plugged in, but in different locations, hopefully avoid any codes!   And honestly, all these new cars with their weird electronics. Pull all the electronics out Duncan, and just shove an aftermarket ECU and if needed a trans controller in, along with a PDM. Make it run basic but race car styled!
    • To follow up a question from earlier too since I had the front bar off again (fking!) This is what is between the bumper and the drivers side wheel And this is the navigator side, only one thing but its a biggy! So basically....no putting coolers in the wheel arches without a lot of moving other stuff. Assuming I move to properly race prepping this car I'll take that job on and see how the computers respond to removing a whole bunch of ADAS modules
    • So I prepped the car for another track day on Wednesday (will be interesting to see coolant temps post flushing out and the larger reservoir, with a forecast of 3-14 being 20o cooler than last time I took it out). Couple of things to mention; since I am just driving the car and not taking a support vehicle, I took the rear seats out and just loaded the back up Team Trackday style. Look at all that space! To cover off removing the rear seat....it is weird (note the hybrid is probably different because it wouldn't have folding rear seats) Basically, you remove the lower seat base, very similar to a r series but it is a clip that pulls forward to release the base rather than it being bolted down. Easy Then, you need to remove the side section of the rear seat on each side. There is a 14mm head nut at the bottom of the side piece, the it slides upwards off a hook at the top to release; you also need to unhook the seatbelt from the loop at the top. Then the centre piece is weird. You need to release/fold the seats forward with the tab in the boot on each side From there, there are 2,x12mm headed bolts holding the rear of each seat to the folding bracket, under the trim between the rear seat and the boot (4x christmas tree clips there, they suck). The seat is out but you can see where the bolts attach to the bracket
    • As discussed in the previous post, the bushes in the 110 needed replacing. I took this opportunity to replace the castor bushes, the front lower control arm, lower the car and get the alignment dialled in with new tyres. I took it down to Alignment Motorsports on the GC to get this work done and also get more out of the Shockworks as I felt like I wasn't getting the full use out of them.  To cut a very long story short, it ended up being the case the passenger side castor arm wouldn't accept the brand new bush as the sleeve had worn badly enough to the point you could push the new bush in by hand and completely through. Trying a pair of TRD bushes didn't fix the issue either (I had originally gone with Hardrace bushes). We needed to urgently source another castor arm, and thankfully this was sourced and the guys at the shop worked on my car until 7pm on a Saturday to get everything done. The car rides a lot nicer now with the suspension dialled in properly. Lowered the car a little as well to suit the lower profile front tyres, and just bring the car down generally. Eternally thankful for the guys down at the shop to get the car sorted, we both pulled big favours from our contacts to get it done on the Saturday.  Also plugged in the new Stedi foglights into the S15, and even from a quick test in the garage I'm keen to see how they look out on the road. I had some concerns about the length of the LED body and whether it'd fit in the foglight housing but it's fine.  I've got a small window coming up next month where I'll likely get a little paint work done on the 110 to remove the rear wing, add a boot wing and roof wing, get the side skirt fixed up and colour match the little panel on the tail lights so that I can install some badges that I've kept in storage. I'm also tempted to put in a new pair of headlights on the 110.  Until then, here's some more pictures from Easter this year. 
    • I would put a fuel pressure gauge between the filter and the fuel rail, see if it's maintaining good fuel pressure at idle going up to the point when it stalls. Do you see any strange behavior in commanded fuel leading up to the point when it stalls? You might have to start going through the service manual and doing a long list of sensor tests if it's not the fuel system for whatever reason.
×
×
  • Create New...