Jump to content
SAU Community

Recommended Posts

Hi guys...

just a quick one, my car is in the garage and I haven't had it aligned for ages so I think its due... especially since I got air over a ripple strip as I straight lined turn one at sandown :P and its been a bit wonky ever since

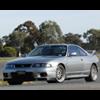
its an R33GTSt running:

the SK group buy kit Bilstiens with King springs

Whiteline sway bars set on medium front and back

Azenis rt615, 225's front 255's back

I was going to go for as much neg camber at the front as possible but I only have stock adjustment so I think 1.5º will be as much as I can get? Neg camber at the back will be about 0.5º... this should be fine as is, I have the adjustable bushes in there

Wheel to guard measurements are 350mm front and 350mm back, there is probably a 5-10mm rake towards the front

as for toe, last time I had it set I think it was set toe in front and back but should I be looking at toe out at the front and toe in at the back? and by how much?

I'm not stressed at tire wear but for reference at the moment it seems to chew the middle/outsides of the fronts and the insides/middle of the rears

um what else... I have the adjustable castor bushes at the front so have about 7º there from memory

pineapples in the rear set to squat

hicas is still active (if that makes a difference)

stock vlsd struggles to put the power down out of 90º, second gear corners (sometimes it single spins in third gear too...eeew) don't know if alignment can help here but thought I would ask

geez that turned into an essay, sorry! any help is aprreciated

Link to comment
https://www.sau.com.au/forums/topic/169957-circuit-friendly-alignment/
Share on other sites

well there is not much you can set really, there is no standard camber adjustment on the front so you can't change that.

castor go for as much as you can out of the bushes

I would try 1mm toe out each side and see if you like it.

maybe a bit of toe in at the rear 1mm each side.

rear camber is ok, but if it were me I'd try a little bit more, maybe go to 1 or 1.5 degree neg.

unfortunately the only things you can adjust from standard is toe, and rear camber. plus you know have some castor adjustment which helps, but some camber adjustment at the front would be good.

cheers beer baron... will try the toe out at the front and see if I like it... what's the best way to get some more negative camber at the front? do the whiteline bushes allow you to go for more neg camber? they are the only part of the gb kit I didn't get as I was happy with the camber at that stage...

also would a front strut brace help? I don't have one as I was always skeptical at how much they improve handling

I'd get a strut brace, it will stiffen up the front end a touch and every little bit helps.

Front camber adjustment would also be beneficial. The whiteline bushes will let you wind a bit more in.

It's also worth thinking about swaybars followed by a diff. $200 per end for swaybars is just a bargain when you consider what a difference they will make to the handling of the car.

yeah I think if I can get close to 2º neg camber out of the whiteline bushes that will do the trick... I have swaybars already and yes I would definately recommend them

strut tower brace I'm still unsure about but I guess for around $100 it can't hurt... who makes a really thick/sturdy strut brace for r33? Cusco? Whiteline?

strut bar is much of a muchness. it's just a piece of bar. chose a brand you like the look of.

whiteline front upper control arm bushes will give you some camber adjustment, or use some replacement upper arms.

Honestly, be careful with camber. Im running 3.5deg and the trips to Phillip Island, Sandown and DECA have been enough to eat the inside shoulder. It works really well. But im going to wind it back a little as it clearly is too far towards track.

I used to have -3.5 deg usign bushes, but you need to run an adjustable inner and outer. But again, when i get some more spring into the car im going to get soem cusco castor arms and try to get about 6.5 castor and wind the camber back to about 2.5. you can get around 2.2-2.3 out of a single adjustable bush

My 33 gtst came with a front brace no rear brace and stock suspension.Ist purchase was a rear brace and i did notice a difference. It definitely tightened the back and a little. Next up came the adjustable whitleline sway bars. These things are great. even on stock springs and shocks i can dial in under/oversteer to a degree and i still havnt fully explored them yet.

Not sure where to go from here. Thinking I might do the cradle and diff bushes etc plus better control arm bushes. As to what coilovers I will end up I think the reccos by Sk will be the way to go.

Most lines I have experienced with a/m sus ride like billy carts. I dont particularly want that. If the euros can dish up a well behaved package that still delivers excellent ride quality I dont see why it cant be done on a skyline.

My old car is track only so not to sure how these setting will be in road car.

Fronts

4 deg castor

5 deg- camber Cusco upper arms

1mm toe each side

rear

1.5 -deg camber

1.5mm toe out each side lock bar in place.

struts

cusco front

cusco three way strut

cusco front tension rod ( inbetween the castor arm mounting point ).

sway bars both cusco

ohlin shocks

It quite neutral in its handling unless to heavy on the throttle at apex then will under steer a little, very pleased though.

Edited by tacker
Most lines I have experienced with a/m sus ride like billy carts. I dont particularly want that. If the euros can dish up a well behaved package that still delivers excellent ride quality I dont see why it cant be done on a skyline.

I'm running the SK package with stock shocks/spring. Very tight feel and handles well but still a very comfortable ride.

My old car is track only so not to sure how these setting will be in road car.

Fronts

4 deg castor

5 deg- camber Cusco upper arms

1mm toe each side

rear

1.5 -deg camber

1.5mm toe out each side lock bar in place.

struts

cusco front

cusco three way strut

cusco front tension rod ( inbetween the castor arm mounting point ).

sway bars both cusco

ohlin shocks

It quite neutral in its handling unless to heavy on the throttle at apex then will under steer a little, very pleased though.

I recommend more throttle mid corner to get those wheels spinng lol

How did you go with the sway bars?

Leave them both on medium?

My car has same set up as yours (cept whiteline springs) - I have a front strut brace and am waiting now for sy kid camber front and rear (been 6 weeks now....) so would I am interested on peoples thoughts for the sway bar settings.

apparantly mine are

front - medium

rear - hard

Oh, and Ive got the castor adjustser from the group buy also

yep left them both on medium... I have had the rear on hard before and to tell you the truth it probably handled better that way but I went faster with it on medium so I left it alone... if I put it back on hard it might help stop the diff from spinning the unloaded wheel

Create an account or sign in to comment

You need to be a member in order to leave a comment

Create an account

Sign up for a new account in our community. It's easy!

Register a new account

Sign in

Already have an account? Sign in here.

Sign In Now


  • Similar Content

  • Latest Posts

    • Yup. You can get creative and make a sort of "bracket" with cable ties. Put 2 around the sender with a third passing underneath them strapped down against the sender. Then that third one is able to be passed through some hole at right angles to the orientation of the sender. Or some variation on the theme. Yes.... ummm, with caveats? I mean, the sender is BSP and you would likely have AN stuff on the hose, so yes, there would be the adapter you mention. But the block end will either be 1/8 NPT if that thread is still OK in there, or you can drill and tap it out to 1/4 BSP or NPT and use appropriate adapter there. As it stands, your mention of 1/8 BSPT male seems... wrong for the 1/8 NPT female it has to go into. The hose will be better, because even with the bush, the mass of the sender will be "hanging" off a hard threaded connection and will add some stress/strain to that. It might fail in the future. The hose eliminates almost all such risk - but adds in several more threaded connections to leak from! It really should be tapered, but it looks very long in that photo with no taper visible. If you have it in hand you should be able to see if it tapered or not. There technically is no possibility of a mechanical seal with a parallel male in a parallel female, so it is hard to believe that it is parallel male, but weirder things have happened. Maybe it's meant to seat on some surface when screwed in on the original installation? Anyway, at that thread size, parallel in parallel, with tape and goop, will seal just fine.
    • How do you propose I cable tie this: To something securely? Is it really just a case of finding a couple of holes and ziptying it there so it never goes flying or starts dangling around, more or less? Then run a 1/8 BSP Female to [hose adapter of choice?/AN?] and then the opposing fitting at the bush-into-oil-block end? being the hose-into-realistically likely a 1/8 BSPT male) Is this going to provide any real benefit over using a stainless/steel 1/4 to 1/8 BSPT reducing bush? I am making the assumption the OEM sender is BSPT not BSPP/BSP
    • I fashioned a ramp out of a couple of pieces of 140x35 lumber, to get the bumper up slightly, and then one of these is what I use
    • I wouldn't worry about dissimilar metal corrosion, should you just buy/make a steel replacement. There will be thread tape and sealant compound between the metals. The few little spots where they touch each other will be deep inside the joint, unable to get wet. And the alloy block is much much larger than a small steel fitting, so there is plenty of "sacrificial" capacity there. Any bush you put in there will be dissimilar anyway. Either steel or brass. Maybe stainless. All of them are different to the other parts in the chain. But what I said above still applies.
    • You are all good then, I didn't realise the port was in a part you can (have!) remove. Just pull the broken part out, clean it and the threads should be fine. Yes, the whole point about remote mounting is it takes almost all of the vibration out via the flexible hose. You just need a convenient chassis point and a cable tie or 3.
×
×
  • Create New...