Jump to content
SAU Community

Recommended Posts

Greedy want $120 for a change over switch for the profec b spec 2, So a little chasing around with my multimeter found the following, It uses a stereo 3.5mm plug of which has 2 voltages, a 12v which obviously powers up the Greddy remote switch and a 4.5-5V which is the changeover voltage. Momentary switching the 5v to ground changes over the Hi-low setting.

The following is a cheaper alternative. Total cost is no more than $10!

Tool List:

Soldering Iron

Drill for mounting switch

Multimeter

Drill bits and solder

Part List:

product_2116.jpg

1x 3.5mm Stereo METAL Plug WITH SPRING (CAT. NO. PP0135) = $1.35 (can use alternative but needs to be a stereo one)

product_4180.jpg

1x PUSHBUTTON PUSH-ON MOMENTARY SPST RED ACTUATOR (CAT. NO. SP0716) = $1.50

- or -

product_4173.jpg

Small Black SPST N/O Momentary Action (CAT. NO. SP0700) = $2.80

(can use alternative but needs to be momentary "ON" type)

1m or so of 3-4 core wire depend where switch is to the unit = $2-3

- or - quite possibly (should work) :D

product_10564.jpg

AUDIO LEAD 3.5MM - 3.5MM PLUG STEREO 5M (CAT. NO. WA7005) = $8.95

I made my own as i already have some cable but the premade one should work. If yu buy premade skip to step 2.

Step 1:

Strip your wire and solder 3 different wires on different pins of the 3.5mm plug.

Step 2:

Strip the wires on the opposite end of the wire to the plug(if using a premade one cut one plug side off). Check with your multimeter on resistance(ohms) between all 3 wires eg; between wire 1 & 2 , 1 & 3 and 2 & 3. You want to make sure that all readings have no resistance value as this means there is a short(dont hold the wires with your fingers as you are a conductor and will create a circuit)

If you get a reading make sure that no wires are joining at the plug.

Step 3:

If step 2 is all good, plug the jack into the back of the profec and turn your ignition on(make sure the side with no plugs wires arent touching). With your multimeter on Volts DC find the ground and 5V wire, touch these wires for a second and make sure it switches modes. If good turn off your ignition and with the last wire(12VDC) cut the stripped part off, i taped it to the insulation of the wire as later on i plan to get a switch with an LED and this will come in handy.

Step 4:

Solder up the 5VDC wire and ground across the switch, Plug in and test with car ignition on. If doesnt work check all your connections ,possibility of bad solder joint or short circuit.

Step 5:

Drill and mount the switch where ever you like. I put mine in the spare switch slot next to the steering wheel on my r33, then just run the wire with plug back to the Profec head unit and enjoy.

Make sure that the momentary switch is of the Normally Open type and test it with a meter before you purchase at jaycar, I plan to get a LED switch that will light up when in high boost mode, trying to source out a good one at the moment. I hope someone will find this useful. :D

Link to comment
https://www.sau.com.au/forums/topic/209903-hi-low-switch-for-profec-b-spec-ii/
Share on other sites

  • Replies 43
  • Created
  • Last Reply

Top Posters In This Topic

  • 2 weeks later...

This is awesome, very good job indeed.

I kept the same idea when I did mine but I changed it a little bit.

Instead of using the stationary button idea, I used a MOMO steering wheel that I have had lying around which has the two "NOS" buttons either side. The main problem was going to be getting the feed from the Boost controller to the steering wheel which is always moving.

So I used the 3.5mm audio jack and lead from JAYCAR which is the 'springy type' and i just soldered it to the buttons in the steering wheel and then plugged it into the Boost controller. Just had to cable tie it to the steering wheel and clamp it to the side of the steering column. If you use the leads from JAYCAR, the black is the ground, the white is the 5volt and the red is the 12volt.

Will chuck up a few photos when it is completely finished.

Top job DAZWAH

post-45738-1206840278_thumb.jpg

post-45738-1206840293_thumb.jpg

Edited by J-train
This is awesome, very good job indeed.

I kept the same idea when I did mine but I changed it a little bit.

Instead of using the stationary button idea, I used a MOMO steering wheel that I have had lying around which has the two "NOS" buttons either side. The main problem was going to be getting the feed from the Boost controller to the steering wheel which is always moving.

So I used the 3.5mm audio jack and lead from JAYCAR which is the 'springy type' and i just soldered it to the buttons in the steering wheel and then plugged it into the Boost controller. Just had to cable tie it to the steering wheel and clamp it to the side of the steering column. If you use the leads from JAYCAR, the black is the ground, the white is the 5volt and the red is the 12volt.

Will chuck up a few photos when it is completely finished.

Top job DAZWAH

If i had am aftermarket wheel with a NOS button i would do the same. Would love to see some photos. :pwned:

  • 4 weeks later...

Great stuff, just working on mine now :D

I plan to get a LED switch that will light up when in high boost mode, trying to source out a good one at the moment

If you do let us know, I also want to connect a light to show when I'm on high boost mode.

If you use the leads from JAYCAR, the black is the ground, the white is the 5volt and the red is the 12volt.

I'm just using a lead I ripped off an old set of headphones and is exactly the same.

  • 5 months later...
  • 2 months later...
Done!

Great tutorial, just wondering if this would actually work if I connected the switch to one of the FM control buttons on the dash cluster surround? I'm pretty sure its the right kind of switch, but does anyone know for sure? Would be nice and stealthy

-D

yeah the radio buttons on the dash are momentary on....so you can just tap into them

Sweet thanks.

Ive bought the cable and tapped it, going to solder it up tomorrow.... gonna also hook up an led on the dash that lights up when hi boost is selected.... EBC is hidden in the glovebox so it does help...

Cheers all

-D

Does anyone have the pinouts for the 2 radio buttons on the 32?

Thanks

Ben

Use a multimeter! put your meter on resistance mode. Switch open should read infinite(open circuit) switch pushed should read 0-0.5ohms (closed circuit). Find what ever 2 terminals match.

Use a multimeter! put your meter on resistance mode. Switch open should read infinite(open circuit) switch pushed should read 0-0.5ohms (closed circuit). Find what ever 2 terminals match.

Yeah lol, sorry. I'm really shite with multimeters but I eventually got there. Its all working nicely now :) All I gotta do now is bust open the casing to the transmitter for the automatic rollerdoor and hook it up to the other button ;D

Now for the hard part -

Does anyone know how I can make it so that I have a red led on my panel when hi boost is selected? I figure the most straight forward way would be to break open the profec's casing and solder a socket to the hi boost LED and then just run a second wire to an LED i can mount next to my boost gauge...

Or does anyone have any fancy tricks that I can use to get around breaking open the box?

Cheers

-D

Edited by Dohmar
Next on the list..

do it for Hks evc 4-5!

i know it involves a bit more and different plugs than what greddy use

What sort of plug does it use? Got any pinout schematics? Would be nice to see what HKS have made controllable by remote

-D

Just wired up my own Hi/Lo switch for my Profec B Spec II, and used the wiper de-icer switch above the ignition.

For those with a R33, R34, or Stagea, its the Blue and Green wires that you hook up to Ground and +5V behind the switch.

I think its the most stealthy way to switch between hi and low boost...using the factory dash switches :3some:

  • 5 months later...

Hi guys

I saw a video in youtube...I have Profec A boost controller and I have almost done my switch...just wondering in which bung in the bag to plug it...i see three bungs- Interaction, Data-out and Option...Which of these three is the right one :blush:

Create an account or sign in to comment

You need to be a member in order to leave a comment

Create an account

Sign up for a new account in our community. It's easy!

Register a new account

Sign in

Already have an account? Sign in here.

Sign In Now


  • Similar Content

  • Latest Posts

    • Cheers. Skyline is back on the menu, can’t get rid of it. It’s like a child you don’t want, or herpes 
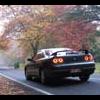
    • I got back to Japan in January and was keen to get back on track as quickly as possible. Europe is god-awful for track accessibility (by comparison), so I picked up a first-gen GT86 in December just to have something I could jump into right away. The Skyline came over in a container this time and landed in early January. It was a bit battered after Europe, though—I refused to do anything beyond essential upkeep while it was over there. The clutch master cylinder gave out, and so did the power steering. I didn’t even bother changing the oil; it was the same stuff that went in just before I left Japan the first time. Naughty. Power steering parts would’ve cost double with shipping and taxes, so knowing I’d be heading back to Japan, I just postponed it and powered through the arm workout. It took a solid three months to get the car back on the road. Registration was a nightmare this time around. There were a bunch of BS fees to navigate, and sourcing parts was a headache. I needed stock seats for shaken, mistakenly blew 34k JPY on some ENR34 seats—which, of course, didn’t fit—then ended up having the car’s technical sheet amended to register it as a two-seater with the Brides. Then there’s the GT86. Amazing car. Does everything I want it to do. Parts are cheap, easy to find, and I don’t care what anyone says—it’s super rewarding to drive. I’ve done a few basic mods: diff ratio, coilovers, discs, pads, seat, etc. It already had a new exhaust manifold and the 180kph limiter removed, so I assume it’s running some kind of map. I’ve just been thrashing it at the track non-stop—mostly Fuji Speedway now, since I need something with higher speed after all that autobahn time. The wheels on the R34 always pissed me off—too big, and it was a nightmare getting tires to fit properly under the arches. So I threw in the towel and bought something that fits better. Looks way cleaner too (at least to me)—less hotboy, less attention-seeking. Still an R34, though. Now for future plans. There are a few things still outstanding with the car. First up, the rear subframe needs an overhaul—that’s priority one. Next, I need to figure out an engine rebuild plan. No timeline yet, but I want to keep it economical—not cutting corners, just not throwing tens of thousands at a mechanic I can barely communicate with. And finally, paint. Plus a bit of tidying up here and there.  
    • Nope, needed to clearance under the bar a little with a heat gun, a 1/2" extension as the "clearancer", and big hammer, I was aware of this from the onset, they fit a 2.0 with this intake no problems, but, the 2.5 is around 15mm taller than a 2.0, so "clearancing" was required  It "just" touched when test fitting, now, I have about 10mm of clearance  You cannot see where it was done, and so far, there's no contact when giving it the beans Happy days
    • It's been a while since I've updated this thread. The last year (and some) has been very hectic. In the second-half of 2024 I took the R34 on a trip through Germany, Italy, France and Switzerland - it was f*cking great. I got a little annoyed with the attention the car was getting around Europe and really didn't drive it that much. I could barely work on the car since I was living in an inner-city apartment (with underground parking). During the trip, the car lost power steering in France - split hose - and I ended up driving around 4,000kms with no power steering.  There were a few Nurburgring trips here and there, but in total the R34 amassed just shy of 7,000kms on European roads. Long story short, I broke up with the reason I was transferred to Europe for and requested to be moved back to Japan. The E90, loved it. It was a sunk cost of around EUR 10,000 and I sold it to a friend for EUR 1,500 just to get rid of it quickly. Trust me, moving countries f*cking sucks and I could not be bothered to be as methodical as I was the first time around.
×
×
  • Create New...