

Announcements
-
Similar Content
-
-
Latest Posts
-
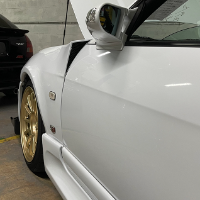
 Hi, Will the R33 GTR rear brake backing plates fit a GTST? I'm struggling to find GTST ones but can find new GTR ones. Thanks.
 -
 I also got the same floor mats for a bit of extra bazzaz haha
 -
Some more close up pics now that I’m back to working on the car, the loop pile is nice but again haven’t compared it to the other types in person, it’s hard to tell from the pics on the website. View of the hemming on the edges too, it comes in 2 pieces - front and back, honestly very happy with it for anyone on the fence. Also attached my previous pics from further up as it didn’t let me post them directly before. (Nothing worse than photo bucket pics that aren’t hosted anymore years later)
-
 I might just check it out.. A Q among all those skylines.. lol
 -

By Dose Pipe Sutututu · Posted
Time will tell, they're doing all the admin stuff at the moment. I've submitted all the required details, photos, etc. I was under the impression that DC coupling is the best approach, i.e.: Solar Array -> Battery Invertor -> Battery Where as AC Coupling is simpler, however less efficient, i.e.: Solar Array -> Solar Invertor -> Battery Invertor -> Battery
-


Recommended Posts
Create an account or sign in to comment
You need to be a member in order to leave a comment
Create an account
Sign up for a new account in our community. It's easy!
Register a new accountSign in
Already have an account? Sign in here.
Sign In Now