Jump to content
SAU Community

Recommended Posts

  • 12 years later...
On 17/07/2021 at 5:52 AM, schowdhry said:

hello from the year 2021 blind elk if your still on here i need your help! i have just swapped the rb25 neo into my gts4, all the mechanical work is done but i need help with wiring up the ecu! 

@blind_elk

  • 7 months later...
On 17/07/2021 at 6:22 AM, schowdhry said:

hello from the year 2021 blind elk if your still on here i need your help! i have just swapped the rb25 neo into my gts4, all the mechanical work is done but i need help with wiring up the ecu! 

Are you available to chat with about this conversion ??

  • 2 months later...
On 11/16/2008 at 3:16 PM, blind_elk said:

Sorry, but that's rubbish. When I did the swap in mine, it all just swapped over.

This is Rubbish information and basically screwed up my build plans. 


RB25DET (Neo) does not use the same AWD oil pan as the RB20.  The Pan's do not swap. Bolt holes are not aligned. I'll have more photos when I pick it up from the shop. 


So to be specific as possible, since every thread I find about this information is vague and useless. 


1989 GTS-4 Coupe - AWD - Turbo RB20DET 5spd Manual. 

Engine  - RB25DET NEO - Stagea - most likely automatic car. 


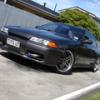
Car in Question 


IMG_20210510_152439.thumb.jpg.067204d9eb6cb415c07435d06db840f1.jpg


Engine

IMG_20210429_122841.thumb.jpg.d39938a742f75efc3df061314ffa2659.jpg

RB25DET NEO AWD PAN

20220518_171456.thumb.jpg.73818ee2fb8d51101fa0f6d4a6ab45e7.jpg

RB20DET AWD PAN

20220518_171538.thumb.jpg.291f0f04d4d14ad2c6cf598be6b25d78.jpg

On 7/16/2021 at 1:22 PM, schowdhry said:

hello from the year 2021 blind elk if your still on here i need your help! i have just swapped the rb25 neo into my gts4, all the mechanical work is done but i need help with wiring up the ecu! 

Did you swap the Ring and Pinion? 


How much a PITA Is it to shim the front differential. From what I can tell there is two thrust washer with 6 various sizes each for sides and two washers with almost 10 each options for the pinion depth along with a pinion sleeve that comes in 6 sizes. 

There is almost 1.65mm of depth tolerance stacking and with each of these washers/shims running for $5, that's almost $500 to get enough to play whack a mole with setting up the R&P pattern. 

On 5/20/2022 at 1:05 PM, corbic said:

There is almost 1.65mm of depth tolerance stacking and with each of these washers/shims running for $5, that's almost $500 to get enough to play whack a mole with setting up the R&P pattern.

That's why I always just give it to my trusted diff guy to put my Frankendiffs back together.

On 5/19/2022 at 10:19 PM, GTSBoy said:

That's why I always just give it to my trusted diff guy to put my Frankendiffs back together.

I'm state side, so while I have two great diff shops near by, neither is going to stock GTR/Nissan shims. 

On 5/19/2022 at 10:47 PM, GTSBoy said:

No, but they can use whatever shim they have, measure the difference with feeler gauges (or whatever alternative approach they may choose) and then buy appropriate shims as required. Not really any different over here.

Shims are unique to the GTR/Nissan.  A local shop may determine that a longer sleeve is needed, but they are not going to be able to call up NAPA Auto Parts or a Nissan Dealer and pick up a sleeve. 

Also, looking at the FSM - it looks like there is a pressed on bearing for the Snub - sooo I doubt any shop is going to have a dummy bearing to get the initial depth without having to press on - press off the bearing a dozen times. 


$150/hr experimenting with all this is going to turn into a $2000 shop bill real quick if I went that route. 


Le sigh. The shim you want to leave in there may unique to the R200. But I can guarantee you that any decent shop will have OTHER SHIMS THAT WILL FIT, even if they have to bore the inner diameter out or scrape some off the outer diameter, to use as a bloody reference.

It hasn't cost me much to have my trusted diff shop do it.

  • 1 month later...

As you can see the Pan's are completely different. The RB25 pan is a different bolt pattern and the axle tube + differential are mounted forward.  The Axle is nearly touching the oil sump and there is an additional 3 inch gap between the differential flange and the end bellhousing plane. 

Create an account or sign in to comment

You need to be a member in order to leave a comment

Create an account

Sign up for a new account in our community. It's easy!

Register a new account

Sign in

Already have an account? Sign in here.

Sign In Now


  • Similar Content

  • Latest Posts

    • Jack the back of the car up, pull that wheel off, pull that sensor out, and put a bore scope into the hole to inspect the outer casing, see if anything looks damaged before you pull the whole thing apart.
    • Ergh... So I pulled the speed sensor out again and the tip was shiny so I think it's rubbing the bearing. The bearing contains the magnets for the speed sensor so I think when the first sensor broke it damaged the magnet ring on the bearing.  This is just a Google image, but there is a hole going to the bearing. So when the tip broke off the old sensor I'm guessing it fouled the bearing... As the magnet is only protected by a plastic cover it would be easy to damage it. So I guess I'm doing a bearing again.   
    • My thinking is that if the O2 sensor is shot then your entire above described experience is pure placebo.
    • Here is the mess that I made. That filler there was successful in filling dents in that area. But in the middle area. I can feel dents. And I've gone ocer it multiple times with filler. And the filler is no longer there because i accidently sanded it away. I've chased my tail on this job but this is something else lol. So I'm gonna attempt filler one more time and if it doesn't work I'll just high fill primer the door and see where the issues are because guidecoat is of no use atm.
    • Ok, so I think I sort of figured out where I went wrong. So I definitely overthinked it, and I over sanded, which is probably a large part of the problem. to fix it, I ended up tapping some spots that were likely to be high, made them low, filled them in, and I tackled small sections at a time, and it feels a lot better.    I think what confused me as well is you have the bare metal, and some spots darker and some are lighter, and when I run my finger across it, it' would feel like it's a low spot, but I think it's just a transition in different texture from metal to body filler.    When your finger's sliding on the body filler, and crosses over to the bare metal, going back and forth, it feels like it's a low spot. So I kept putting filler there and sanding, but I think it was just a transition in texture, nothing to do with the low or high spot. But the panel's feels a lot better, and I'm just going to end up priming it, and then I'll block it after with guide coat.   Ended up wasting just about all of my filler on this damn door lol  
×
×
  • Create New...