
Announcements
-
Similar Content
-
-
Latest Posts
-
 What are we supposed to be seeing in the photo of the steering angle sensor? The outer housing doesn't turn, right? All the action is on the inside. The real test here is whether or not your car has had the steering put back together by a butcher. When the steering is centred (and we're not caring about the wheel too much here, we're talking about the front wheels, parallel, facing front) then you should have an absolutely even number of turns from centre to left lock and centre to right lock. If there is any difference at all then perhaps the thing has been put back together wrongly, either the steering wheel put on one spline (or more!) off, and the alignment bodged to straighteb the wheel, or the opposite where something silly was done underneath and the wheel put back on crooked to compensate. Nut there isn't actually much evidence that you have such a problem anyway. It is something you can easily measure and test for to find out though. My money is still on the HICAS CU not driving the PS solenoid with the proper PWM signal required to lighten the load at lower speed. If it were me, I would be putting either a multimeter or oscilloscope onto the solenoid terminals and taking it for a drive, looking for the voltage to change. The PWM signal is 0v, 12V, 0V, 12v with ...obviously...modulated pulse width. You should see that as an average voltage somewhere between 0V and 12V, and it should vary with speed. An handheld oscilloscope would be the better tool for this, because they are definitely good enough but there's no telling if any cheap shit multimeter that people have lying around are good enough. You can also directly interfere with the solenoid. If you wire up a little voltage divider with variable resistor on it, and hook the PS solenoid direct to 12V through that, you can manually adjust the voltage to the solenoid and you should be able to make it go ligheter and heavier. If you cannot, then the problem is either the solenoid itself dead, or your description of the steering being "tight" (which I have just been assuming you mean "heavy") could be that you have a mechanical problem in the steering and there is heaps of resistance to movement.
 -

By MissMintyR33 · Posted
Little update I have shimmed the solenoid on the rack today following Keep it Reets video on YouTube. However my steering is still tight. I have this showing on Nisscan, my steering angle sensor was the closest to 0 degrees (I could get it to 0 degrees by small little tweaks, but the angle was way off centre? I can't figure this out for the life of me. I get no faults through Nisscan. -

By Dose Pipe Sutututu · Posted
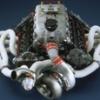
The BES920 is like the Toyota Camrys of coffee machines. E61 group head is cool, however the time requirements for home use makes it less desirable. The Toyota Camry coffee machine runs twin boilers and also PID temp control, some say it produces coffees as good as an E61 group head machine. -
 And yes with a full tank it will hit limiter free revving or driving 6B6CDF6E-4094-426D-A9CB-6C553475FE36.mp4
 -
One way of putting the fuel surge idea to rest, is that even when in neutral/clutch in or free revving it still has the same issue, it can’t even get to limiter (7800) so to me that says it can’t be g force, I’m not trying to argue I just want to find the f&$king issue 😡
-


Recommended Posts
Create an account or sign in to comment
You need to be a member in order to leave a comment
Create an account
Sign up for a new account in our community. It's easy!
Register a new accountSign in
Already have an account? Sign in here.
Sign In Now