Jump to content
SAU Community

Recommended Posts

will get a clean up and be put back in storage to be honest I am over it and have other far more important things to worry about to be honest.

I am unsure if getting it back was the best move but I have made my decision and I would like to think I could still get out of it relatively easily, but that is not really why I brought it back.

Still in the process of seeking legal advice, I am not sure what it will cost me and to be honest this is a minor consideration right now.............................

Cheers Alex

Couldnt have asked for a better outcome Alex for what started out so glum. I can understand you being over it at the moment with all the stress and anxiety it has caused....I rekcon in 10 years time you will be happy you bought it back though.

^ZILLR Im keen to see auction if you can be stuffed putting it up

  • Like 1

hi guys,

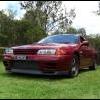
i dug up some old pics of my gtr when i was running r34 wheels back in 2004.

they did look nice but would have been nicer if they were a tad wider :)

post-8728-0-93582300-1339648397_thumb.jpg

post-8728-0-89365300-1339648404_thumb.jpg

we should start sharing more detailed pics of our ADM's on this thread!

I actually purchased a ticket then had to sell it due to other commitments (house was half open due to reno's)

I wanted to get my glove box signed by jim Richards as I was going to remove this.

I had my motorcycle fairing and leathers signed by the likes of Wayne rainey, shaun Giles and the like

The Ex-Kerry Packer Silver car is up for sale again (55,000kms with full service history). Looks like good buying at $39,500 asking price, although does have some modifications.

Does anybody know any more history on this car?

QLD Reg: Norty1

Build No. 015994 (No.12 of 100)

Build Date: May 31st, 1991 Complied

Paint/Trim: KJ1/G Jet Silver Metallic

http://www.carsales....VNAV=A&__N=1216 1247 1252 1282 4294963846 4294963593 4294795819&distance=25&find=gtr|CarAll

Owner's Description.

One for the motoring enthusiast / collector. purchased new by Kerry Packer (Consolidated Press) this is a original nissan austalia GTR.If you are looking at this you will know the original purchase price and how many were complied here. it comes with full log books and manuals/keys and excellent motoring history. this vehicle was also driven and maintained and modified by the motoring great himself Kevin Bartlett. for those who are not aware Kevin spent alot of time helping nissan compliance the cars. This GTR however goes one step further being modified from new by Kevin for Kerry having the larger discs fitted,wheels to clear the larger discs, computer remapped, custom exhaust and more. The car presents as an original with log booked klms. Servicing was mainly performed by Kevin and his team and this is reflected in the service manuals.

Further history of the car extends to the second owner who was Nick Ross (Kerrys helicopter pilot)and for those who dont know he was the person who gave Kerry a liver.

Nick had entended to do motorsport Rallies so a complied roll cage was fitted, although the roll cage has been removed and trims returned to standard as these events were never fullfilled it will accompany the sale of the vehicle and the QLD modification plate still remains. Now the car remains in storage with very little use only to keep things turning every couple of weeks.Due to expansion of business i am no longer able to store the car so it is now offered for sale or trade. The vehicle is currently Qld registered and the plates are not included in the sale. As mentioned i will accept trades with cash differnce either way.

Looks like it has sold or withdrawn from sale.......

Bob.

More than likely sold at that price. Although, it was on the market for a few months as well which was surprising.

For me, the rollcage would be the deal breaker

The rollcage, penetrations through the body, the condition of the under carriage, stone damage to various panels, etc, they were some of the deal breakers for me.

That car was regularly driven on dirt roads by Mr. Packer when travelling to/from his country property. It had also done a targa Tasmania (one of two Packer cars that went to Targa) and some track work. Kevin Bartlett confirmed all this when I contacted him.

I looked into it at the time but it wasn't what I was after. I'm sure it is what suited somebody else however.

Being on the market for 6+ months doesn't surprise me at all.

Edited by RS4StagMan
  • 2 weeks later...

Hi guys - the only update in the below list is no. 30 under Red Pearl Metallic - I have removed the stolen reference, as requested by Alex.

Red Pearl Metallic (30):

1. 8/91, 53 of 100 (#16907), QLD plates OZR32, owned by RBNT

2. 5/91, 27 of 100 (#16070), NSW plates GTR100, owned by AUSSIE_DELIVERED_R32_GTR

3. 8/91, 72 of 100 (#16930), VIC plates, owned by ZARDOS

4. 77 of 100 (#17161), VIC plates, owned by MAZ

5. With Hollandia sunroof

6. Mark Skaife's GTR as seen at the NSW Club, Gibson modified

7. Kerry Packer's GTR, NSW plates AZ?97H, sold privately, heavily modified

8. 6/91, 37 of 100 (#16117), WA plates, owned by jun 2.7

9. Former Linfox Transport Targa GTR #720 raced by Kevin & Peter Bartlett, 6/91, (#16141), QLD plates 151HHZ, owned by John_AUSGTR (prior plates were VIC EXD441)

10. NSW plates CHN032

11. As per magazine article, NSW plates ANO84F

12. Targa GTR #832 raced by Jim Richards & Barry Oliver

13. With NOS kit, NSW plates DIG04U

14. NSW plates SYNRGY

15. NSW plates KNETIC

16. Hills area of Sydney, NSW plates

17. Carlingford area of Sydney, lady driver, NSW plates

18. 18inch gold Simmons wheels, QLD plates

19. GMS race car no.1

20. 93 of 100, Sydney, Autosport customer

21. 36 of 100 (16107), VIC plates GTR500

22. Mark Skaife was given a GTR by Nissan

23. Jim Richards was given a GTR by Nissan, used in Targa Tassie a few times, colour coded Simmons wheels with bigger brakes. Former GMS mechanic stripped the brakes off the car and getting it ready for sale

24. QLD plates ONBAIL & now replaced with GDZILA, 447kw, T66 low mount setup with roll cage, 18” BBS LM gold wheels

25. Kier Wilson owned GTR, SA plates BB555D

26. Published in magazine in a handling test comparison with supercars, trade plates 25A1500

27. 76 of 100 (#17039), registered in VIC

28. As seen in autospeed article, bearing plates GTR111 (state unknown)

29. As seen @ CRD on the dyno, bearing NSW plates GDZILA with R34 GTR wheels, modified

30. 6/91, (#16142), TAS plates EP0937, major engine rebuild with N1 oil pump/collar modifications/CP pistons/24 new valves/N1 turbos/Exedy clutch/splitfire coil packs/Endless brake pads.

Black Pearl Metallic (20):

1. 5/91, 21 of 100 (#16045), NSW plates ASU66U, owned by GTR FAN

2. 8/91, 78 of 100, VIC plates NURVUS, owned by GODZILA

3. 5/91, 14 of 100, QLD plates 322GTR, owned by brad_gtr

4. Tarmac Rally GTR

5. Parramatta area of Sydney

6. CRD built GTR with 1000+hp, ACT plates JUN

7. 5/91, WA plates GTR091

8. 5/91, NSW plates ABA20G

9. 1992 Australian Touring Car pace/safety car

10. 19 of 100, Sydney, Autosport customer

11. 87 of 100

12. Kerry Packer's GTR, gave to his friend, heavily modified

13. VIC plates OZGTR as seen at the Nats 2006

14. Jim Richards published article comparing factory GTR to Winfield GTR, VIC plates starting with ‘KB’

15. (#15973), likely Kevin Bartlett car as it was modified with roll cage, owned by GTROB

16. (#16034), advertised on shannons website, lot 10

17. advertised on shannons website, lot 9

18. (#16172) plates AUSGTR, owned by Ronin 09

19. 5/91, 19 of 100 (#16034) NSW plates ABA20G, owned by Rocket1466

20. 7/91, (#16983) had TAS plates F1979 & now resides in VIC with plates B83BW

Jet Silver Metallic (9):

1. 60 of 100 (#16942), NSW plates GO21LA, owned by Marko R1

2. Kier Wilson of Willall Racing's 8.7sec GTR with 1000hp, SA plates RH9

3. Brisbane area, not registered and driven anymore

4. Kerry Packer's GTR (#015994), he gave to his helicopter pilot who saved his life after heart attack (Nick Ross), heavily modified

5. As seen in the published track test @ Eastern Creek, NSW plates AEL16K, gunmetal grey Enkei wheels

6. 22 of 100 (#16048), VIC plates DWS, owned by smithy2167

7. 11 of 100, original owner Dale Breed, lightly modified with -7 turbos, full engine rebuild, AP brakes

8. 59 of 100, not modified, owned by John Murray & original owner lost his licence doing 165kph in a 100kph zone (at the age 0f 73!), registered in NSW

9. 5 of 100 (#15970), registered in WA with plates GTR32, for sale

10. 5/91, QLD plates NO1GTR, owned by Dazmo (chassis number does not exist on the build date list, 6F4KBNR32A0011273...11273)?

Racing livery colours (6):

1. GMS race car no.2

2. GMS race car no.3

3. GMS race car no.4

4. GIO race car no.1

5. GIO race car no.2

6. Blue & green Falken promotion GTR

Hey guys,

We released the basic Show and shine Categories for the Skyline Nationals this year and thought you might be pleased to know that there is now a dedicated class for the Aussie R32's we already have a few Aus cars confirmed and would love to see this as a hotly contested category.

Thread : http://www.skylinesaustralia.com/forums/topic/388625-the-shannons-insurance-skyline-nationals-2012-goulburn-and-wakefield-park/page__st__40

Preliminary classes for the show and shine,

these are the bare minimum for the show and shine, Classes may be split or joined as numbers become more available

Model - Sub Categories - More Info

BNR32 - Standard - Depending on Numbers - Aus Cars Only

Hey guys,

We released the basic Show and shine Categories for the Skyline Nationals this year and thought you might be pleased to know that there is now a dedicated class for the Aussie R32's we already have a few Aus cars confirmed and would love to see this as a hotly contested category.

Thread : http://www.skylinesaustralia.com/forums/topic/388625-the-shannons-insurance-skyline-nationals-2012-goulburn-and-wakefield-park/page__st__40

my adm has a few bolt on mods, will there be a category for this as it appears your category is for standard adms only?

I could bring mine back to stock but its too much effort :)

my adm has a few bolt on mods, will there be a category for this as it appears your category is for standard adms only?

I could bring mine back to stock but its too much effort :)

It all depends on the day,

If we get enough Modified Aus cars then there will be a category for them, If there is only 3 Aus cars then they will have to be all in the same Category

Create an account or sign in to comment

You need to be a member in order to leave a comment

Create an account

Sign up for a new account in our community. It's easy!

Register a new account

Sign in

Already have an account? Sign in here.

Sign In Now


  • Similar Content

  • Latest Posts

    • From there, it is really just test and assemble. Plug the adapter cables from the unit into the back of the screen, then the other side to the car harness. Don't forget all the other plugs too! Run the cables behind the unit and screw it back into place (4 screws) and you should now have 3 cables to run from the top screen to the android unit. I ran them along the DS of the other AV units in the gap between their backets and the console, and used some corrugated tubing on the sharp edges of the bracket so the wires were safe. Plug the centre console and lower screen in temporarily and turn the car to ACC, the AV should fire up as normal. Hold the back button for 3 sec and Android should appear on the top screen. You need to set the input to Aux for audio (more on that later). I put the unit under the AC duct in the centre console, with the wifi antenna on top of the AC duct near the shifter, the bluetooth antenna on the AC duct under the centre console The GPS unit on top of the DS to AC duct; they all seem to work OK there are are out of the way. Neat cable routing is a pain. For the drive recorder I mounted it near the rear view mirror and run the cable in the headlining, across the a pillar and then down the inside of the a pillar seal to the DS lower dash. From there it goes across and to one USB input for the unit. The second USB input is attached to the ECUtec OBD dongle and the 3rd goes to the USB bulkhead connected I added in the centre console. This is how the centre console looks "tidied" up Note I didn't install the provided speaker, didn't use the 2.5mm IPod in line or the piggyback loom for the Ipod or change any DIP switches; they seem to only be required if you need to use the Ipod input rather than the AUX input. That's it, install done, I'll follow up with a separate post on how the unit works, but in summary it retains all factory functions and inputs (so I still use my phone to the car for calls), reverse still works like factory etc.
    • Place the new daughterboard in the case and mount it using the 3 small black rivets provided, and reconnect the 3 factory ribbon cables to the new board Then, use the 3 piggyback cables from the daughterboard into the factory board on top (there are stand offs in the case to keep them apart. and remember to reconnect the antenna and rear cover fan wires. 1 screw to hold the motherboard in place. Before closing the case, make a hole in the sticker covering a hole in the case and run the cable for the android unit into the plug there. The video forgot this step, so did I, so will you probably. Then redo the 4 screws on back, 2 each top and bottom, 3 each side and put the 2 brackets back on.....all ready to go and not that tricky really.      
    • Onto the android unit. You need to remove the top screen because there is a daughterboard to put inside the case. Each side vent pops out from clips; start at the bottom and carefully remove upwards (use a trim remover tool to avoid breaking anything). Then the lower screen and controls come out, 4 screws, a couple of clips (including 3 flimsy ones at the top) and 3 plugs on the rear. Then the upper screen, 4 screws and a bunch of plugs and she is out. From there, remove the mounting brackets (2 screws each), 4 screws on the rear, 2 screws top and bottom and 3 screws holding in the small plates on each side. When you remove the back cover (tight fit), watch out for the power cable for the fan, I removed it so I could put the back aside. The mainboard is held in by 1 screw in the middle, 1 aerial at the top and 3 ribbon cables. If you've ever done any laptop stuff the ribbon cables are OK to work with, just pop up the retainer and they slide out. If you are not familiar just grab a 12 year old from an iphone factory, they will know how it works The case should now look like this:
    • Switching the console was tricky. First there were 6 screws to remove, and also the little adapter loom and its screws had to come out. Also don't forget to remove the 2 screws holding the central locking receiver. Then there are 4 clips on either side....these were very tight in this case and needed careful persuading with a long flat screw driver....some force required but not enough to break them...this was probably the fiddliest part of the whole job. In my case I needed both the wiring loom and the central locking receiver module to swap across to the new one. That was it for the console, so "assembly is the reverse of disassembly"
    • But first....while I was there, I also swapped across the centre console box for the other style where the AV inputs don't intrude into the (very limited !) space.  Part# was 96926-4GA0A, 284H3-4GA0B, 284H3-4GA0A. (I've already swapped the top 12v socket for a USB bulkhead in this pic, it fit the hole without modification:) Comparison of the 2: Basically to do the console you need to remove the DS and PS side console trim (they slide up and back, held in by clips only) Then remove the back half of the console top trim with the cupholders, pops up, all clips again but be careful at the front as it is pretty flimsy. Then slide the shifter boot down, remove the spring clip, loose it forever somewhere in the car the pull the shift knob off. Remove the tiny plastic piece on DS near "P" and use something thin and long (most screwdrivers won't fit) to push down the interlock and put the shifter down in D for space. There is one screw at the front, then the shifter surround and ashtray lift up. There are 3 or 4 plugs underneath and it is off. Next is the rear cover of the centre console; you need to open the console lid, pop off the trim covering the lid hinge and undo the 2rd screw from the driver's side (the rest all need to come out later so you can do them all now and remove the lid) Then the rear cover unclips (6 clips), start at the top with a trim tool pulling backwards. Once it is off there are 2 screws facing rearwards to remove (need a short phillips for these) and you are done with the rear of the console. There are 4 plugs at the A/V box to unclip Then there are 2 screws at the front of the console, and 2 clips (pull up and back) and the console will come out.
×
×
  • Create New...