Jump to content
SAU Community

From Stock Clean R33 Gtst To Full Time Track Drift Car


Recommended Posts

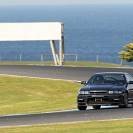
Well I always wanted to do a build thread of my car but could never be bothered but finally Im going to give it a go. I bought the car in April 2008 from SSV import yard and was a nice clean fairly stock car with just coilovers and a cat back exhuast and that sort of was the plane to keep it that way lol. How wrong that assumption would prove to be.All the work carried out on it has been done by myself apart from tune and alignments. Here it is when I just got it.

post-50426-0-38055000-1316507801_thumb.jpg

I was quite content with the performance of it as I was coming from a 6 cylinder NA EL falcon so I just loved every bit of the turbo punch of it. Next mod on the list were some GP sports side skirts which I picked up from PSI parts and also a turbo timer. Little did I know once I did the first mods to it I would be bitten by the modification bug.

post-50426-0-97797600-1316508055_thumb.jpg

So it was approaching summer of 2008 and I decided since I would be driving the car alot crusing etc that I should invest in a FMIC lol really that was just an excuse for me wanting another mod. So straight after my last uni exam for the year came home and got to work and fitting up the cooler.

post-50426-0-49047000-1316508215_thumb.jpg post-50426-0-79226000-1316508228_thumb.jpg

Next all my tires had suffered from the good old inner camber wear so I decided might aswell chuck some new rims on aswell since Im getting new tyres, decided to go with a set of Speedy infernos, yes there not jap rims or anything special but they did the job for the time being and also on my budget back then.

post-50426-0-50458400-1316508400_thumb.jpg

After this decided to finish off the exhuast properly as I had a look at the stock dump/front and it looked shocking so ordered a bellmouth dump and luckily I recived a EPA test the day before I was going to fit it so took care of that cleared it came back and chucked on the new dump with all the other removed parts.

post-50426-0-26329900-1316508546_thumb.jpg

Finally I got the first problem with the car the all too common missfiring in higher revs so the coilpacks had had it so straight away picked up a set of spitfires and chucked them in and car was back to itself.

post-50426-0-09353800-1316508656_thumb.jpg

It was about march 2009 and Easternats was coming up and I was really tempted to go out to a track to have fun with the car as I havent really pushed it as hard as I would like so I thought why not so entered into my first event on a track, got a few stockies and since it was close to my house no need to tow it there and luckily I entered as It was the last easternats that sandown would have. I loved every bit of being on the track and cutting loose giving it as hard as I could to the car all weekend, burnouts, abit of sliding, draging I was hooked to track events.

post-50426-0-89972500-1316508902_thumb.jpg post-50426-0-39980400-1316508918_thumb.jpg post-50426-0-29294300-1316508941_thumb.jpg

So after 3 days of really giving the car a good run all I came out with was a blown turbo to mani gasket which I couldnt be bothered fixing so I just put some exhuast cement around it and it fixed the problem but this all was not a big deal since 1 week later just driving normally BOOM no more boost bye bye stock turbo it finally gave up, easternats weekend must of finished it off and at the same time I was feeling like I just won the lottery which now gave me an excuse to start chasing more power and more fun. Ill leave it at that for part 1 and will put down antother entry soon.

Link to comment
Share on other sites

Continuning on as I had now just blown my turbo I started doing alot of research into what turbo I was going to get. The decision was set to chase the all to common 300kw mark and plans for the car at this stage were still just a fast street car. So after searching and searching I was left tossing up between a 3071 and a 3076 which I eventually opted for the 3076. So called up CRD and ordered the kit no worries then I get a call in the afternoon sorry there seems to be a problem with garett at the moment and there was no supply of the turbos for a few months and everywhere else I checked was the same had no stock.

I was left with the decision to either wait it out or look for a alternative but since I was losing my license in a month I really wanted to get the car on the road and drive it for a last few times. So I rang hypergear and at this time he was not as big as he is now but I told him what I was after and he recomended me the TR43I which could would get me to the 250-300kw mark. After thinking about it I said why not for a third of the price and the reviews he had were good I'd give it a crack. So here started the install.

post-50426-0-49668000-1316672740_thumb.jpg post-50426-0-80597200-1316672782_thumb.jpg post-50426-0-83413600-1316672804_thumb.jpg post-50426-0-79064800-1316672963_thumb.jpg post-50426-0-22726700-1316672996_thumb.jpg

After fitting it all up and making everything I needed for it fired it up ran nice felt better but as it should be was pretty useless without the tune and all the other bolt on upgrades. Come june now I had officially lost my license for what was meant to be 6 months so I said cool now I can organise everything else I need and get the car tuned and ready for the streets when I get my license back at the end of the year.

First up on the list was get the power fc out the way so one night my freind asked me if I wanted to go to the casino I said why not never really been before and so went there played from 20 bux and ended up getting up 900 for the night so next day went out and bought the power fc lol another think of the list.

post-50426-0-59245900-1316673249_thumb.jpg

Next on the list was take car of the fuel pump. After researching again I opted for a nismo drop in as it seemed easiest and best option if you had the extra coin and I had no problem forking out for it so that was done another thing sorted and install was a breeze.

post-50426-0-28630600-1316673366_thumb.jpg

Moving on it left me now with just the injectors and z32 with still 3-4months of time before I get my license back so again opted for the nismo 555 injectors and the z32 and that was done.

post-50426-0-91328700-1316673493_thumb.jpg

That just left me now with a boost controoler to take care off and I found a guy selling a brand new blitz dual sbs for 250! so I wasted no time and snatched that up and also installed it ready to go. It was about november now and getting closer to getting my license back and I was getting excited as the car was also on track to be done so just to make sure I rang to book my car in 1 month in advance in order to ensure no delays as it might get busy and the car was booked for boxing day.

I was quite bored now as I had done everything I wanted to so I decided to tidy up the engine bay abit and polished my cam covers and painted the rocker case and timing cover. I did the polishing all by hand since I didnt have my air polisher and never again will I do it took so long and was awkward doing it while on the car but after 4-5 hours it was done.

post-50426-0-19185600-1316673825_thumb.jpg post-50426-0-99204700-1316673870_thumb.jpg

Now the license situation took a twist as you see I had almost finished my 6 months for the speeding charge but I also had another charge of a careless driving incident which I had to go to court for in december and all laywers told me I should expect 90 percent chance of a fine and at worst 1 month extra suspension so I went in and got one of the worst judges he just was brutal to everyone on the day and as soon as he heard skyline I saw hes face light up bang antoher 6 months added so I was back to where I started lol. Oh well that put a new twist on plans so instantly I started planning on more things to do in the next 6 months and slowly in my head the idea of having a street car was diminishing and I wanted to do something on the track with it just wasn't sure what yet.

Tune day was up next and that came up took it in after a few hours it was done without any problems or complications on the day besdies the battery dying when I turned the car off. It made 265kw on 18 psi which I was happy with considering I spent 1000 for the turbo setup. I dont have the dyno graph for it as I lost it but later will upload one with the new tune and old tune for comparission. It was hard though to now have the car ready and to not be able to even drive it and have to passenger it with the new power but what could you do.

post-50426-0-11118500-1316674251_thumb.jpg

Ill leave it at that for the end of part 2 and will add part 3 soon, it will slowly slowly become more interesting lol.

Link to comment
Share on other sites

So for part 3 of the build up, now with the car being tuned and in the garage for another 6 months it was time for the projects for 2010. First up with the mechanical stuff done for now I decided to start looking at the cosmetic side and never got around to completing the bodykit after just putting on the side skirts so I decided to add a rear bar. Once again came to researching and really after all the ones I saw I only liked one and it was the 400r rear bar the rest were all to out there for my liking. Ordered one from from Just jap and started test fitting it up and making it fit half decent before I went on to spray it and put it on.

post-50426-0-61291100-1316679002_thumb.jpgpost-50426-0-13716000-1316679033_thumb.jpgpost-50426-0-93916100-1316679122_thumb.jpgpost-50426-0-74540600-1316679149_thumb.jpg post-50426-0-93760700-1316679198_thumb.jpgpost-50426-0-58789600-1316679252_thumb.jpg

Car started to look abit more complete with the rear now actually matching the sides. Next on the list was to do some interior work and I always liked the look of the blak and white interior trim so hey had time and money to kill so why not decided that was the next project, while still not really knowing what purpose the car was being built for. After two days of stitching up and doing some upholstrery here is the finished product.

post-50426-0-51929100-1316679487_thumb.jpgpost-50426-0-98642900-1316679518_thumb.jpgpost-50426-0-13561000-1316679550_thumb.jpgpost-50426-0-18536800-1316679578_thumb.jpgpost-50426-0-28082500-1316679611_thumb.jpg

Once again getting bored having to need something to keep me busy so I decide lets finish off the kit on the car with a new front bar. Once again looking around for which one I had broken it down to either the 400r or xplosive and in the end decided 400r is to common so went with the xplosive as it suited my taste still simple as its just like a stock front bar pumped up on steroids. Ordered this one from carmate and my luck ran out as this fibreglass copy was not as good quality as the rear and required hours and hours of prep work to get it half decent with a million imperfections which I had to fix up. Since I had no where to rush it wasnt a big deal so back to panel beating.

post-50426-0-94249500-1316679991_thumb.jpgpost-50426-0-64730500-1316680022_thumb.jpgpost-50426-0-66204500-1316680051_thumb.jpgpost-50426-0-17033800-1316680077_thumb.jpgpost-50426-0-77865900-1316680103_thumb.jpgpost-50426-0-10085800-1316680129_thumb.jpgpost-50426-0-89987600-1316680164_thumb.jpgpost-50426-0-83626500-1316680206_thumb.jpg

Moving on now I was checking something under the car cant remember what but anyway I forgot to pull the handbrake up and car was in neutral and when I removed the wheel stoppers all of a sudden the car rolled and before I knew it went into my navaras tow bar and damaged to hood so once again back to some panel beating to fix it up.

post-50426-0-43481300-1316680722_thumb.jpgpost-50426-0-75596500-1316680804_thumb.jpgpost-50426-0-86514500-1316680863_thumb.jpgpost-50426-0-91601400-1316680929_thumb.jpg

And Ill leave it at that for part 3.

Link to comment
Share on other sites

Part 4 of the build starts off pretty much I just got my license back finally and finally got to drive the car with all done to it. As at the moment it was still my daily I opted to get a quieter exhuast as my straight through 3.5inch one was way to loud. I decided to go with the kakimato regu 06 so ordered that from just jap chucked it on and yep sure was quiet maybe a little to quiet for my liking but small price to pay for less cop attention. It also meant I had to raise my car abit since now I had a middle muffler which sat low as my aim was to try and pass a defect check with the car now.

post-50426-0-74209700-1316690160_thumb.jpgpost-50426-0-39138200-1316690199_thumb.jpgpost-50426-0-42507800-1316690238_thumb.jpg

A few weeks past and winton was having a track fun day and a few guys from sau were organsing to head up together so I thought would be a perfect chance to get out on track and test out the car as It had been way too long since Id been on the track at easter nats. The day was fun as the name suggests and got to feel the car how it drove and what weaknesses it had and as you would expect cheap tyres and pretty much no suspension work apart from coilovers it was letting the car down. Also encountered high knock levels on the PFC controller throughout the day so I would go and investigate that later.

post-50426-0-45884900-1316689505_thumb.jpgpost-50426-0-35559600-1316689513_thumb.jpgpost-50426-0-22645500-1316689522_thumb.jpgpost-50426-0-21246200-1316689538_thumb.jpgpost-50426-0-21246200-1316689538_thumb.jpg

Once got back the following week went to investigate the knock problem so took the car to get the tune checked on the dyno and turns out the exhuast was causing a restriction and didnt like the extra timing from the old exhuast and was slightly pinging, so removed some timing and it was fine. At this stage I was kind of disapointed as to paying 1200 for a exhuast that claimed to be able to flow well and be quiet but yet it still caused a restriction and so I started investigating further into it and found out it had a restrictor welded into the rear cannon, looks like I found my next job got the die grinder out and cut away removing it. Now it had a decent sound and wasnt quiet anymore and most definately would flow better now as the restrictor was 2.5inch. Lesson learnt theres no cheap way out of getting a high flowing exhuast while remaining quiet.

post-50426-0-13499400-1316689850_thumb.jpgpost-50426-0-74683900-1316689884_thumb.jpg

The next mod on the list was to start improving the handling of the car so I opted for the basic upgrade of just putting in a whiteline adj front sway bar. It really did tighten the car up and made it handle much better was a great mod for the gain from it.

post-50426-0-55611800-1316690084_thumb.jpgpost-50426-0-82105300-1316690109_thumb.jpg

My next plan was to go to a vic drift practice day and see how I go as I was getting to the stage where I wanted to pick a purpose for the car and really set it up towards that so drifting was next on the list. I decided to invest in a trailer as I had decided tracking the car was not going to be a 1 in a blue moon thing but most likely monthly so it seemed worth it. Got that organised and off to my first drift day in september. I started off in the beginner section as it was my first time drifting on the track and it definately was a lot harder to actually properly drift rather than just power over and you soon realise there is a big difference in skill there.

Eventually I started to get the hang of it and could some what hold a drift through the couple of beginner section corners. I remember the main peice of advice that helped me on the day giving by one of the instructors was usually if you think your going to fast into the corner its probably the right speed and if you think your going the right speed its probably to slow so you had to mentally get over that fear of going to fast to get the hang of it. For the second half of the day the instructors thought I had mastered the basics and told me I could go on the main track to further enhance my skills. All in all I loved every bit of it, the rush and adrenaline you get from having the car sideways through the corner and not knowing if your gona make it out in 1 peice of spin so that was that I decided that I wanted to lean towards drifting over grip and drag.

post-50426-0-68270800-1316690675_thumb.jpgpost-50426-0-72087500-1316690687_thumb.jpgpost-50426-0-86854400-1316690698_thumb.jpgpost-50426-0-73069300-1316690968_thumb.jpg

A few days after I got back from my drift day the rush to get back out there was so hard I was dying to go and I had to wait to December for the next drift day arhhhh! But oh well back to on next mod ideas. I was contemplating going on e85 for a while since I heard caltex would be rolling it out with the release of the holden ethanol car and it was at this time that caltex started to stock it and there was one right near me so I said yep thats the next step for me but decided since im going in for a full retune might aswell add some tomei poncams , tomei valve springs, do the 100k service and also rebuild all of my lifters. I planned to take on this task after I came back from the next drift day in december as I would have plenty of time for complications as you will soon see was a good decision lol.

Anyway finally December was here about time and time to go to my second drift day. Went out there this time straight onto the main track and kept trying to raise the bar for myself and learn the track and how to tackle each corner , trying different techniques to see what worked what didn't and at the same time seeing what weaknesses the car had. Ill be honest here at this moment I knew absouletly jack shit about suspension mods, mechanically I was very competent but when it came to suspension I knew nothing so the car naturally was very weak in that area and as I kept learning in drifting its probably the most important part in regards to car setup so I slowly along the way kept learning and researching more and more. All in all I was happy with my second time out and I felt I had improved yet still had a long way to go.

post-50426-0-29261100-1316691456_thumb.jpgpost-50426-0-43707200-1316691470_thumb.jpg

Ill leave it at that for part 4 and will continue on with the build for e85 and more POWER!

Link to comment
Share on other sites

Here goes part 5 of my build. Now it was finally time to prepare the car for e85 tune with the addition of a few goodies. I was planning on adding tomei poncams, tomei cam gear, tomei valves springs and also rebuild all my lifters whilst doing the 100k service. Since I wanted to change the valve springs without removing the head I opted for the fill up the cylinder with air trick and use the valve remover tool. Now I had ordered my valve spring remover tool from the states a few weeks ago and still had no signs of it and this was frustrating me because I had just got stuck into the car and ripped everything out belts, cams, lifters and was just waiting for the tool to swap over the springs. My first dose of bad luck in this build was my harmonic balancer snapped when I was pulling it out with the pulley the bolts ripped the chunk of the thread out so a big head ache of a few hours trying to improvise and remove the balancer but finally got away with some claw pulleys with the price of fulley destroying the balancer so off to the wreckers.

Another few weeks passed and still no tool so I had enough I went out and ordered another one and ofcouse this had to happen I got both on the same freaking day! Anyway no bigdeal atleast I had spare now. Got stuck into removing the springs was all going great had done 20 with 4 more to go, then suddenly shit happened. The ratchet on the crank bolt wasnt jammed against anything so as I pushed down on the valve to compress it pop the crank moved and lost air for a sec and down went the valve. SHIT I couldnt believe it almost at the end and I had dropped a valve. After pointless hours of trying to win the lottery and somehow flick the valve back from the spark plug hole to no avail I also got a borescope to see if It would help and nup no go.

After another day of mucking around I finally bit the bullet and said the hell with it Im gona rip of the head and rebuild it, which would turn out to be a blessing in disguise. Next day started the task of ripping it all apart wasnt so bad had it all off in a little bit over an hour and what I had found was there was only half a exhust manifold gasket left and one head bolt missing! But still had no signs of blown head gasket running 18psi. Christmas was fast approaching and I knew I needed to get parts fast or else I would be stuck again in that window where the shops are closed so ordered some head bolts from kudosmotorsports with unbeliavble service as always with 1 day turn around, decided to upgrade and go with a tomei metal headgasket as I found one for cheap on ebay from someone who bought but never used and finally set out to buy a VRS gasket kit from just jap on the day they closed up so my luck took a turn again and I was stuck til after newyears not being able to advance any further. Luckily I had taken care of all the timing belts and pulleys a few months ago.

In the few weeks that I had to wait for the rest of the parts I started on the painful process of scrapping the old gasket off the block and head then check the flatness hoping it would be in tolerance and yes both head and block were easily in spec so thats one less thing to worry about. stripped the head of all the valves and valves seals since I would replace them and grinded the valves in to ensure a nice fresh seal.

Next on the list was dis assembling each of the 24 lifters individually and cleaning each one by hand which proved easy but time consuming then drying and reassembling all them again and they were as good as new. Finally the vrs gasket kit arrived so I instantly set out on assembling the head with the new valve seals, fittings the springs, the cams, cam gears and everything else. Finally got up to slapping the head back onto the block and remember the painful ordeal of having to torque up the head in the really really humid day and got excited so said Im going to smash it all back together today so went all out got it back together up to putting the aux belts and surprise surpise antoher problem the alternator belt tensioner bolt snapped so that pretty much drained it and I left it at that for the day.

Got back to it the next day rejuvenated and fixed up the bolt and got through it assembled and what not , filled up the coolant ready for the boring process of bleeding it. Finally went to start the car and it turned on fine and worked, sounded really clean no lifter tick so was happy. Took care of the bleeding then went for a drive all all seemed well but noticed the car was unusually getting to hot in 90 to 100 on normal driving I put it down to still having air in so bled it more and yep problem got better. Took it for another run at 11pm on sunday night bad idea with first day of work next day and was running well then all of a sudden burwood hwy and springvale rd intersection car dies. So crushed could not work out what happened just died and wouldnt start. Eventually called the towtruck he comes after 1 hr goes shit your cars low cant get it up I go dw ill take off the front bar and typical the day I need my tool kit I left it at home so he calls antoher tow truck after a few hours im back home disapointed but would fight antoher day.

So next day suspecting maybe a timing issue took apart the timing belt again to check and nup it was perfect no problem so put it all back together and car started, feeling puzzled but more cheeful took it for antoher drive and now the overheating issue was back again and on top of that it died again! But luckily I had lost confidence in the car so I only drove up and down the street. This time I was really stumped but then lookin at the engine bay it hit me, No shit I didnt put my timing belt cover on and I was still repainting it and I forgot to put washer on the cas to compensate for it so I was betting that my issue was the I had killed the CAS. Next day picked one up from wreckers and straight away started and this time didnt die but I still had overheating issues. Also my tuner called asking if I still wanted to come in for tomorow and I said only if I could figure out this over heating probelm and that I would let him know. So started investigating and found out my thermostat wasnt opening and luckily I had a spare one that came with the timing belt kit quickly got to changing that over when my next problem as I went to pull the housing off it snapped it half, you POS I was thinking to myself can this build have anymore bad luck. With it being 10pm I had no way of getting another housing so tune was delayed.

Come next day back to the wreckers again it was getting to familar going in there to get a housing and put that in bled it for a long time to make sure all the air was out and finally no more overheating! All the hard work finaly it was time to take it get the e85 tune put on and let me tell you I had lost all confidence in the car after this last build and the drive to the tuners was one of the most nervous drives ive ever had. Left the car there over night to get the cold start set aswell and was thrilled with the results, made 307kw on 17psi on a very safe tune with midrange really being boosted due to the cams and ethanol so finally I felt all that hard work payed off.

post-50426-0-46048100-1316764419_thumb.jpgpost-50426-0-12808200-1316764452_thumb.jpgpost-50426-0-54819600-1316764470_thumb.jpgpost-50426-0-44191100-1316764486_thumb.jpgpost-50426-0-62308900-1316764515_thumb.jpgpost-50426-0-72613600-1316764527_thumb.jpgpost-50426-0-99488600-1316764555_thumb.jpgpost-50426-0-21958600-1316764755_thumb.jpgpost-50426-0-78972800-1316764786_thumb.jpgpost-50426-0-85136900-1316764806_thumb.jpgpost-50426-0-44311900-1316764827_thumb.jpgpost-50426-0-98279700-1316764847_thumb.jpgpost-50426-0-30722000-1316764873_thumb.jpgpost-50426-0-81950300-1316764887_thumb.jpgpost-50426-0-16504600-1316764901_thumb.jpgpost-50426-0-05516400-1316764934_thumb.jpgpost-50426-0-27178300-1316764955_thumb.jpgpost-50426-0-80118500-1316764972_thumb.jpgpost-50426-0-23043200-1316765153_thumb.jpgpost-50426-0-29412600-1316765174_thumb.jpgpost-50426-0-55229600-1316765194_thumb.jpgpost-50426-0-98077400-1316765210_thumb.jpgpost-50426-0-30497600-1316764993_thumb.jpeg

And that concludes part 5 the e85 build will add the next part soon.

Link to comment
Share on other sites

So continuing on with the car finally back running and feeling like a completely different car on e85 the way the power came on and how hard it pulled I loved it and couldnt wait til march to take it out to the next drift day. Although after maybe a few weeks of driving it it sort of seemed to be down on power but at the time I put this down to just getting used to the power so didnt think much of it and continued on.

I decided to be on the lookout for a bucket seat since youd get thrown around all over the place with the stock seat and a bride brix came up with rail which turned out to be a few streets down from my house, what are the chances of that ey so picked it up straight away and bolted it in.

post-50426-0-97809300-1316846403_thumb.jpg

Finally the next drift day which I had been waiting for since december had come and was a great day. It was wet for the first half of the day and was good to have to adjust to the driving conditions and I felt my throttle control really improved because of it and as it dried up my confidence continued to grow and grow until the last session coming into the 3 S bends before the straight came in too hot into the first one and spun out going over the ripple strip where the car wouldnt move. First I thought it was bogged but then got out and saw my right rear wheel had about 50degrees positive camber ahahaha no wonder its not going anywhere.

Tow truck came and took me off the track then came the task of trying to push the car onto the trailer while the wheel is sitting at 50 degrees camber and another group of nice guys saw we were struggtling so 5 of them came and helped push it up and no worries got it on and that was the third drift day completed.

post-50426-0-52663300-1316847044_thumb.jpgpost-50426-0-63311800-1316847909_thumb.jpg

The following weekend decided to get stuck into repairing the damage on the car so after having a look just appeared to be a bent LCA and since I was going to replace it as always you look for exucses to do other stuff I decided to do all the rear bushes and balljoints after picking up a new LCA from the wreckers. Also decided to upgrade the rear swaybar to a whiteline adj one while I was down there. Took it all off that weekend waited for parts to come during the week and went to reassemble the next weekend and put it all back together and hrmmmm wheel is still not sitting straight. That was annoying, after looking around and measuring against the other side I suspected the rear knuckles must of got deformed aswell so took it all apart again and compared it to the other knuckle and sure enough it had been twisted and deformed with about 20mm difference so off to the wreckers the following week again to pick up a new knuckles.

post-50426-0-10424500-1316848021_thumb.jpgpost-50426-0-77925000-1316848042_thumb.jpgpost-50426-0-88345300-1316848056_thumb.jpgpost-50426-0-10244900-1316848071_thumb.jpg

Once again the following week got back to putting it all back together again and no worries this time it was straight as ever so 1 problem out of the way. The next task I wanted to get done before the next drift day was install a surge tank as whenver petrol was below half a tank on hairpins car would surge so got 2L surge tank from aftermarket industries with a single bousch 044. Once again turned into a headache as I ordered it just before easter weekend so it was meant to be sent out the following week on wed and week went past did not receive turns out got lost in the post but credit to the company they instantly expressed me a new one which I got straight away.

The next weekends project was to get the surge tank installed. Decided on the postion to mount it in the boot so spent saturday mounting it in and securing it. Ran all the lines and hooked them up to the standard lines to reduce the hassle of having to run new lines. Moved on to wiring up the relay on sunday and taking care of all the electrical work and that was done, fired it up worked fine no problem which just left me with the task of creating an enclosure for it. I had some sheet metal left over from the case of a hot water system which would do the job so used that and made up a enclosure for it and bolted that in.

post-50426-0-58323300-1316848454_thumb.jpgpost-50426-0-12937600-1316848573_thumb.jpgpost-50426-0-35512400-1316848618_thumb.jpgpost-50426-0-84642200-1316848642_thumb.jpgpost-50426-0-97478400-1316848721_thumb.jpgpost-50426-0-62657200-1316848701_thumb.jpgpost-50426-0-65573500-1316848742_thumb.jpg

That was another task off the list, I had a few more weeks before the next drift day in june so I decided the standard viscous diff was pretty useless and opted to weld it up. Also lowered the car a fair bit since I didnt really care about it being road legal anymore as this was starting to become more and more of a track only car but ran into a problem with one of the coilovers seized and wouldnt wind down anymore so had to remove it, clean all the debris in it oil it up and good as new.

post-50426-0-34984200-1316848980_thumb.jpgpost-50426-0-28496100-1316848993_thumb.jpgpost-50426-0-34208600-1316849018_thumb.jpg

After getting a wheel alighnment it was off to antoher drift day to see what this one had installed for us. Another day and my skills steadly improving with new tricks learnt, more confidence built and finding new weaknesses that I had. Surge tank worked perfectly with no more surging and definately noticed the rear being more predictable with the weldy in it. Once again came in to hot onto the straight and lost it and tapped the wall with the back of my car, bruised up the rear bar and probably the reo but no big deal kept on going for the rest of the day. The only other issue that arose was the clutch was starting to slip in third gear drifts so already had some work to be done when I got back from the day.

post-50426-0-27810100-1316849332_thumb.jpgpost-50426-0-88534200-1316849338_thumb.jpgpost-50426-0-57585800-1316849342_thumb.jpgpost-50426-0-73298600-1316849346_thumb.jpgpost-50426-0-22759800-1316849353_thumb.jpgpost-50426-0-04417800-1316849357_thumb.jpgpost-50426-0-20892400-1316849368_thumb.jpgpost-50426-0-77021400-1316849379_thumb.jpg

Leave it at that for part 6.

Link to comment
Share on other sites

Hey mate,

Nice work on the build, always good to see some drifters in skylines.. with your build if you want to try and have some bigger pictures between your text maybe you should make a flickr account and then you can use that as your image hoster and just copy/paste the image code wherever you want it..

Keep up the good work!

Link to comment
Share on other sites

Enjoyed the read mate, i also laughed at the bit were u said you were nervous while driving to your tuners, haha i know how that feels. The feeling of relief after the car comes back sweet from the tuner is priceless :)

These days im quite confident but you just cant help but expect something random to f**k up on you..

Link to comment
Share on other sites

Onto part 7, as I had returned from the drift day I only had one month until the next one in july so no time to muck around and got straight into fixing the issues I had. The first issue I tackled was replacing the clutch. It was the first time I had done a clutch on a skyline so it was expected that a few of the bolts would be a pain as it was not done before so removed everything I had to tailshaft gear stick, removed the starter and the bell housing bolts. Put the gearbox jack in and tried to pull the box off and I spent an hour it wouldnt budge well the top half anyway. I have done numerous boxes before and they just come off no worries so I took off the dump and said just maybe Im missing a bell housing bolt right at the top centre and sure enough that was it.

Now came the creativity part of how to get to it evenutally used million extensions with flexi joints and a rattle gun at the end of it to take it off lol. Off slid the box now followed by the pressure plate and clutch. At this moment I was excited to see what clutch was in there all this time because it had never slipped before and was running 300kw and to my shock it was a OEM exedy replacement! The clutch of choice was putting in a exedy HHHDB as it was fairly cheap and could take the power no problems also decided might aswell be smart and do all the seals while im there so rear main, tailshaft, gearbox input shaft, spigot bush and replace the pivot ball with a nismo item espcially since this was such a heavy clutch.

Got to work fitting everything back in and bolted up so far sticking to my schedule and now onto the next task of fixing up the rear dmage.

post-50426-0-99777000-1316902406_thumb.jpgpost-50426-0-41580500-1316902430_thumb.jpgpost-50426-0-42266700-1316902457_thumb.jpgpost-50426-0-90556900-1316902476_thumb.jpgpost-50426-0-15351700-1316902497_thumb.jpgpost-50426-0-36450000-1316902520_thumb.jpgpost-50426-0-57666400-1316902540_thumb.jpg

Started off with stripping the rear off the car, removed boot lid, tail lights, rear bar, rear reo to investigate the extent of the damage and pretty much reo was screwed all twisted and deformed, boot lid had a bend inwards which would be a hassle to panel beat because of the position it had deformed and also the rear body was bent in at several places. Had a look at for sale section for some parts and got lucky with a member selling everything I needed for real cheap so got a new boot lid and new reo off him so that really helped me out reducing the work load and now was just lift with fixing up the rear body of the car.

I invested in a hydraulic panel beating jack so I could straighten the rear body up. Turned up really well and was really easy to striaghten the body and got it pretty much perfect as before. Now bolted everything back up to see how it all lined up and was perfect so pretty happy with my panel beating repairs lol. Next I needed to take care of the rear bar so I went repco bought 100 pack of cable ties and gave the rear bar a good old cable tie stich up which took care of that aswell. Now I urgently had to get the car out on the road to atleast put on 500km to bed in the clutch.

post-50426-0-91002200-1316903080_thumb.jpgpost-50426-0-35425800-1316903107_thumb.jpgpost-50426-0-31420600-1316903143_thumb.jpgpost-50426-0-61216800-1316903200_thumb.jpgpost-50426-0-14842400-1316903458_thumb.jpgpost-50426-0-71070900-1316903490_thumb.jpg

At this point is where I pretty much decided I really dont care about having the car street trim so I pulled out all the interoir and plastics and also ditched the regu 06 exhuast for my old failthul 3.5 inch straight through but I just needed to do a little bit of repairs on it since the hanger off the rear cannon had craked off. Also clocked up the kms after doing about 100km of cruising after work everynight of the week hoping that a cop would not pull me over lol. So the next step I decided for safety sack head down to my tuner to get the AF ratios checked with the old exhuast back on and also with the new surge tank setup.

It was a bloody good thing I went there since the car was making 240 kw instead of 300kw and rememeber how I mentioned earlier that the car started to feel down in power a few weeks after the tune well it actually was down in power 60kw less and really running lean. after some diagnosis turned out the timing was at 2 degree! so it was put down to antother failed CAS. Thankfully the car was on e85 and after doing a couple of track days running lean I think was around the 14-15 mark its still alive with no problems. I decided enoughs enough with these second hand CAS so I went out and bought a brand new one this time and sure enough power was back at 300kw.

post-50426-0-50132200-1316903964_thumb.jpgpost-50426-0-59710000-1316903982_thumb.jpg

The final plan I had was seeing as at this point I was really becoming into the suspension side of things for drifting and after much research now had a good understanding of the suspension aspect of things ordered a full kit of castor rods, front and rear camber arms and traction rods from driftworks and also some rack spacers to get some much needed more lock from driftworks.

After about a week I had all the parts arrive from the UK and I was very impressed with the quality of it so set out on the weekend to install it all so could get the alignment done the week after. Install was going painlessly started off with the front camber arms then went to install the castor rods and hrmm problem they dont fit! After abit of research online I discovered they had sent me the castor rods for the GTR so I guess the whole kit was for a gtr but luckily the rest of the arms are interchangable and only the castor rods wearnt. Obviously I didnt have time to send it back to exchange for the right ones and nor could I be bothered so was left with two choices either modify the ones I had or order a set from Just jap to get in a day and sell off these ones and I opted for option number 2.

Continued on with the install putting on the rear arms in with no problems then got stuck into the steering rack spacers which had no problem installing but the problem was I had gained no lock! even after grinding down the stops a little bit. But anyway I didnt have time to investigate that as I was running out of time so got the castor rods during the week installed them but noticed I had clearance issues because of the massive front sway bar and I read about how some guys drifting are running no front sway bars or just standard one and I decided to stick in my standard sway bar up front to help with clearance. All done took it to wheel alignment the following saturday got it done to my specs and had the car ready to go to its next drift day the following week.

post-50426-0-79583900-1316904555_thumb.jpgpost-50426-0-83500900-1316904625_thumb.jpgpost-50426-0-85190400-1316904702_thumb.jpgpost-50426-0-24055400-1316904727_thumb.jpgpost-50426-0-22510200-1316904817_thumb.jpgpost-50426-0-60911700-1316904843_thumb.jpg

That concludes part 7.

Link to comment
Share on other sites

Continuing on, it was time to get back out to winton for another drift day and with some new goodies to try out. The first session out was awful I could barely get any sections of the course clean the car felt so different with the new suspension settings so I really had a tough 20min trying to adjust to it. It felt much more aggressive and needed much more throttle control in order to control it. The clutch was fine so that was good and the car also felt strong as now it was the first time with actually 300kw so that might have been also an issue why the car felt so different to drift with. Anyhow down in the second session it really started to come together and I was loving the new suspension setup it allowed me to push harder into the corners with more confidence and started to pull some nice third gear drifts with decent smoke. Was good to see camber wear on the back tyres was now even so I got the most of them not like before where the inside just wore out wasting the tyre. Was antoher good drift day with my skills yet again improving I felt and reaching new levels of confidence and also the car came out with no problems that was a first lol but I already had a job to get done when I got back of fitting a oil cooler I had already purchased from just jap.

post-50426-0-15939100-1317018442_thumb.jpg

Again with 1 month of time before the next drift day in august I set out on installing my oil cooler and also decided to ditch my headunit and stick in 3 gauges there instead. After some contemplating on what oil cooler kit to get I decided to go the cheap option of the JJR kit. As always you pretty much get what you pay for and in this instance it required abit more work to make it fit. The hoses were redicoulously long i mean you could probably mount the cooler on my car and run the hoses to another car so it took alot of creativity and mucking around to somehow monevure the hoses in and to ensure they were not rubbing against anything since people had reported the hoses ripping. Also was the issue of people having leaky fittings without the use of sealant so I opted for some liquid sealant on the thread to give that little bit of extra security.

I accidently dropped the cooler core and it landed on the connector fitting and chipped a peice off. Why cant jobs ever go smoothly something always has to make it more of a task. So filed it down to get rid of the burrs and hoped the sealant would do its job as there was still abit of meat left on the taper fittings so I was confident I could get away with it. Ended up mounting it all up, connecting everything up, decided to start it for the first time with the old oil to make sure no leaks before I use new oil and success had no leaks from all the fittings so changed my oil over and finished off installing the gauges and all the oil sensors and job was done.

post-50426-0-06984200-1317019103_thumb.jpgpost-50426-0-50732700-1317019175_thumb.jpgpost-50426-0-16139200-1317019227_thumb.jpgpost-50426-0-07368800-1317019282_thumb.jpgpost-50426-0-02404200-1317019338_thumb.jpgpost-50426-0-48933800-1317019761_thumb.jpgpost-50426-0-42299600-1317019847_thumb.jpgpost-50426-0-03245100-1317019910_thumb.jpgpost-50426-0-93316600-1317019707_thumb.jpg

A few more weeks later if was back to winton again, going in this time had nothing new to get used to driving wise just kept an eye on the oil temp and oil pressure gauges to make sure everything was running fine and yep no worries temp never excedded 80-90 degrees all day so I was glad after all that effort to make it work it performed and did what it was supoosed to do aswell. Drifting wise again I kept pushing more and more and seemed to imporve but what I sort of noticed was letting me down was consistency as I might have a real clean great lap then a poor lap I felt that when I started pushing it harder the car didnt have much margin for error and was unforgorgiving and just span out if everything wasnt perfect. It was mainly I think due to the fact of the steering lock still being stock and r33 stock lock is very average.

post-50426-0-02404200-1317019338_thumb.jpgpost-50426-0-38608000-1317019537_thumb.jpgpost-50426-0-38114600-1317019545_thumb.jpgpost-50426-0-67283300-1317019551_thumb.jpgpost-50426-0-95071000-1317019558_thumb.jpgpost-50426-0-72594900-1317019568_thumb.jpgpost-50426-0-50428500-1317019575_thumb.jpgpost-50426-0-49508300-1317019527_thumb.jpg

Once again I had about another month until my next drift day in september and this was probably the first time I actually had nothing to fix or change on the car besdies just oil. So I started researching what other guys have done for more lock and really got into the modifying knuckles as nissansilvia.com have a massive thread on it with about 80 pages so spent a week reading all through that. Got through all that and decided might leave it as a project for the end of the year since Ill have more time and see how I go.

About 2 weeks before winton I did my oil change and went to wash the car when I also had another look at my lock and why I couldnt get anymore. I found something interesting, the car was now hitting the lock stops on full lock and I had plenty clearance everywhere so I put two and two together and thought no shit when I was trying to look at the lock I did it before the alignment so toe was way out just guess work and now after the alignment I never checked it. So much for not having any work ahhaha I always find something to do. Got excited so got the grinder and demolished those lock stops but I went a little too far lol and now I had pretty decent lock but major clearance problems, it was scrubbing hard on the inner rail and also the brake line bracket but atleast it wasnt fouling the castor rod as the other can be taken care. firstly I grinded down the rail lips as much as I could to give me some room and also took abit off the brake line bracket but it was nowhere near enough since the shitt +38 offset on my rims.

After abit of measuring worked out a 20mm spacer and rolling my guards would provide enough clearance and also still be alright with just guards rolled. Jumped online striaght away to justjap and ordered some spacers, great service as always here in a day or two and went on to try fit them crossing my fingers that all was well since I didnt have much time now. Perfect it all cleared and done but I was very close to the limits of the steering going over centre so just incase I made some adjustable lockstops incase on the day binding was really bad I could reduce the lock. Also decided to order a Nardi style steering wheel since the stock one is way too bulky and annoying probably a very long over due mod.

post-50426-0-73080300-1317020443_thumb.jpgpost-50426-0-32606400-1317020538_thumb.jpgpost-50426-0-17901300-1317020576_thumb.jpgpost-50426-0-07775900-1317020605_thumb.jpgpost-50426-0-47849100-1317020650_thumb.jpg

With that all done and appear to be working the time had come to test it out where it counts on the track. After doing my first lap on the day all I could say was f**k me dead this is amazing, I cant explain how much difference the lock made it was so easy to drift now and go heaps harder than before with consistency. Straight away from the first lap it just felt so natural sliding and linking corner to corner. Its as if drifting all this time with stock lock had really helped hone my skills and now when I get abit more lock it was just incredible. I finally felt like I had slowly been improving one step at a time every drift day but at this drift day it felt as if I took the same step forward as all those days since I started combined it really was a breakthrough for me I felt. I kept pushing hard all and just couldnt belive how much more consistent I was its like the car was so forgiving even if your line was abit off and you went too hot you could bring it back with the extra lock I loved it.

Although I did have issues with the clutch pedal after the first session it just lost pressure and I couldnt engage gears so quickly once I got off track did a quik fix and re adjusted the throw on the pedal and it was all good and got me through the day which was great since would of been a shame to end a day where I felt so good on track so quickly.

post-50426-0-12763300-1317021113_thumb.jpgpost-50426-0-55106900-1317021119_thumb.jpgpost-50426-0-27844200-1317021130_thumb.jpgpost-50426-0-26459100-1317021145_thumb.jpgpost-50426-0-31033300-1317021152_thumb.jpgpost-50426-0-74045400-1317021160_thumb.jpgpost-50426-0-25775400-1317021170_thumb.jpg

And here a video of some of my drifting during the sept day.

http://www.youtube.c...h?v=j5xTwv92GWU

Link to comment
Share on other sites

Well pretty much got my build up to date now and can stop having to think back to write out updates but yeah pretty much just been doing little things to get the car ready for another drift session next weekend which mainly just checked out the clutch issue and removed my pedal box to check it and wasnt cracked but welded it up so thats one less problem to have in the future so Im suspecting a dying master clyinder or slave which Im going to run next weekend without changing them and hopefully get through the day but already have the brand new parts to go in once I get back. Also did the usual trip down to wheeltech to pick up some tyres.

post-50426-0-02615600-1317284218_thumb.jpg

Link to comment
Share on other sites

Ok time for an update. Just got back from another drift practice day on the weekend. It was a great day perfect weather and the the car ran well no issues besdies frying to many tyres lol. I brought 6 brand new tyres with me which each pair lasted me probably about 1-1.5 sessions so had to go and buy another pair of federal 595 rsr's! just to fry up in one session lol what a waste. I felt my drifting went up antoher level this time as I felt confident and was also pushing it harder to make the most of this last chance to get some practice in before drift attack at calder park in 3 weeks which will be my first comp. One of my sideskrits decided to fly off ahah so guess will be looking at the kit of the car and deciding on what to do with it. Here is a video and a few pics.

<iframe width="1280" height="720" src="http://www.youtube.c...bed/P9QJjLz1uWw" frameborder="0" allowfullscreen></iframe>

post-50426-0-38701500-1318229307_thumb.jpgpost-50426-0-38132800-1318229388_thumb.jpgpost-50426-0-28833200-1318229407_thumb.jpgpost-50426-0-59549100-1318230268_thumb.jpg

So got back saturday and sunday morning it was time to get the car back up on stands and start doing what I have to do before drift attack. First on the agenda was to replace the master and slave cylinder with a new one and bleed them as I suspected the current ones on there way out as sometimes the clutch goes down and gets spongy and Ive also had to wind the adjusting rod all the way out. I read about all the people having dramas bleeding there clutches due mainly to that stupid dampner valve thing that creates a massive loop line between slave and master so I got rid of that then re bent the master line in order to make it meet with the slave line.

Once had them both installed and checked for leaks started the bleeding the process starting with the master and then the slave and after maybe 20min that was done and I had tension in the pedal and that was done and off the list. Next while the car was on stands did my usual suspension check underneath and also to check if anything is broken or leaking after that called it a day.

post-50426-0-02877700-1318229713_thumb.jpgpost-50426-0-88880400-1318229742_thumb.jpgpost-50426-0-97967400-1318229767_thumb.jpg

Had a RDO from work today so decided to make it a productive day on the car and got out there early to start on the body work. I decided to ditch the sideskrits and my 400r rear bar in exchange for standard items as they were not broken and I didnt mind the clean stock kit look. After a few hours of having to remove all that silkaflex on the skirts and all the tyre delam all over the car it was ready for a good wash. Good time to test out my new pressure washer to. So here are some pics of the new look of the car, it needs to be slammed at the back abit more now since theres no kit and chuck some 25mm wheel spacers on the rear but ill do that before I do another allignment. Just leaves me with fixing up my old stock front bar.

post-50426-0-67361600-1318230003_thumb.jpgpost-50426-0-45624200-1318230132_thumb.jpgpost-50426-0-59159500-1318230089_thumb.jpg

PS can anybody tell me why the youtube embed links dont work?

Link to comment
Share on other sites

Create an account or sign in to comment

You need to be a member in order to leave a comment

Create an account

Sign up for a new account in our community. It's easy!

Register a new account

Sign in

Already have an account? Sign in here.

Sign In Now
 Share


  • Similar Content

  • Latest Posts

    • Go to SP mufflers and get the muffler of size you want and make a nice mid muffler. It's about that simple! I have 2x 3.5 Magnaflow straight through Mufflers and while it's pretty loud with the Varex open, it's quiet enough with the Varex closed. You can also buy off the shelf Magnaflow straight through mufflers as well. You also have a turbo to quiet the car down too. Don't overthink it. Buy my extra Magnaflow muffler sitting on a shelf doing nothing (buy it new, ignore this part)
    • Centre-offset muffler under the floor, same as stock. Just....3.5". The change from straight pipe there to centre-offset will mean that you need to remake some of the pipe (add a bend or two).
    • Hey guys. So my R34 GTT has a custom 3.5” exhaust (done by previous owner) with a high flowing cat, and then just a Varex cannon muffler on the back. The car does drone alot and is really loud even on highway driving just cruising, as you can imagine due to the Varex muffler basically being a straight through with the valve open. As much as i love a loud RB, it can be a bit much with no other muffling in line and just driving casually. I wanted to lower the volume output on the exhaust a bit, as well as remove the drone (probably a way to do both at once), and was going to do it all myself as I am a fabricator and have done exhaust work in the past, so the fab work isnt my issue, im just not sure on the right product or type of product to use to get the job done, and i doubt an exhaust shop would be wanting to help me as they wont be making any money from helping me, unless they supplied the product? Anyway any help or guidance in best way to approach this would be awesome   Thanks in advance
    • Meh, whilst the Honda is a "really" good car and has potential if you want to drop coin on, it was uninspiring for me to look at, but, it did serve its purpose and is now in the boys hands, his happy, his girl is happy, as she wasn't to keen on the noisy old Patrol, and most importantly, the Minister for War and Finances is extremely happy that her "little baby boy" (6'2 nugget who is currently training to be a copper, which will make 3 coppers in the immediate "circle of trust") has a well sorted reliable car that doesn't guzzle diesel Me, I'm more than happy with the NC MX5 that I replaced it with, it's a fun little car that I like looking at, like driving, and yes..... I do like the fact that the maintenance and modifications that I have done/will do are plentiful and relatively cheap, well........ while staying naturally aspirated slow that is, and that's all I really need for a fun little daily, I can rev the 5hit out of it rowing through the gears and never really break the speed limit  In saying that wicked word, "modifications", I've already ordered something for some noise and an additional "3 ish" horse powers, or whatever it gives, in the form of a header, and, a new set of "cheapo" BC coilovers that are already sitting in the shed waiting to get put in, I had the same BC's in my old NB and found they were fine for the street, hwy, and the occasional track days I did in it, they have 6kg front and 4kg rear springs which is about 10% stiffer than the stock springs which I found worked well for their price  I've also already been in touch with MX5 Mania in Dural, so once the header is on it will get a ECUTek RaceROM tune there (I cannot rev match for 5hit, and I loved the RaceROM rev match and FFS in my old 86 "RIP") In other, maintenance news, I put some new sparkler plugs in it, and have a new set of DBA Street series pads to put in over the next day or so, I'm running the DBA street series in the SS and Honda and really like them, they work great and are not dusty at all I've also booked in a few days leave over this weekend to give me 4 days weekend do some paint correction and give the leather seats some conditioning and interior some Bissell and steam cleaning OCD lovin', the carpet and interior looks clean, but from my experience with the Bissell IRT carpet, and the steam cleaner IRT trim, looks can be deceiving I've also found that finding a detachable hard top is proving problematic, the main reason why I didn't like the NC initially was the power retractable hard top that I seen them with gave the roof line a weird look, the detachable roof though looks good, and is a same shape as a NA/NB hard top, similar, but unfortunately not the same as it has different fixture point on the front, so fitting a easy to get NA/NB detachable hard top is no bueno New Old cars are fun, cleaning, hunting and playing around brings much joy How are your beasties going? Do you still have the Skyline with the LS???, or Barra??? that you were playing with
×
×
  • Create New...