Jump to content
SAU Community

Recommended Posts

Thought we'd start a thread realating to the past and current fabrication work we are doing in our sydney workshop.

First up a few previous and very current cages which we've done.

A couple of S chassis both half and full

gallery_20349_4009_184250.jpg

gallery_20349_4009_129065.jpg

gallery_20349_4009_100122.jpg

gallery_20349_4009_46120.jpg

A few R32/33 chassis with fairly extensive cages

gallery_20349_4009_39160.jpg

gallery_20349_4009_77050.jpg

gallery_20349_4009_85649.jpg

gallery_20349_4009_44596.jpg

gallery_20349_4009_52030.jpg

gallery_20349_4009_40031.jpg

gallery_20349_4009_45024.jpg

gallery_20349_4009_80519.jpg

gallery_20349_4009_112145.jpg

A lotus and Focus RS

post-20349-0-97252300-1323163529_thumb.jpg

post-20349-0-94131400-1323163610_thumb.jpg

Our Regular Fabrication work

180SX alloy door trims, folded over the edges.

post-20349-0-24439700-1323163697_thumb.jpg

Ford F350 alloy washer bottle

post-20349-0-79134200-1323163758_thumb.jpg

Custom alloy surge tank

post-20349-0-04527800-1323163815_thumb.jpg

post-20349-0-46563300-1323163880_thumb.jpg

post-20349-0-94029600-1323164116_thumb.jpg

post-20349-0-93197300-1323164187_thumb.jpg

We have a few interesting projects underway currently.

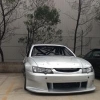
An on going development FG F6 ute with carbon 4 link suspension

post-20349-0-89920400-1323164538_thumb.jpg

post-20349-0-03573500-1323164670_thumb.jpg

  • Like 1
Link to comment
https://www.sau.com.au/forums/topic/385051-pro-fabrications-pfre-fabrication/
Share on other sites

Did you seen the skyline arms in the box opposite the ford stuff Ariel??

That's the gear everyone wants to see ;)

I'll be putting photos of them out there soon.

That cage is in neil's R33 GTsT. The lower horizontal bars have harness lugs and the tunnel bar is there to provide some strength to the trans tunnel over the "bridge" I've seen heaps of people do those lower harness bars and the inner plates just tear off the tunnel in an accident. (so theyshould when the tunnel is .8mm tin can....)

As you can imagine there is some work involved getting a

360deg weld around those floor bars and even more to get a weld around some of the intricate X section roof bars.

In that cage no it's welded to plates on each side of the trans tunnel. The cage wasn't aloud to penetrate the cabin area for the intended category.

Other cages I've done have that same bar passing through the tunnel and making a complete tailshaft loop like your thinking. I'll post up some photos of the underside of said car latter.

I don't think I've seen anyone else doing it like that.

Awesome ally welds.

Would love some tips on how to get such a nice finish. Ive just spent a whole day trying to work out why my tig wont weld ally properly, and I have thus found out how much stainless f**ks (read: contaminates) everything up.....

Hey mate, good to see your having a go.

Being clean is the biggest thing.

Everything relates back to clean, technique comes after that.

If using a guillotine make sure the cut is 2/3rds knife 1/3rd snap. That actually makes a massive difference.

If using a bandsaw/jigsaw make sure it's a dedicated alloy blade.

Dont use a grinding wheel, abrasive will always get bedded into the alloy.

If using a linisher make sure it's a dedicated alloy belt.

Grinding tungstens use a dedicated grinding stone.

Make sure fillers are cleaned, clean gloves, clean bench top etc etc.

Wipe the job down with thinners, alcohol or some type of oil less cleaner before welding.

There is heaps of small things we do every job that are second nature. The process is fairly involved when I think about it in broken down terms

Yes of course AC/DC where appropriate otherwise you wont get anywhere, i already learnt that :)

Yeah thats the thing, its second nature for experienced welders, but if youre self taught and dont have anybody letting you know these little bits n pieces it gets really frustrating sometimes.

I solved my contamination problems yesterday by trying a new belt...cleaning the tungstens and even the ceramic. I also wore so rubber gloves (dont have any other leather ones atm) to stop anything else getting on the ally. I also cleaned the filler rods for the first time (never thought of doing this before) and alot of metal dust n crap came off them!

I didnt know about the grinding wheel thing, thats good, not that theyre very useful for ally anyway.

Another thing is tip profile, some use it sharp and others blunt? My problems have been relating to the arc wondering around everywhere and struggling to keep a pool. Havent tried blunt yet.

Tungsten depends on the machine.

One of my machines is really hard on the smaller 1.6mm ones. Regardless of balance it turns them into a ball fairly quickly.

My other machine is a gem. It can look after the tungsten and keep it reasonably consistent. arc stability comes down to the machine as much as the tungsten.

Is it a big 3phase welder or a smaller single phase job?

Thanks Andrew.

I've been really busy with various projects these are just a few of the minor fab jobs that have been done.

Tony from Wakefield park just dropped off his new Honda integra which is to be started shortly.

Cage, and safety fit out.

Same model Integra as the other ones?

Also, have you done any cages and/or suspension work to 70 Series Supra's?

If not, I have a nice cutaway drawing of a works group A version I would like replicated next year sometime

Tungsten depends on the machine.

One of my machines is really hard on the smaller 1.6mm ones. Regardless of balance it turns them into a ball fairly quickly.

My other machine is a gem. It can look after the tungsten and keep it reasonably consistent. arc stability comes down to the machine as much as the tungsten.

Is it a big 3phase welder or a smaller single phase job?

Thanks Andrew.

I've been really busy with various projects these are just a few of the minor fab jobs that have been done.

Tony from Wakefield park just dropped off his new Honda integra which is to be started shortly.

Cage, and safety fit out.

Create an account or sign in to comment

You need to be a member in order to leave a comment

Create an account

Sign up for a new account in our community. It's easy!

Register a new account

Sign in

Already have an account? Sign in here.

Sign In Now


  • Similar Content

  • Latest Posts

    • Yeah well per the video it took 15s for the stock unit to start up....even if I give it a few seconds discount for starting that is at least 12 sec before you get a reverse camera if you are trying to leave a park.  The android unit is way faster, but 2016 for the stock unit is a long time ago in consumer electronics
    • Yea that’s why I said ima test them with multimeter and see the reads.
    • Only at idle. Isn’t a problem when rev it seems.
    • @Haggerty This seems silly to ask, but are you confident in your ability to tune the Haltech?  
    • Next on the to-do list was an oil and filter change. Nothing exciting to add here except the oil filter is in a really stupid place (facing the engine mount/subframe/steering rack). GReddy do a relocation kit which puts it towards the gearbox, I would have preferred towards the front but there's obviously a lot more stuff there. Something I'll have to look at for the next service perhaps. First time using Valvoline oil, although I can't see it being any different to most other brands Nice... The oil filter location... At least the subframe wont rust any time soon I picked up a genuine fuel filter, this is part of the fuel pump assembly inside the fuel tank. Access can be found underneath the rear seat, you'll see this triangular cover Remove the 3x plastic 10mm nuts and lift the cover up, pushing the rubber grommet through The yellow fuel line clips push out in opposite directions, remove these completely. The two moulded fuel lines can now pull upwards to disconnect, along with the wire electrical plug. There's 8x 8mm bolts that secure the black retaining ring. The fuel pump assembly is now ready to lift out. Be mindful of the fuel hose on the side, the hose clamp on mine was catching the hose preventing it from lifting up The fuel pump/filter has an upper and lower section held on by 4 pressure clips. These did take a little bit of force, it sounded like the plastic tabs were going to break but they didn't (don't worry!) The lower section helps mount the fuel pump, there's a circular rubber gasket/grommet/seal thing on the bottom where the sock is. Undo the hose clip on the short fuel hose on the side to disconnect it from the 3 way distribution pipe to be able to lift the upper half away. Don't forget to unplug the fuel pump too! There's a few rubber O rings that will need transferring to the new filter housing, I show these in the video at the bottom of this write up. Reassembly is the reverse Here's a photo of the new filter installed, you'll be able to see where the tabs are more clearing against the yellow OEM plastic Once the assembly is re-installed, I turned the engine over a few times to help build up fuel pressure. I did panic when the car stopped turning over but I could hear the fuel pump making a noise. It eventually started and has been fine since. Found my 'lucky' coin underneath the rear seat too The Youtube video can be seen here: https://www.youtube.com/watch?v=uLJ65pmQt44&t=6s
×
×
  • Create New...