Jump to content
SAU Community

Recommended Posts

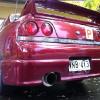
Hey everyone, I have owned my r33 s1 for the best part of over a year now, and have sadly now blown a headgaskit.

Now I know your thinking, just replace the head gaskit and be done with it, but the lifters have also been extremely noisy aswell the last 3-6 months.

So im just wondering, would it be cheaper to swap the engine with a series 1 or 2 neo engine (if compatible?) Or go and rebuild the top half of the engine taking into concideration the engine has gone 235,XXX kms before letting go.

Mods are, splitfires 3 inch exhaust and fmic. So all basic stuff.

I would love some help/people to give me their experience on this matter as being an apprentice with minimal cash to play around with, I would like the cheapest way possible to get my car back up and running again while still being reliable.

Thanks everyone,

Aaron.

Link to comment
https://www.sau.com.au/forums/topic/409391-r33-series-1-engine-swap-or-rebuild/
Share on other sites

Your hydrolic lifters may be gummed up inside, whilst the heads off give them a good clean.

Remember to pre fill them before you reinstall them, if not it will rattle off its head till they pump themselves up (this is bad).

Or get a good second hand motor, ensure you do a compressdion test on it before handing over any dollars, also if possible remove the sump and have a look inside, if its coated in thick sludge find another.

EDIT: or rebuild if you have the dollars

Good luck, hope it turns out well.

What they all said. A worthwhile thing would be to put in a Neo. But there is enough extra cost involved that you'll be better off spending that money on rebuilding the existing lump with a few choice upgrades (like some mild cams, a little porting, etc). You'll spend a lot more rebuilding, but everything will be much newer and will last a lot longer.*

* Assuming you don't use one of the muppet engine builders that we read about on here so often.

sadly i dont have much money to play with, would be lovely to spend 10+ grand on it but im stuck on a budget of about 2-3 thousand.

have been inquiring around adelaide for engines with no luck yet about.

will keep this thread updated as soon as i know more about pricings of 2nd hand engines.

thanks all for your posts and experiences. and hope to get this sorted sooner rather than later.

In that case pull the engine, take the head off and then decide whether to fix it (clean the lifters, check the head, replace head gasket) or get a second hand engine.

+1 for second hand motor especailly if your not chasing big power. Try and get a s2 as you can just use your loom and it will be a bit of a newer motor. I think the neo's are a little bit more mucking around don't quote me on that..

Assuming you can do it yourself it wil take about 4 or 5 hours to replace the headgasket, so just do that an clean your head up abit. If you want rebuild it, new springs/heavier whatever u choose because when the bottom end lets go you can still transfer your head over to your new secondhand/rebuilt motor.

Assuming you can do it yourself it wil take about 4 or 5 hours to replace the headgasket, so just do that an clean your head up abit. If you want rebuild it, new springs/heavier whatever u choose because when the bottom end lets go you can still transfer your head over to your new secondhand/rebuilt motor.

that actually seems quite tempting.

ive also managed to get a quote from an engine importer in adelaide with a engine package of approx 2grand.

for thoes who have done a top end rebuild what have you done and approximation of prices would be great. as if i could get a rough estimate of what work youve done for $$$ will give me an idea of what i can and cant afford in my budget of about 2-3grand.

will a rebuilt top end have problems with the bottom end and make the bottom end give in soon after?

thanks for all the posts sofar they have been quite helpful.

Your engine has high kays (For a forced induction import). You could throw another head gasket in it, then find that you spin a bearing or the engine starts to heavily breath 3 months down the track.

Seriously i would just find a low km long engine from Nisswreck or something and throw it in. Do the ring around and see what you can find. S1 or S2 engine doesn't matter to you, as all you need is the long engine, then attach all your bolt on gear from your current engine. Replacing the water hoses while your at it along with a new water pump, timing belt and idlers would be smart. You could do a few other things at the same time if you like.

Nisswreck

Japanese import spares

JDM Spares

Adelaide Jap Dismantlers

There is a wrecker here in Adelaide on Magill Road, Norwood that i wouldn't touch however for anything that is an engine, gearbox, trans or anything you have to put a deposit down for or cannot verify its condition 100% before handing cash over.

I'm sure there will be 20 RB25's between the other wreckers. Speak to Nisswreck or JDM Spares, they would be my preference.

For the love of god though, get a compression test and preferably leak down test if possible before buying. And actually watch the test being done.

If the head is gummed up chances are the bottom end isn't in great nick either.

A low km newer neo motor would be a good thing purely as it isn't that old, maybe 8 years max instead of 20. The swap is easy, you can even use all the R33 intake gear on the R34 motor, just need to rewire cas and ignitors that is all. If you do this you only need a bare block, seen them go for $1100 with no ancillaries, dont buy from a wrecker buy privately as you'll pay $2.5k from a wrecker.

Can flog off your head and bottom end for some money to make your cash back. Winner winner chicken dinner!

Edited by Rolls

have gone thru wreckers and a few privates, had one lined up (full setup ready to go) for 1750 but has bailed on me.

so if anyone can recommend me someone who has an rb25det they dont need, come at me!

would go "bare block/long motor" but swaping everything over is a bit of a hassle exp with paying labour at 50+ per hour.

thanks tho rolls for the information, big help. so many options but so little money to tinker with :(

+1 for import motor, most the neos will be between 98-2000 so still 12-14 years old, the difference isn't as much as 1 is 8 years old & the other 20?, s1 93-95ish, s2 95-98ish, neo 98-02ish

Edited by WMDC35

would go "bare block/long motor" but swaping everything over is a bit of a hassle exp with paying labour at 50+ per hour.

If you have a garage and a spare car for the time being I would recommend it purely for the learning experience, lots of people on here willing to help, post in your local area and I'm sure there will be people willing to come help you do it in your garage for cheaper than $50 an hour.

Best way to learn is to jump in the deep end but I understand if you don't have the time.

+1 for import motor, most the neos will be between 98-2000 so still 12-14 years old, the difference isn't as much as 1 is 8 years old & the other 20?, s1 93-95ish, s2 95-98ish, neo 98-02ish

You are right it isn't that many years difference, it is a newer design and a better motor as well though, would always go for the newest model possible when swapping motors personally, the neo is just so much smoother and nicer to drive compared to the freshly rebuilt r33 rb25 with forgies I had before. I trust nissans seal of approval over that of most builders.

Eh, get and RB30 block and find an RB25 NEO head. Problem solved..........

lol pretty sure he is looking for an easy out, not a pit to burn all his money in

Edited by Rolls

If you have a garage and a spare car for the time being I would recommend it purely for the learning experience, lots of people on here willing to help, post in your local area and I'm sure there will be people willing to come help you do it in your garage for cheaper than $50 an hour.

Best way to learn is to jump in the deep end but I understand if you don't have the time.

You are right it isn't that many years difference, it is a newer design and a better motor as well though, would always go for the newest model possible when swapping motors personally, the neo is just so much smoother and nicer to drive compared to the freshly rebuilt r33 rb25 with forgies I had before. I trust nissans seal of approval over that of most builders.

lol pretty sure he is looking for an easy out, not a pit to burn all his money in

have a spare car and garage but no time, as being a 3rd year apprentice panel repairer i dont get much time on the weekends as im normally at work practicing.

would like to get a neo engine but in that i would need to change wiring loom and etc to make fit? and dont exactly want to go down the path of getting new coilpacks again as my original splitfires cost me an arm and a leg. ive heard its possible to change over with some mods to the loom but is it worth it when i can get a series 2 engine and just swap ignition system over (from what ive been told)

an rb 25/30 was an idea but a money pit it would be. i would like to have nice power gains but someone such as myself whos short on cash and doesnt want to spend the cost of my vehicle again on engine mods im trying to get out of this with the most amount of ease and as cheaply as possible while being as reliable as it can be.

i guess when i get my old motor out, i can have a look at the thing, and strip it down and see how the thing works, could always be a good project for having a spare motor in hand incase i blow up my replacement???

again thanks rolls for the comments, making my life a lot easier (since im not exactly mechanically minded persay)

Create an account or sign in to comment

You need to be a member in order to leave a comment

Create an account

Sign up for a new account in our community. It's easy!

Register a new account

Sign in

Already have an account? Sign in here.

Sign In Now


  • Similar Content

  • Latest Posts

    • From there, it is really just test and assemble. Plug the adapter cables from the unit into the back of the screen, then the other side to the car harness. Don't forget all the other plugs too! Run the cables behind the unit and screw it back into place (4 screws) and you should now have 3 cables to run from the top screen to the android unit. I ran them along the DS of the other AV units in the gap between their backets and the console, and used some corrugated tubing on the sharp edges of the bracket so the wires were safe. Plug the centre console and lower screen in temporarily and turn the car to ACC, the AV should fire up as normal. Hold the back button for 3 sec and Android should appear on the top screen. You need to set the input to Aux for audio (more on that later). I put the unit under the AC duct in the centre console, with the wifi antenna on top of the AC duct near the shifter, the bluetooth antenna on the AC duct under the centre console The GPS unit on top of the DS to AC duct; they all seem to work OK there are are out of the way. Neat cable routing is a pain. For the drive recorder I mounted it near the rear view mirror and run the cable in the headlining, across the a pillar and then down the inside of the a pillar seal to the DS lower dash. From there it goes across and to one USB input for the unit. The second USB input is attached to the ECUtec OBD dongle and the 3rd goes to the USB bulkhead connected I added in the centre console. This is how the centre console looks "tidied" up Note I didn't install the provided speaker, didn't use the 2.5mm IPod in line or the piggyback loom for the Ipod or change any DIP switches; they seem to only be required if you need to use the Ipod input rather than the AUX input. That's it, install done, I'll follow up with a separate post on how the unit works, but in summary it retains all factory functions and inputs (so I still use my phone to the car for calls), reverse still works like factory etc.
    • Place the new daughterboard in the case and mount it using the 3 small black rivets provided, and reconnect the 3 factory ribbon cables to the new board Then, use the 3 piggyback cables from the daughterboard into the factory board on top (there are stand offs in the case to keep them apart. and remember to reconnect the antenna and rear cover fan wires. 1 screw to hold the motherboard in place. Before closing the case, make a hole in the sticker covering a hole in the case and run the cable for the android unit into the plug there. The video forgot this step, so did I, so will you probably. Then redo the 4 screws on back, 2 each top and bottom, 3 each side and put the 2 brackets back on.....all ready to go and not that tricky really.      
    • Onto the android unit. You need to remove the top screen because there is a daughterboard to put inside the case. Each side vent pops out from clips; start at the bottom and carefully remove upwards (use a trim remover tool to avoid breaking anything). Then the lower screen and controls come out, 4 screws, a couple of clips (including 3 flimsy ones at the top) and 3 plugs on the rear. Then the upper screen, 4 screws and a bunch of plugs and she is out. From there, remove the mounting brackets (2 screws each), 4 screws on the rear, 2 screws top and bottom and 3 screws holding in the small plates on each side. When you remove the back cover (tight fit), watch out for the power cable for the fan, I removed it so I could put the back aside. The mainboard is held in by 1 screw in the middle, 1 aerial at the top and 3 ribbon cables. If you've ever done any laptop stuff the ribbon cables are OK to work with, just pop up the retainer and they slide out. If you are not familiar just grab a 12 year old from an iphone factory, they will know how it works The case should now look like this:
    • Switching the console was tricky. First there were 6 screws to remove, and also the little adapter loom and its screws had to come out. Also don't forget to remove the 2 screws holding the central locking receiver. Then there are 4 clips on either side....these were very tight in this case and needed careful persuading with a long flat screw driver....some force required but not enough to break them...this was probably the fiddliest part of the whole job. In my case I needed both the wiring loom and the central locking receiver module to swap across to the new one. That was it for the console, so "assembly is the reverse of disassembly"
    • But first....while I was there, I also swapped across the centre console box for the other style where the AV inputs don't intrude into the (very limited !) space.  Part# was 96926-4GA0A, 284H3-4GA0B, 284H3-4GA0A. (I've already swapped the top 12v socket for a USB bulkhead in this pic, it fit the hole without modification:) Comparison of the 2: Basically to do the console you need to remove the DS and PS side console trim (they slide up and back, held in by clips only) Then remove the back half of the console top trim with the cupholders, pops up, all clips again but be careful at the front as it is pretty flimsy. Then slide the shifter boot down, remove the spring clip, loose it forever somewhere in the car the pull the shift knob off. Remove the tiny plastic piece on DS near "P" and use something thin and long (most screwdrivers won't fit) to push down the interlock and put the shifter down in D for space. There is one screw at the front, then the shifter surround and ashtray lift up. There are 3 or 4 plugs underneath and it is off. Next is the rear cover of the centre console; you need to open the console lid, pop off the trim covering the lid hinge and undo the 2rd screw from the driver's side (the rest all need to come out later so you can do them all now and remove the lid) Then the rear cover unclips (6 clips), start at the top with a trim tool pulling backwards. Once it is off there are 2 screws facing rearwards to remove (need a short phillips for these) and you are done with the rear of the console. There are 4 plugs at the A/V box to unclip Then there are 2 screws at the front of the console, and 2 clips (pull up and back) and the console will come out.
×
×
  • Create New...