
Can't Undo My Diff Fill Bolt
Announcements
-
Similar Content
-
-
Latest Posts
-

By Dose Pipe Sutututu · Posted
When you crank your car, and hit it with a timing light, can you see a steady crank timing? -
 Oh, forgot to add, A few months ago I was getting mixture codes and the car was using crap loads of fuel. You could smell the unburned fuel in the exhaust, it was crazy strong. Economy was over 17.5 l/100 and usually around 19. I smoked the engine and found a leaky CCV hose which I replaced and then I replaced my two pre cat O2 sensors, I also replaced the MAF. This fixed my mixture codes and improved my exonomy but I'm still 14 - 15 l/100 when pottering about town so something is still amiss. Throttle response is much better and it has more pep but I'd like to know why it's still so thirsty (and I'm hoping that whatever it is gives me a bit more poke).
 -
 Car is on factory injectors/z32 maf/ q45 throttle body/ z32 ecu with nistune
 -
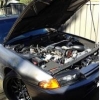
Hello all, currently finishing up a rb25 swap into my s14. Having issues with starting, car has spark (confirmed by pulling a plug and watching it spark), has fuel(confirmed by checking pulse/voltage at injectors all spark plugs are soaked in fuel). Car cranks over and pops into the exhaust with a heavy fuel smell but no attempt to start or run, I have torn the timing cover off and triple confirmed timing, turned the CAS in multiple spots both directions, attempted to start with coolant temp and maf unplugged, checked my fuel lines and made sure they weren’t backwards, checked voltage at cas/injectors/coilpacks, made sure all the grounds in the harness are connected and added a few grounding straps (1 from chassis to block, 1 from chassis to head, and 1 from chassis to igniter chip) I am getting stumped here. As a last ditch effort I made a full grounding harness tonight that’s going to run from the battery and add an extra ground from the battery onto the coil pack harness/igniter chip/ intake manifold/ Wiring specialties harness ground/ and alternator. I’m hoping maybe the grounding harness will fix it here but posting here to see if anyone has any other ideas on what else I can check. My fuel pressure is unknown right gauge will be here tomorrow. IMG_3206.mov
-
 yeah I was shocked when I checked my spare OEM on and as below that's how they come from Nissan. (side interesting note new NEO gearbox and replacement park lack the brass bush on the tips and its just all alloy) unsure about damage to the box currently back at 1110 to be pulled down/inspected and selector fork replaced as he built it previously and given the never before seen failure on his billet forks he is replacing it under warranty. He said he has used always OEM the keyway tab without issue for years so it could be an unlucky coincidence. I did talk to him about the sharp corners and stress concentration too. Re: hard shifts i got 7+ years out of the OEM one and the fork itself failed not the keyway. so could be bad luck as I said or an age thing + heat cycles in box and during fabrication of billet?
-


Recommended Posts
Create an account or sign in to comment
You need to be a member in order to leave a comment
Create an account
Sign up for a new account in our community. It's easy!
Register a new accountSign in
Already have an account? Sign in here.
Sign In Now