Jump to content
SAU Community

Recommended Posts

Have you replaced the std rubber intake pipe yet ?

Yes with 80mm stainless lobster, hectic flutters with no bov lol

Need a video of sututututu [emoji2]

Will try to get one. I'm going to have to disable my antilag/launch to do at standstill. CBF but I'll try[emoji12]
  • Like 1
  • 4 weeks later...

Update. I got sick of the hectic flutters and dose and reverted to the stock airbox. I think the final straw was when a toothless bogan in a vs commodore was hanging out the passenger window giving me the thumbs up when he saw me taking off. Not the kind of attention I'm after. Lol.

  • Like 2

In other news, I have been quite busy over the last month. I have replaced my exhaust manifold gaskets and studs as a couple decided they would snap off. I also got around to replacing the upper intake manifold gasket too. None of this had any impact on my holding boost issue.

I managed to get to the bottom of the boost issue. It ended up being an issue with the intake snorkel not sitting properly due to the new alloy rad being too thick. The snorkel was angled up towards the bonnet and was effectively making the air entry point narrower and becoming a restriction at high boost/revs. Can't believe this was the damn problem. Shakes head. I'm going to heat it up with a heat gun and mould it so it sits properly around the new rad.

f**k you snorkel.

post-139042-1459574179458_thumb.jpg

Since I thought that all my issues had been solved, I thought I'll put the car to the test and what better way to do that than a track day.

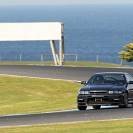
I entered the demo class for the Vic time attack yesterday. There was only 6 cars entered in this class and less than 40 cars across all classes. There was stuff all traffic and plenty of track time. The last 2 sessions it was only me and 1 other car a 370z sharing the track. I completed all of the 6 x 12 min sessions. The car didn't miss a beat. The only things I did was adjust tyre pressure and pour fuel into it. The issues I had at sandown are gone. The brakes worked quite well as this circuit is less demanding of them. The same can't be said for the driver. I was a bit hesitant as the last time I was at the island I crashed my old car. I progressively got quicker through the day. I started the day doing 2:02's and worked it down to a 159:76 on my final lap of the day. This is 1 second off (slower)my previous pb in my s15 but I'm quite happy with that for now. There was a slight mix up with the timing, my car was no.31 and was associated to the wrong car description and name. There's probably a bloke in a pos Lexus is200 boasting to his mates that he did under 2 mins at Phillip island. Lol.

post-139042-14595751387299_thumb.jpg

Also weighed the car at the weigh bridge at the track. Came in at 1423kg with an almost full tank of fuel, full interior, 18 inch rims with 265's all round + half roll cage. It was a little less than I was expecting. I was surprised and happy at the same time. My s15 at the same weigh bridge was 1380 with full fuel. Maybe all the carbon fibre bits have reduced a fair bit of weight.

Update. I got sick of the hectic flutters and dose and reverted to the stock airbox. I think the final straw was when a toothless bogan in a vs commodore was hanging out the passenger window giving me the thumbs up when he saw me taking off. Not the kind of attention I'm after. Lol.

I'm surprised he didn't try to race you.

I'm surprised he didn't try to race you.

He did, I just didn't realise though. Lol

noooooooooo need more dose :(

Dosed out for now brah. If it makes you feel any better, I did run the pod at the track. Plenty of sutututu[emoji3]
  • Like 1
  • 2 months later...

A bit of an update, not much has happened over the last couple of months. Did a hill climb at haunted hills, car performed very well and had no issues. The Achilles 123s tyres have now seen better days. The rears lasted 2 track days and about 5000 street km before being on the indicators. They grip very well but longevity is poor. They where a false economy. Ive swapped them around front to back so I can get another track day out of them and i'll probably move on to some rs3's.

The car has had a few minor changes, a gfb bov for a choice of woosh, sututu (so Johnny dosepipe doesn't get upset)or silence depending on the flavour of the month, a pod filter semi housed in a stock airbox (more sututu) and a hard wired upgraded fuel pump (dw340lph) in prep for E85. This required a tweaking of the fuel maps and an extra 12rwkw where found, making a total of 260rwkw on BP98. An ethanol sensor has also found its way onto the return fuel line and I have finally got around to fitting an air temp sensor. Naughty me has been driving around for the last 10 months without one.

Flex fuel is on the horizon, everything has been setup, just waiting for the tank to be empty of 98. I'm pretty much running on fumes atm, so hoping to drain out the remainder over the weekend and dump a jerry can worth of E85 in there. Hopefully I can get the thing to start so I can try to sort out cold and hot starting and tune the light load compensation table so I can drive it around for the next week to flush all that yucky 98 out and bring the E content up to 83-85.

Hopefully everything goes well and its tuned over the next couple of weeks. A big thank you to our resident adaptronic expert, Johnny (dosepipesutututu), ive been breaking his chops with a million and 1 questions on how to set this all up and do some basic tuning on it. Thanks mate. A couple of pics for now and ill post some more later.

52ec7aeda7fbba5175ef40cb4328dffd.jpga27e9d82435d755f6c5e0d02e534f5fa.jpg29ce914d648d0a516f0c42e1ee922416.jpgcf9394d617845e2235ff042b1f2089f9.jpgc7b4fe82f825a3eaa6835202248cc20c.jpg3c53b10dd118cc484bfd3c85ad991bbc.jpg

Nearly ran out of juice on the way home from work. Car was cutting out around left hand turns. Luckily a united was just around the corner. I was too scared to switch the car off, in case it wouldn't start so I put in 2 litres of e85 with the car running to get home. I got home and plugged the laptop in and was sitting on 34% ethanol. I made a couple of little tweaks to the hot start and compensation table and got my jerry cans and headed back to united. Filled 2 Jerry's and put another 4 litres in the tank. Its now on E62 and running in an acceptable manner to cruise in. Just got to hope I can get it to start in the morning. Tomorrow I'll drain what's left over and pour in 20l and hope for a reading in the 80's. So far all I can say is it smells good.

  • Like 2

Thanks swapper[emoji106] . Car started well this morning at 7 degrees, had a slight hesitation after a few seconds. I think I need to increase the post start cranking compensation a bit. I ran the fuel down again and added 12l of e85 in the tank. It's at E76 now. I did some road tuning and its happily cruising around.

I can't believe how well the car idles now and how smooth it is compared to 98. When I come to a stop at traffic lights, I have to look at the tacho to make sure the car is still running. E85 is bloody awesome[emoji3] . Can't wait to get it on a dyno and crank the boost up.

  • Like 2

Yes it is Johnny. Will be dosing harder soon. I bit the bullet last night and went to united and filled the tank. Ended up on 78% ethanol according to the flex sensor. I'm gonna have to try and burn as much of it down as I can and refill before the tune. I really want to get the ethanol content to 83 or more. I may have to try a different united. What are peoples experience with united and what their flex sensors show? Is it consistently E85 or can it be as low as 78?

Here's a few more pics of things that have changed on the car.

post-139042-14669967760622_thumb.jpgpost-139042-14669968059645_thumb.jpgpost-139042-14669968445492_thumb.jpgpost-139042-14669968575686_thumb.jpgpost-139042-14669968689613_thumb.jpg

I managed to pick up that hacked up airbox and pod filter in a couple of boxes of assorted RB junk that I won on ebay for $4. I ended up giving the guy $40 for it all. Felt sorry for him. The bloke was wrapped and so was I. Lol

This happened yesterday morning. Car is tuned on e85 now and responded very well to timing increases. Ended up with 312rwkw and 476nm @ just under 20psi. Yeah baby. That run was done without any additional timing below 4000rpm so the power and torque below that will be a fair bit better than what the graph shows. Was starting to run low on e85 so we stopped doing power runs after that.

VID_20160702_121358_643.mp4

4fa82407a6407e7a0a6d3f684873e6fd.jpg

The tune was done by Simon Phillips at Vic dyno hire in Ballarat. Simon has a very quick turbo datsun 1200 improved production racecar and has tuned quite a few other ip race cars. I decided to give him a go as he was available at short notice and im glad i did. It was a bit of a hike driving to ballarat but i figured i've driven further for track days and his hourly rate for dyno time was very attractive and offset the fuel costs. His service, thoroughness and attention to detail where excellent and i wouldn't hesitate to recommend him to anyone in his area or willing and able to travel to ballarat.  Ive covered around 300km since getting the tune and the car drives like an absolute beast when on the gas and cruises beautifully in all other situations. Gotta love E85 for that. 

Create an account or sign in to comment

You need to be a member in order to leave a comment

Create an account

Sign up for a new account in our community. It's easy!

Register a new account

Sign in

Already have an account? Sign in here.

Sign In Now


  • Similar Content

  • Latest Posts

    • Did this end up working? Did you take some pictures?
    • And finally, the front lower mount. It was doubly weird. Firstly, the lower mount is held in with a bracket that has 3 bolts (it also acts as the steering lock stop), and then a nut on the shock lower mount itself. So, remove the 3x 14mm head bolts , then the 17mm nut that holds the shock in. From there, you can't actually remove the shock from the lower mount bolt (took me a while to work that out....) Sadly I don't have a pic of the other side, but the swaybar mounts to the same bolt that holds the shock in. You need to push that swaybar mount/bolt back so the shock can be pulled out past the lower control arm.  In this pic you can see the bolt partly pushed back, but it had to go further than that to release the shock. Once the shock is out, putting the new one in is "reverse of disassembly". Put the top of the shock through at least one hole and put a nut on loosely to hold it in place. Put the lower end in place and push the swaybar mount / shock bolt back in place, then loosely attach the other 2 top nuts. Bolt the bracket back in place with the 14mm head bolts and finally put the nut onto the lower bolt. Done....you have new suspension on your v37!
    • And now to the front.  No pics of the 3 nuts holding the front struts on, they are easy to spot. Undo 2 and leave the closest one on loosely. Underneath we have to deal with the wiring again, but this time its worse because the plug is behind the guard liner. You'll have to decide how much of the guard liner to remove, I undid the lower liner's top, inside and lower clips, but didn't pull it full off the guard. Same issue undoing the plug as at the rear, you need to firmly push the release clip from below while equally firmly gripping the plug body and pulling it out of  the socket. I used my fancy electrical disconnect pliers to get in there There is also one clip for the wiring, unlike at the rear I could not get behind it so just had to lever it up and out.....not in great condition to re-use in future.
    • Onto the rear lower shock mount. It's worth starting with a decent degrease to remove 10+ years of road grime, and perhaps also spray a penetrating oil on the shock lower nut. Don't forget to include the shock wiring and plug in the clean.... Deal with the wiring first; you need to release 2 clips where the wiring goes into the bracket (use long nose pliers behind the bracket to compress the clip so you can reuse it), and the rubber mount slides out, then release the plug.  I found it very hard to unplug, from underneath you can compress the tab with a screwdriver or similar, and gently but firmly pull the plug out of the socket (regular pliers may help but don't put too much pressure on the plastic. The lower mount is straightforward, 17mm nut and you can pull the shock out. As I wasn't putting a standard shock back in, I gave the car side wiring socket a generous gob of dialectric grease to keep crap out in the future. Putting the new shock in is straightforward, feed it into at least 1 of the bolt holes at the top and reach around to put a nut on it to hold it up. Then put on the other 2 top nuts loosely and put the shock onto the lower mounting bolt (you may need to lift the hub a little if the new shock is shorter). Tighten the lower nut and 3 upper nuts and you are done. In my case the BC Racing shocks came assembled for the fronts, but the rears needed to re-use the factory strut tops. For that you need spring compressors to take the pressure off the top nut (they are compressed enough when the spring can move between the top and bottom spring seats. Then a 17mm ring spanner to undo the nut while using an 8mm open spanner to stop the shaft turning (or, if you are really lucky you might get it off with a rattle gun).
    • You will now be able to lift the parcel shelf trim enough to get to the shock cover bolts; if you need to full remove the parcel shelf trim for some reason you also remove the escutcheons around the rear seat release and you will have to unplug the high stop light wiring from the boot. Next up is removal of the bracket; 6 nuts and a bolt Good news, you've finally got to the strut top! Remove the dust cover and the 3 shock mount nuts (perhaps leave 1 on lightly for now....) Same on the other side, but easier now you've done it all before
×
×
  • Create New...