

Bushy
-
Posts
334 -
Joined
-
Last visited
-
Feedback
100%
Content Type
Profiles
Forums
Events
Gallery
Media Demo
Store
Everything posted by Bushy
-
White Gts-T's, White Gts-T
Bushy replied to White GTS-T's topic in Members Cars, Project Overhauls & Restorations
Good work mate, Winton looks like a bit of fun in the wet haha -
Underbody turned out sick! Definitely want to do that one day
-
Very nice mate! What's left on the list?
-
Also RB25 injectors are side feed, RB20 are top feed, so won't work. Could use RB26 injectors but need the resistor module to suit as well, and would need to be retuned.
-
Condition and price of fibreglass guards? Pics?
-
Cheers buddy! Hadn't heard that one before, good old urban dictionary helped me out haha Me and the brother loaded the car onto a trailer today and took it to the auto electrician. Bit nervous as I'm a little apprehensive as to whether he will be able to stay within the quote, I tried to be as explicit as possible with what needs to be done so hopefully he understood and quoted accordingly. Regardless, we will be stoked to hear it fire up for the first time.
-
Our car is almost done so we'll be interested as well most likely
-
Alright so I want to get this thread up to date, so I’m just going to rattle off the list of bolt-ons/other mods with pictures. If you want more detail on anything in particular let me know. ProFlow air filter. As you can see we've dummied up an airbox out of plywood that will be made out of alloy once its running/we have time. Turbosmart Kompact plumb back BOV Polyurethane gearbox mount. Don’t think I’ve mentioned that we’re using the standard RB20 5 speed Aluminium subframe collars GKtech fan and SR to RB adapter Also have GKtech castor rods and offset end inserts but not fitted yet 25mm Whiteline front sway bar In the previous car there was a lot of lateral movement of the front sway bar when cornering hard (only noticed this at the track) which made a loud clunk and was a little unnerving. When looking at options for lock collars I came across a DIY alternative so I decided to give it a go. It cost me $3 in clamps vs. $30+ for a purpose made item. GTR rear sway bar. GTR is 25mm vs. 16mm stock GTST. JJR screamer and 3" stainless front pipe. The screamer had to be modified slightly as the outlet was pointed straight at the firewall and almost touching. We cut it about 2” from the end and rotated it so now it points downwards. The screamer and front pipe are mated to an XForce 3" stainless cat back exhaust that was on the old car, it has a fairly large centre muffler so hopefully it will be quiet off boost. OMP fixed back seat and Velo Magnum 4 point harness Saas oil pressure and water temp gauges, and unknown boost gauge. Mounted on custom race spec dash (the stereo/climate control surround is damaged, plus I just couldn’t be bothered wiring up the stereo yet haha) Velo tow strap Saikou Michi oil catch can (bit scratched up from the crash, needs repainting) R31 powersteering pump and bracket. We had to make a spacer between the block and the bracket for the top front bolt hole but apart from that everything lines up fine. Also have to use an R31 3 ribbed belt, R32 pump pulley uses 4 ribbed belt. Hopefully won’t have problems with the belt jumping ribs on the harmonic balancer end. S13 powersteering reservoir. As I think I mentioned we cut the bracket off the standard R32 reservoir and welded it to the S13 one to retain the stock mounting position. Reason for going to all this effort was because the S13 one has only one return and a smaller feed to suit the R31 pump. Battery relocated to boot in box We’ve put in all fluids and we should be taking the car to an auto electrician on Thursday this week to get it all wired up. I rolled the car out of the garage for the first time in months yesterday and washed off the layer of dust that had accumulated, it also gave me a chance to stand back and look at it properly as our garage isn’t particularly big. It still needs a lot of work cosmetically but we’re mainly concerned with getting it running and drivable. Cheers, Michael
-
Glad I could help out mate Loving all the photo's, car is looking sick and I'm a bit jealous of that trailer haha
-
Hi, As the title says I'm trying to get hold of 2x projector type headlight looms, including locking caps, boots and projector bulb adapter (one set per side). If you have converted to HIDs you probably have these lying around. To clarify exactly what I want here's a photo: I'm located in Hobart but willing to pay postage. Cheers, Michael
-
Thanks mate, yeah very happy with how it turned out Nah no vehicle insurance on the track, both cars had road insurance but that doesn't cover it on the track. Yeah true, although building it has been generally quite fun and given us a lot of experience, just took a lot longer than we were expecting, which is probably a bit naive on our part considering we had never done a full build like this before.
-
Iruvyouskyrines Rb25Det Neo R32
Bushy replied to iruvyouskyrine's topic in Members Cars, Project Overhauls & Restorations
Good work mate! Did you get the GKTech fan adapter as well or are you going with a different viscous clutch pack (I've heard SR clutch pack fits)? -
Thanks mate, we're not really expecting any big power gains but a bit of a gain in response would be nice
-
Time for another update. I'm going to continue on from that last photo hint and talk about the intake setup. So the previous setup on the old car was a return flow intercooler with ridiculously long piping between the turbo and the intake, now obviously this was all smashed up in the crash so it needed to be replaced, and we decided it was a good time to improve it. I’ve always been told that the shorter you can make the piping the better, to improve response, I haven’t done any research on this so I have no idea what the gains are, but logically there has to be some truth to it and there’s no real loss if there are no gains as it will be a good setup for the future if we decide to chase more power (sorry, when ). For a long time I’ve admired the upside down intercooler setup that a lot of Silva/180SX owners go for, but they have the advantage of having a lot more room between the engine and the radiator support than us Skyline owners. We decided we would try and go for this approach although we had no idea how much cutting would be necessary to make it work. It sealed the deal when a mate showed it could be done relatively easily with his 2J R32 setup. We got hold of a cheapish 300x600 Monza intercooler (2nd hand but never fitted), that came with a shitty China piping kit that I think was to suit an S13, this would later become useful to cut up and get re-welded to the right shape. Our main concern was that there would be no room between the ends of the intercooler and the headlights to fit a 90 deg. silicon bend and initially thought it would be necessary to cut off the ends and have 90 deg. alloy bends welded straight onto the end tanks, like the one above. But with a bit of messing around we figured we should be able to get enough clearance if we could get the intercooler sitting back far enough and underneath the top radiator support. So I marked out how much needed to be cut out of the sides of the radiator support, being careful not to interfere with the headlight mounting points, and attacked it with a die grinder/cutting wheel. I was surprised at how little actually needed to be cut and we managed to get the intercooler sitting hard up against the radiator and flush with the front of the radiator support, with enough room to fit some cut down 90 deg. 3” to 2.5” silicon reducers. The standard radiator even still fits in the factory position. The intercooler is mounted at the top with bolts straight through the top radiator support, with spacers on the underside between it and the intercooler. As you’ve probably noticed the silicon bends do touch, but the intercooler is securely mounted at the top and bottom and I have put rubber u-channel over the edges I have cut, so there is minimal chance of it chaffing. But, we may end up just cutting out the area where it touches later down the track. To make use of this setup, obviously a forward facing intake manifold was needed, and around the time we started work on the engine bay, we managed to get a mate on board to fabricate one from the standard manifold for us. I assume you’re wondering why, well…we thought it would be cheaper, but in hindsight it would have been close to the cost of buying a Freddy forward facing manifold (with very generous mates rates mind you). I’ve got to give full credit here to Lloyd Smith at Tasmanian Mobile Mechanics here in Hobart for the fabrication, he has done an amazing job, and Aaron Martin at AzCustom for the welding. It has turned out even better than we were expecting and really gives us the look we were going for. Lloyd started off by cutting the bottom half of the standard manifold along the runners and welded a flange to runners, we then test fitted it to determine the position of the throttle body flange… Next a 3” bend of alloy tube was welded on to form the bend at the far end of the manifold, it was then test fitted again to make sure it cleared the clutch master cylinder, it didn't which we were half expecting, so we fitted an S13 CMC that is shorter than the R32 item. With R32 CMC With S13 CMC Then a length of straight 3” alloy tube was tacked onto the bend, up to the throttle body flange. To determine where the pipe should be cut a straight edge was used to scribe the highest and lowest point in relation to the top and bottom of the runner flange. The same steps were taken to form the bend at the front of the manifold. Ignore the ghetto plywood airbox, its only a dummy version, will be made out of alloy eventually. And then to finish it off it was closed in with alloy sheet. The AAC, air regulator and the various vacuum line fittings were hidden away underneath like this… Before it was all fitted up for good, we re-plumbed the water hoses underneath the manifold as some were no longer needed. The hoses that used to go to the TB and air bleeder were blanked off. I made the hot and cold side intercooler piping by cutting up the intercooler piping kit I mentioned earlier and had them welded up by Az with a 19mm alloy barb on the cold side for the AAC return and Az machined up a 34mm short section of tube to suit a Turbosmart Kompact plumback BOV that was welded to the hot side, I know there is a bit of a debate about which side is better for the BOV but we were assured it wouldn’t cause an issue, and it made things so much easier that we didn’t need to run a huge 34mm length of rubber hose from the cold side back to the intake. As you may notice the TB is mounted upside down to avoid the throttle linkage fowling on the top radiator hose. Clearly the original throttle cable wasn't going to be long enough, so we ended up using a much longer FWD(?) Pintara cable that has the same firewall mounting points as an R32, this can be seen in the photo above. And here’s one final photo of the manifold fitted for good, we are so stoked with how it turned out! This is getting closer to being up to date, the last photo is from beginning of May 2013, although no doubt I have forgotten to mention a million things. Cheers, Michael
-
Thanks mate, I'm doing Surveying and Spatial Science at Uni
-
Yep, spot on! Ultimately it would have been easier to do out of the car but it wasn't impossible. Plus we decided to take a slightly different route which meant it had to be taken off and put back on numerous times for test fitting......teaser below Thanks mate, good to get some positive input on the stitch welding as we were in two minds about it, we knew it would be better but just not sure by how much, I guess it depends largely on the type of car though.
-
Okay so I've found a bit of free time to post another proper update, I’ll focus more on the shell today. The shell had obviously been sitting out it the weather for a fair amount of time as paint was in poor condition and there was some surface rust appearing in various places. We weren’t too concerned with the exterior at this stage as we just wanted to get it running but it was clear that the engine bay needed some attention, the battery tray was completely rusted through! So that was cut out and we decided at the same time to spot weld the seams in the engine bay as well and give it a respray, this like many things on this build turned out to take about 10 times longer than we estimated, but I think the end result was worth it. In about August 2012 Tom got stuck into the welding side of things, and I spent endless hours sanding back the engine bay. Stupidly, we didn’t seal the spot welds immediately with paint so after only a couple of cold nights the welded areas started to rust (all part of the learning curve I guess). So over the next few months I tried hard to maintain the motivation and took a wire wheel to pretty much every seam in the engine bay, treating it with rust kill and immediately spraying with etch primer as I went. New battery tray made by Tom Start of spot welding engine bay The home made spray booth (not ideal haha) In primer The end result (January 2013!) At the same time a few small areas on the body were tidied up and resprayed by us where surface rust had started to appear, such as the right rear quarter panel edge, rear section behind reo bar, and rear guard lips where a pretty generous guard roll has been done by the previous owner. Before putting the engine back in, a full HICAS pump and line delete was done and replaced with a lockout bar. To get around the issue of now having an unused high pressure line from the pump, we changed to an R31 power steering pump and bracket, and a modified S13 power steering reservoir (replaced the mounting bracket with the R32 one to retain the original mounting position). We also replaced the sway bars with Whiteline front and R32 GTR rear. And then the engine went back in! This was an awesome feeling as it had been out for so long and provided a bit more motivation to get things done. I think that will do for now. Cheers for reading as always, Michael
-
Just realised I forgot to mention that the conrods were also checked and aligned at the same time the crank collar was fitted Cheers fellas
-
You haven't had much luck lately have you, good to see you getting stuck into it!
-
Okie dokie, so I've managed to knock over a bit of uni work so it’s time for another update. As mentioned in the last update the plan was to pull down the engine, check if everything was within spec and replace what needed replacing, along with making a few improvements in the oil control department. The idea was that we wanted a fairly reliable engine. Once the engine was in pieces it looked fairly healthy apart from big end, main and little end bearings were pretty close to needing replacement so we figured it was a good opportunity to do it whilst it was all apart, so these item were all replaced with new ACL race bearings. Pistons, bores and ring end gaps were within spec so they were left as is. The crank was taken in and had a new, wider oil pump drive collar fitted. ACL mains being installed. Measuring big end clearances with good old plastigage. Bottom end done! We had the head decked, with new valve stem seals and cam seals fitted, we also fitted oil restrictors as the first of the oil control mods. We also had a mate machine up an external head drain to fit where the rear welsh plug is on the back of the head. *Sorry thought I had a photo of this but don’t* And a hole was tapped by the local mobile thread repair guy in the left hand side of the block for the external drain oil return. To complete the oil control mods we decided we would attempt to create our own baffles and trapdoors in the sump and extend the oil pickup so it sits in the middle of the sump. Inspiration for this was drawn from another SAU member, savman’s build thread. Tom tackled the job and it turned out better than we expected. Now has trapdoors as well. The engine was then reassembled with a full new gasket and seal kit. New Gates Racing timing belt, tensioner and idle pulley were fitted. When the turbo was off we noticed the rear housing was a bit cracked internally. Due to the money factor and limited seat time we decided it would be best to keep it relatively standard power wise so we just replaced the cracked housing with a standard item and mildly ported the wastegate. That’s pretty much it for the engine internals, there’s a few more changes to do with bolt ons that I’ll get to later on. Hope you enjoy the read, fire away with any questions or feedback Cheers, Michael
-
Yeah tell me about it! If we had our time over again we would have just waited until a registered car came up for sale with a blown engine. Oh well, its been a good learning experience so far. It was a bit of a rare situation, just one of those unfortunate accidents that happens once in a blue moon, but you're exactly right at least no-one was hurt. Cheers fellas, Michael
-
Sounds promising. We need to pull our finger out and get ours done then we can join you, bloody uni is taking up too much of my time at the moment!
-
Finally got around to starting a build thread, have a read if you haven't already, there will be a lot of updates to come http://www.skylinesaustralia.com/forums/topic/425763-our-r32/
-
Haha *not sure if being sarcastic* But there will be plenty of pictures regardless I didn't actually realise how mint it was until we started pulling it apart, there was literally no rust, whereas the new shell is starting to show some signs of cancer (more on that later).
-
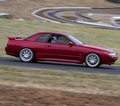
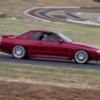
I’ve never really posted much about our car as I don’t think it’s particularly different or special, but I kind of wish I had as it would have been a good way of keeping a record of what has happened. First a bit of background info… My brother Tom and myself purchased the car, a 1993 R32 GTST, in September 2011 from Victoria, it had an RB25DET which wasn’t engineered so we spent a fair bit of time organising that once we got it back, it was on the road on 11/11/2011 (easy date to remember haha), this is how it looked… We didn’t really do anything worth mentioning, just tidied a few things up, got some new wheels and brake pads and went to a few track days at Baskerville (from memory the best lap I achieved was 68.xxx sec). We then entered a drift practice day in May 2012 which didn’t end well with the car being written off when we were run into by another driver after a spin. Luckily (somewhat) it appeared to be only structural damage with only minor damage to the engine, surprisingly even front end components such as brakes/hubs were not damaged, the chassis seemed to absorb all the impact. This one gives an indication of how far the rails bent. We weren’t happy to simply throw our hands in the air and feel sorry for ourselves so we started the search for a shell. We nearly bought an S13 which would have been a cool project but ended up getting hold of another R32 (1989) in June 2012 off another SAU member. Once we started transferring things across we were glad we went with another R32 as it makes things soo much easier. Tom showing that you don't need coilovers to get a hectic stance. The shell was not quite rolling (blocks of wood instead of shocks ) with no interior but it didn’t matter as we could transfer a lot over from our wreck. During my mid-semester break from Uni we got a bit done…we put in our subframe and front end so it was properly rolling (don’t worry everything was checked thoroughly for damage before being bolted up!). Tom pulled the RB25 out of the wreck and it was pulled down to do a few oil control mods and give a good check over/freshen up. That will do for now, I'm nowhere near up to date as almost a year has passed. Next post I’ll go into what has been done with the engine. I hope you enjoy the read. Cheers, Michael
