

Announcements
-
Similar Content
-
-
Latest Posts
-
 Practical solution...
 -
 I got these caps. They look kinda thin, like they would blow out with 15 or 20psi of boost.
 -
Funny you ask, because its been about a year since i made this post. She is no longer my gf now lol. I have a new one though that didn't mind the squeeling.
-
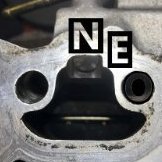
Is there a best practice on how to cap this? Its a 1.5 inch hole. I couldn't find standard sized caps, except some thin walled vinyl caps to fit the hole. Is there where you guys would cap it at? (circled in red) or would you cap it off the hose that attaches to this. As the re-circ pipe comes up from the intercooler and has a bunch more twists of connections and hardpipe that seperates into a soft rubber pipe to each turbo.
-
yeah it does! I'm going to tweak it one more time so the cover fits perfect as right now the cover is slightly popping out 1-2 cm.
-


Recommended Posts
Create an account or sign in to comment
You need to be a member in order to leave a comment
Create an account
Sign up for a new account in our community. It's easy!
Register a new accountSign in
Already have an account? Sign in here.
Sign In Now