Jump to content
SAU Community

Recommended Posts

Not sure if you guys still wanna know as there's been a few posts on this thread!

This is also my first post [emoji39][emoji39][emoji39]

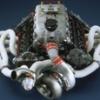
But this is my new cars set up (I haven't really changed anything yet - only enjoyed it so far!!)

R32 gtr

2.6

Built bottom end

33 gtr crank

Forged pistons, rods etc

Single trust t78-33d

Trust stainless manifold

Trust external gate and screamer

Custom camshafts... I was told they were "mild" but wouldn't mind finding out for myself as it's quite lumpy..?

Big trust fmic

Power FC

440lph pump

800cc injectors

3.5" Exhaust

Standard porting and plenum

He had it tuned at 366rwkw on 18psi

(Was still a fresh rebuild)

I have bought a water meth injection kit for it and am going to get retuned in August

With a bit more boost (and a better tuner) will hopefully make something around the 425awkw mark, but not too sure what the 800cc injectors will be good for?

post-140343-14364623945227_thumb.jpg

Not sure if you guys still wanna know as there's been a few posts on this thread!

This is also my first post [emoji39][emoji39][emoji39]

But this is my new cars set up (I haven't really changed anything yet - only enjoyed it so far!!)

R32 gtr

2.6

Built bottom end

33 gtr crank

Forged pistons, rods etc

Single trust t78-33d

Trust stainless manifold

Trust external gate and screamer

Custom camshafts... I was told they were "mild" but wouldn't mind finding out for myself as it's quite lumpy..?

Big trust fmic

Power FC

440lph pump

800cc injectors

3.5" Exhaust

Standard porting and plenum

He had it tuned at 366rwkw on 18psi

(Was still a fresh rebuild)

I have bought a water meth injection kit for it and am going to get retuned in August

With a bit more boost (and a better tuner) will hopefully make something around the 425awkw mark, but not too sure what the 800cc injectors will be good for?

800cc on 98, around 800hp

Stock Bottom End

Stock Plenum

HKS 1.2mm Metal Head Gasket
ARP Head Studs
HKS 272 Cams
HKS Cam Gears
T04z Turbo
6 Boost Manifold
4" Custom Dump & Front Pipe
3.5" Custom Exhaust

Sard fuel pressure regulator
Bosch Injectors 2000cc
Twin 255lph E85 Walbro fuel pumps

Splitfire Coilpacks
Greddy fuel rail
Greddy Oil Cooler
Greddy Front Mount Intercooler
Koyo Radiator

On United E85

post-91350-0-26766900-1436538378_thumb.jpg

1997 R33 series 2 Gtst

Forged rb25
Nitto rods
Cp Pistons
Power fc with z32
Proboost gtx3582 .82 rear

walbro 460lph

Need another fuel pump as I ran out of fuel pump and maybe relocate my afm near the throttle body.

How far can I push a gtx3582? Thinking to go Upto a 1.06 rear

post-105015-0-45090400-1436646927_thumb.jpg

Edited by Gta51

1997 R33 series 2 Gtst

Forged rb25

Nitto rods

Cp Pistons

Power fc with z32

Proboost gtx3582 .82 rear

walbro 460lph

Need another fuel pump as I ran out of fuel pump and maybe relocate my afm near the throttle body.

How far can I push a gtx3582? Thinking to go Upto a 1.06 rear

E85 or pulp?

  • 4 weeks later...

1997 R33 series 2 Gtst

Forged rb25

Nitto rods

Cp Pistons

Power fc with z32

Proboost gtx3582 .82 rear

walbro 460lph

Need another fuel pump as I ran out of fuel pump and maybe relocate my afm near the throttle body.

How far can I push a gtx3582? Thinking to go Upto a 1.06 rear

i pushed my gtx3582 with .82 rear to 500rwkw on a 30det e85

  • 2 weeks later...

You, haha!

I don't think people should be surprised when they build a stroker engine/head combo, put a small exhaust side (turbocharger) on there and then the power noses over early... there will be more power earlier (more 'response') which is the intent of these builds but you just wont get that peak number.

http://www.sau.com.au/forums/topic/434910-rb3026-cam-selection/page-2

An elephant never forgets, lol

Hi Mike

Finally had the car tweaked and here are the results, same Turbo that was on the car with the last tune, changed the manifold , looks OK

98 pump @ 22psi = 437.3 awkw , E85 @ 22psi = 462.8awkw and E85 @ 25.5 psi = 475.7awkw

Tractive effort/torque is 974Nm peaking at 5250rpm

A good one to remember :thumbsup:

post-52098-0-65778400-1439630579_thumb.jpg

Hi Mike

Finally had the car tweaked and here are the results, same Turbo that was on the car with the last tune, changed the manifold , looks OK

98 pump @ 22psi = 437.3 awkw , E85 @ 22psi = 462.8awkw and E85 @ 25.5 psi = 475.7awkw

Tractive effort/torque is 974Nm peaking at 5250rpm

A good one to remember :thumbsup:

Not the Turbo you told us that was on there. Mikes opinion was based on that.

Not the Turbo you told us that was on there. Mikes opinion was based on that.

No it isn't , BUT it is the Turbo that was on it when that Dyno tune was done when Mike commented on the way it reacted on the tune, it is the turbo that showed the result!

This Turbo was on the 2.6 before the build.I as told it was the 6262, never 6266 !

This is the Photo of the Turbo model when Jez took it off when doing the manifold, this was the news I was going to post at the end of the Educated Guess.

They said they put this on the car when doing 3.2 build BUT only after they saw that the manifold was off and the Turbo model would be noticed. They said I must have been pissed when they told me. It was never mentioned before or after , not once in all of the emails and other conversations I had with them, not once.

So whether or not it was on the 2.6 IT WAS ON THE 3.2 from the start and this is the Turbo Mike's opinion was based on judging from the Dyno Graph that was posted,

post-52098-0-86716600-1439671531_thumb.jpg

post-52098-0-96457200-1439672370_thumb.jpg

My long awaited RB34 dyno result, while it put me in the 400kw club I was hoping for more.

I believe valve spring float in top end caused by weak tomei springs, a reluctance to fiddle with the exhaust cam timing, and too small a hot side turbo housing prevented the top end from continuing to climb on the E85 higher boost levels.

The lower boost/98 octane tunes showed power climbing towards 8000. Not so in E85 due to the float issue.

Still, above 400kw from 4250 to 6500 makes it a mid range monster.

RB34 (3360cc, 90x89)

Tomei B Procams (10.25/272)

Full race twin scroll, twin 38mm gates, and a Precision 6466 CEA 1.0

E85

post-26553-0-31165200-1439676675_thumb.jpg

  • Like 2

My long awaited RB34 dyno result, while it put me in the 400kw club I was hoping for more.

I believe valve spring float in top end caused by weak tomei springs, a reluctance to fiddle with the exhaust cam timing, and too small a hot side turbo housing prevented the top end from continuing to climb on the E85 higher boost levels.

The lower boost/98 octane tunes showed power climbing towards 8000. Not so in E85 due to the float issue.

Still, above 400kw from 4250 to 6500 makes it a mid range monster.

RB34 (3360cc, 90x89)

Tomei B Procams (10.25/272)

Full race twin scroll, twin 38mm gates, and a Precision 6466 CEA 1.0

E85

Awesome result. Midrange is insane! Can tell that it just wants more (just like the owner :) )

Whack better springs in + bigger turbine housing = 500kw

Do you think the rear housing is such an issue when Mitch's 3.4 pushes over 600kw with it?

Your right, its not a huge issue, but a larger housing and retarded exhaust cam would have delayed the impact of the valve float a little longer and seen more mid-top end gain.

Valve springs are my biggest issue. Paul went through the same thing with his 2.8.

Your right, its not a huge issue, but a larger housing and retarded exhaust cam would have delayed the impact of the valve float a little longer and seen more mid-top end gain.

Valve springs are my biggest issue. Paul went through the same thing with his 2.8.

Even with your current rev limit you'll be moving so quick.

Your right, its not a huge issue, but a larger housing and retarded exhaust cam would have delayed the impact of the valve float a little longer and seen more mid-top end gain.

Valve springs are my biggest issue. Paul went through the same thing with his 2.8.

What's springs are you looking at getting mate

  • 2 weeks later...

26/30

E85 2000 cc inj

Twin bosch 044s and surge tank

Haltech platinum plug in

Gtx 35 1.06

Ported kelford cnc head

Tomei head gasket

Arp head studs

Kelford 272 274 10.85 lift cams

Rips stock bottem end with prep upgrade

Tomei oil pump

Rips 10l L sump and gredy oil cooler

426 kw at all 4

26 psi

Edited by danny14

Create an account or sign in to comment

You need to be a member in order to leave a comment

Create an account

Sign up for a new account in our community. It's easy!

Register a new account

Sign in

Already have an account? Sign in here.

Sign In Now


  • Similar Content

  • Latest Posts

    • Did this end up working? Did you take some pictures?
    • And finally, the front lower mount. It was doubly weird. Firstly, the lower mount is held in with a bracket that has 3 bolts (it also acts as the steering lock stop), and then a nut on the shock lower mount itself. So, remove the 3x 14mm head bolts , then the 17mm nut that holds the shock in. From there, you can't actually remove the shock from the lower mount bolt (took me a while to work that out....) Sadly I don't have a pic of the other side, but the swaybar mounts to the same bolt that holds the shock in. You need to push that swaybar mount/bolt back so the shock can be pulled out past the lower control arm.  In this pic you can see the bolt partly pushed back, but it had to go further than that to release the shock. Once the shock is out, putting the new one in is "reverse of disassembly". Put the top of the shock through at least one hole and put a nut on loosely to hold it in place. Put the lower end in place and push the swaybar mount / shock bolt back in place, then loosely attach the other 2 top nuts. Bolt the bracket back in place with the 14mm head bolts and finally put the nut onto the lower bolt. Done....you have new suspension on your v37!
    • And now to the front.  No pics of the 3 nuts holding the front struts on, they are easy to spot. Undo 2 and leave the closest one on loosely. Underneath we have to deal with the wiring again, but this time its worse because the plug is behind the guard liner. You'll have to decide how much of the guard liner to remove, I undid the lower liner's top, inside and lower clips, but didn't pull it full off the guard. Same issue undoing the plug as at the rear, you need to firmly push the release clip from below while equally firmly gripping the plug body and pulling it out of  the socket. I used my fancy electrical disconnect pliers to get in there There is also one clip for the wiring, unlike at the rear I could not get behind it so just had to lever it up and out.....not in great condition to re-use in future.
    • Onto the rear lower shock mount. It's worth starting with a decent degrease to remove 10+ years of road grime, and perhaps also spray a penetrating oil on the shock lower nut. Don't forget to include the shock wiring and plug in the clean.... Deal with the wiring first; you need to release 2 clips where the wiring goes into the bracket (use long nose pliers behind the bracket to compress the clip so you can reuse it), and the rubber mount slides out, then release the plug.  I found it very hard to unplug, from underneath you can compress the tab with a screwdriver or similar, and gently but firmly pull the plug out of the socket (regular pliers may help but don't put too much pressure on the plastic. The lower mount is straightforward, 17mm nut and you can pull the shock out. As I wasn't putting a standard shock back in, I gave the car side wiring socket a generous gob of dialectric grease to keep crap out in the future. Putting the new shock in is straightforward, feed it into at least 1 of the bolt holes at the top and reach around to put a nut on it to hold it up. Then put on the other 2 top nuts loosely and put the shock onto the lower mounting bolt (you may need to lift the hub a little if the new shock is shorter). Tighten the lower nut and 3 upper nuts and you are done. In my case the BC Racing shocks came assembled for the fronts, but the rears needed to re-use the factory strut tops. For that you need spring compressors to take the pressure off the top nut (they are compressed enough when the spring can move between the top and bottom spring seats. Then a 17mm ring spanner to undo the nut while using an 8mm open spanner to stop the shaft turning (or, if you are really lucky you might get it off with a rattle gun).
    • You will now be able to lift the parcel shelf trim enough to get to the shock cover bolts; if you need to full remove the parcel shelf trim for some reason you also remove the escutcheons around the rear seat release and you will have to unplug the high stop light wiring from the boot. Next up is removal of the bracket; 6 nuts and a bolt Good news, you've finally got to the strut top! Remove the dust cover and the 3 shock mount nuts (perhaps leave 1 on lightly for now....) Same on the other side, but easier now you've done it all before
×
×
  • Create New...