
Removal & Replacement Of Heater Core Skyline - The Right Way, Without Removing The Dash At All

Announcements
-
Similar Content
-
-
Latest Posts
-

-
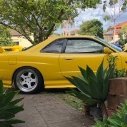
 I could show you guys photos of wrap having been removed properly, and where the wrap was removed, paint underneath is perfect. Sections of the vehicle didn't have wrap on it, and in those areas, the paint work is destroyed because of how long it had been sitting in the hot QLD sun for many many many years. Wrap even still looked decent. Good quality wrap, and removing it properly shouldn't rip off the paint work, unless the paintwork was already shot to pieces before hand.
 -

By jacobzking · Posted
Any write ups on replacing the window motor? I've never messed with them (or window regulators) before. Ever since I've had the car, the driver window would roll down just fine, but most often I'd have the try a few times to get it to go up. As soon as it started to go up, it always goes up smoothly and quietly. Seemed like a bad switch. But now, its stuck in the fully down position and won't come back up. I get =12/-12V coming out of the relay/amp when pressing the switch up/down. So the switch and amp are working. Just a bad motor. I've also applied 12V directly to the motor and nada. Any help on replacing the motor? Can the glass and regulator stay in, and only replace the motor? Or not possible? Thanks!!! -
 You are wrong. That's just Whiteline going along with the incorrect slanguage of the sheeple userbase. They are only correctly known as anti-roll bars. They are only incorrectly known as swaybars. They do do anything to prevent "sway". The swaybars that are fitted to trailler hitches do prevent sway. In the trailer. And they do not look like anti-roll bars. So, take your incorrect infopinion away.
 -

-


Recommended Posts
Create an account or sign in to comment
You need to be a member in order to leave a comment
Create an account
Sign up for a new account in our community. It's easy!
Register a new accountSign in
Already have an account? Sign in here.
Sign In Now