Jump to content
SAU Community

Recommended Posts

Reflecting on thoughts

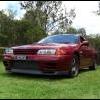
Skaife's wine red JDM was advertised at $70k also (14,000kms)

JDM with Australian notoriety and low KMs is equivalent to an ADM with sub 100k kms

and nothing compares dollar wise to a Gibson motorsport 32 GTR.

Edit. I expected that the majority of ADM's would not exceed $50k for insurance purposes.

Certainly not greater than the market value of the car.

Things are looking up

The Skaife car in Canberra was actually advertised for $130,000.00!

I normally save all the ads but I can't find that one.

Shannons was quite happy to insure my ADM for $60K.

Cheers........

Bob.

Here we go...... Looks good for the kms its travelled......

http://www.carpoint.com.au/all-cars/private/details.aspx?R=SSE-AD-2472741&Cr=0

Bob.

Either removed from sale or SOLD...........

Took a long time. Hopefully it sold and we hear about it.

Bob.

post-78207-0-75502000-1404987800_thumb.jpg

I HAVE THE OFFICIAL COLOUR SPLITS ON ALL ADM VIN'S

Ok......... After 4 years of playing around with this and I know that Marko has put a lot of time and effort into this too, I can confirm I have EVERY colour for all the 100 ADM's. BUT THERE IS A BIG SURPRISE THAT NOBODY KNOWS!!!!!!!!!!

Before I spill the beans on the totals, for a long time rumour had it that there were 37 Red, 37 Silver and 26 Blacks.

For anybody who follows these cars, these numbers never stacked up.

It's absolute bunkum so please disregard it from now on!

We see a lot more Red's than any colour and we see more Blacks than Silvers.

So....... Marko WILL be please to know that the rarest ADM's are the Silver ones with nearly less than 50% of Red ones.

I am going to release some info that has never been common knowledge until today.

Build Number 1 with the VIN 6F4KBNR32A0015145 is NOT Red, Black or Silver!

Have a look at the following and bear in mind that we know that there were 2 batches of 50 cars totally the 100.

BATCH 1

· Build Number 1 - VIN ending in 15145 - Built in early April

· Build Number 2 - VIN ending in 15832 - Built in May as per document.

· The difference is 687 cars.

· Build Number 50 - VIN ending in 16176

· The difference between builds 2-50 is 344 cars exactly half the difference between builds 1 and 2.

· You can see Build 1 is totally out of sync with the other 49 cars.

· Build Number 1 was built in April 1991 not May/June like all the other cars.

BATCH 2

· Build Number 51 - VIN ending in 161899.

· The difference between builds 50 and 51 is 723 cars which makes sense as there was a month break between the batches.

· Build Number 100 – VIN ending in 17266.

· The build number difference between 51-100 is 367 cars.

Every way you look at it Build Number 1 consistently stands out as an odd ball............

It had/has a paint code of KH2....... Gun Metal Grey Metallic.

The other 99 Cars are:

· 44 – AH3 - Red Pearl Metallic

· 31 – 732 - Black pearl Metallic

· 24 – KG1 - Jet Silver Metallic

The mystery is solved.........

And how do I know all of this..........

Mr Nissan told me!

Bob.

Nissan Skyline GTR R32 Australian Delivery - 10 page Nissan Document.pdf

Bob, u never cease to amaze us :)

Your email is pleasing I must say :)

1 question...where is this mystery gun metal grey ADM and how did u validate the vin number 15145 as its not on the supplied Nissan Aust list (was the info based on a verbal confirmation with your Mr Nissan source)?

Bob, u never cease to amaze us :)

Your email is pleasing I must say :)

1 question...where is this mystery gun metal grey ADM and how did u validate the vin number 15145 as its not on the supplied Nissan Aust list (was the info based on a verbal confirmation with your Mr Nissan source)?

Hey mate....... It took some smooth talking but I got there.

It is on the list tucked away on page two. Check out my screen print. Remember these VIN's are not in sequential order.

I manually placed them into excel and the sorted them in ascending order.

Bob.

Attached screenprint.

post-78207-0-40689100-1405428485_thumb.jpg

Ok, it makes sense BUT how did he confirm the paint code as gun metal or better still, does your source know of this car and how did he gain this level of insight?

Nonetheless it's a great spot on your behalf...what made u dig deeper on this build number 15145? Purely due to the fact that it was the odd ball?

15145 is the lowest number so when I asked him to check the paint code he came back with KH2.

I thought it was a mistake but after convincing him to look up a few more, this was the only weird colour.

I convinced him to go through the list to which he begrudgingly did. I am sending him a couple of nice bottles or red!

Nissan naturally has the records for all the cars they sell but nobody ever bother to match the VIN's to colours.

We had the VINs to the ADM's so it was easy providing we could find someone within NISSAN to go through the 100 cars.

It takes about a minute to do each car so there was a bit of time involved.

I can't/won't ever reveal who it was for obvious reasons as I'm sure his boss might ark up for doing this.

Anyway ........ When all else fails...... KEEP TRYING!

Bob.

  • Like 1

ACTUALLY......... I'VE JUST PICKED SOMETHING! I THINK THERE IS A MISTAKE.

If you look at my screen print it may well be a typo and should be 16145 NOT 15145. It sits perfectly between the one above and below it.

This unfortunately screws up a lot of numbers that we use for our cars.

I'll try and make contact with him tomorrow and update the colour of 16145.

Stay tuned.

Bob.

I ran 16145 and 15145 through Japanese Fast (I don't have the aussie one) and 15145 comes up as KH2. 16145 comes up as "invalid" as do a few others from your aussie vin list which means it is much more likely the correct vin is 16145.

Well done pulling this info together.

Ok....... Sorry for the delay but day to day life got in the way.

Attached is a new spreadsheet with the correct build numbers matched to VIN's in sequential order from lowest to highest.

With the correction surrounding the 15145/16145 anomaly (myself included), anyone who has/had a build number under 45 needs to deduct 1.......... I go from 27 back to 26 etc.

The final count of colours within the 100 ADM's is:

  • 44 Red Pearl Metallic's - Paint Code AH3
  • 32 Black Pearl Metallic's - Paint Code 732

  • 24 Jet Silver Metallic's - Paint Code KG1

Based on my research and information supplied within these 50+ pages, these numbers are much more in line than the previously published ones. The 37/Red, 37/Silver and 26/Black theory just doesn't stack up.

Whilst as a matter of respect to my informant, I won't post up a complete list of colours mated to VIN's but if anyone has a one off enquiry, I'm happy to supply the info via PM's.

Cheers,

Bob.

Book1.xlsx

What about the dark green ones? (They were used as pace cars) what colour do they come under?

They were black cars..........BUT..........

They were not part of the 100 special build.

They were part of the 4-6 evaluation cars that Nissan brought in for testing and compliance testing.

I can't confirm whether there were 4 or 6 of these cars I'm getting both numbers quoted from various sources.

As you can see with my attached pics, the VIN is well before the first batch of 50 cars.

The Japanese ID tag doesn't have the 40Z prefix either that were assigned to the ADM's.

Cheers,

Bob.

post-78207-0-28041500-1406012301_thumb.jpg

post-78207-0-69239600-1406012302_thumb.jpg

post-78207-0-35781600-1406012310_thumb.jpg

I have seen one of the ex pace cars. It was completely factory except it was British racing green but was so long ago I wouldn't even know where the car was anymore.

Edit: I was told at the time it was the pace car for the 92 Bathurst and if you watch footage it was definitely a British racing green Aussie Gtr

Create an account or sign in to comment

You need to be a member in order to leave a comment

Create an account

Sign up for a new account in our community. It's easy!

Register a new account

Sign in

Already have an account? Sign in here.

Sign In Now


  • Similar Content

  • Latest Posts

    • Hi, is the HKS  Tower Bar still available ? negotiable ? 🤔
    • From there, it is really just test and assemble. Plug the adapter cables from the unit into the back of the screen, then the other side to the car harness. Don't forget all the other plugs too! Run the cables behind the unit and screw it back into place (4 screws) and you should now have 3 cables to run from the top screen to the android unit. I ran them along the DS of the other AV units in the gap between their backets and the console, and used some corrugated tubing on the sharp edges of the bracket so the wires were safe. Plug the centre console and lower screen in temporarily and turn the car to ACC, the AV should fire up as normal. Hold the back button for 3 sec and Android should appear on the top screen. You need to set the input to Aux for audio (more on that later). I put the unit under the AC duct in the centre console, with the wifi antenna on top of the AC duct near the shifter, the bluetooth antenna on the AC duct under the centre console The GPS unit on top of the DS to AC duct; they all seem to work OK there are are out of the way. Neat cable routing is a pain. For the drive recorder I mounted it near the rear view mirror and run the cable in the headlining, across the a pillar and then down the inside of the a pillar seal to the DS lower dash. From there it goes across and to one USB input for the unit. The second USB input is attached to the ECUtec OBD dongle and the 3rd goes to the USB bulkhead connected I added in the centre console. This is how the centre console looks "tidied" up Note I didn't install the provided speaker, didn't use the 2.5mm IPod in line or the piggyback loom for the Ipod or change any DIP switches; they seem to only be required if you need to use the Ipod input rather than the AUX input. That's it, install done, I'll follow up with a separate post on how the unit works, but in summary it retains all factory functions and inputs (so I still use my phone to the car for calls), reverse still works like factory etc.
    • Place the new daughterboard in the case and mount it using the 3 small black rivets provided, and reconnect the 3 factory ribbon cables to the new board Then, use the 3 piggyback cables from the daughterboard into the factory board on top (there are stand offs in the case to keep them apart. and remember to reconnect the antenna and rear cover fan wires. 1 screw to hold the motherboard in place. Before closing the case, make a hole in the sticker covering a hole in the case and run the cable for the android unit into the plug there. The video forgot this step, so did I, so will you probably. Then redo the 4 screws on back, 2 each top and bottom, 3 each side and put the 2 brackets back on.....all ready to go and not that tricky really.      
    • Onto the android unit. You need to remove the top screen because there is a daughterboard to put inside the case. Each side vent pops out from clips; start at the bottom and carefully remove upwards (use a trim remover tool to avoid breaking anything). Then the lower screen and controls come out, 4 screws, a couple of clips (including 3 flimsy ones at the top) and 3 plugs on the rear. Then the upper screen, 4 screws and a bunch of plugs and she is out. From there, remove the mounting brackets (2 screws each), 4 screws on the rear, 2 screws top and bottom and 3 screws holding in the small plates on each side. When you remove the back cover (tight fit), watch out for the power cable for the fan, I removed it so I could put the back aside. The mainboard is held in by 1 screw in the middle, 1 aerial at the top and 3 ribbon cables. If you've ever done any laptop stuff the ribbon cables are OK to work with, just pop up the retainer and they slide out. If you are not familiar just grab a 12 year old from an iphone factory, they will know how it works The case should now look like this:
    • Switching the console was tricky. First there were 6 screws to remove, and also the little adapter loom and its screws had to come out. Also don't forget to remove the 2 screws holding the central locking receiver. Then there are 4 clips on either side....these were very tight in this case and needed careful persuading with a long flat screw driver....some force required but not enough to break them...this was probably the fiddliest part of the whole job. In my case I needed both the wiring loom and the central locking receiver module to swap across to the new one. That was it for the console, so "assembly is the reverse of disassembly"
×
×
  • Create New...