

Announcements
-
Similar Content
-
-
Latest Posts
-
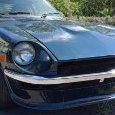
 As discussed in the previous post, the bushes in the 110 needed replacing. I took this opportunity to replace the castor bushes, the front lower control arm, lower the car and get the alignment dialled in with new tyres. I took it down to Alignment Motorsports on the GC to get this work done and also get more out of the Shockworks as I felt like I wasn't getting the full use out of them. To cut a very long story short, it ended up being the case the passenger side castor arm wouldn't accept the brand new bush as the sleeve had worn badly enough to the point you could push the new bush in by hand and completely through. Trying a pair of TRD bushes didn't fix the issue either (I had originally gone with Hardrace bushes). We needed to urgently source another castor arm, and thankfully this was sourced and the guys at the shop worked on my car until 7pm on a Saturday to get everything done. The car rides a lot nicer now with the suspension dialled in properly. Lowered the car a little as well to suit the lower profile front tyres, and just bring the car down generally. Eternally thankful for the guys down at the shop to get the car sorted, we both pulled big favours from our contacts to get it done on the Saturday. Also plugged in the new Stedi foglights into the S15, and even from a quick test in the garage I'm keen to see how they look out on the road. I had some concerns about the length of the LED body and whether it'd fit in the foglight housing but it's fine. I've got a small window coming up next month where I'll likely get a little paint work done on the 110 to remove the rear wing, add a boot wing and roof wing, get the side skirt fixed up and colour match the little panel on the tail lights so that I can install some badges that I've kept in storage. I'm also tempted to put in a new pair of headlights on the 110. Until then, here's some more pictures from Easter this year.
 -

By joshuaho96 · Posted
I would put a fuel pressure gauge between the filter and the fuel rail, see if it's maintaining good fuel pressure at idle going up to the point when it stalls. Do you see any strange behavior in commanded fuel leading up to the point when it stalls? You might have to start going through the service manual and doing a long list of sensor tests if it's not the fuel system for whatever reason. -

-
 Hi, Just joined the forum so I could share my "fix" of this problem. Might be of use to someone. Had the same hunting at idle issue on my V36 with VQ35HR engine after swapping the engine because the original one got overheated. While changing the engine I made the mistake of cleaning the throttle bodies and tried all the tricks i could find to do a throttle relearn with no luck. Gave in and took it to a shop and they couldn't sort it. Then took it to my local Nissan dealership and they couldn't get it to idle properly. They said I'd need to replace the throttle bodies and the ecu probably costing more than the car is worth. So I had the idea of replacing the carbon I cleaned out with a thin layer of super glue and it's back to normal idle now. Bit rough but saved the car from the wreckers 🤣
 -

By GabsReDeal · Posted
After my last update, I went ahead with cleaning and restoring the entire fuel system. This included removing the tank and cleaning it with the Beyond Balistics solution, power washing it multiple times, drying it thoroughly, rinsing with IPA, drying again with heat gun and compressed air. Also, cleaning out the lines, fuel rail, and replacing the fuel pump with an OEM-style one. During the cleaning process, I replaced several hoses - including the breather hose on the fuel tank, which turned out to be the cause of the earlier fuel leak. This is what the old fuel filter looked like: Fuel tank before cleaning: Dirty Fuel Tank.mp4 Fuel tank after cleaning (some staining remains): Clean Fuel Tank.mp4 Both the OEM 270cc and new DeatschWerks 550cc injectors were cleaned professionally by a shop. Before reassembling everything, I tested the fuel flow by running the pump output into a container at the fuel filter location - flow looked good. I then fitted the new fuel filter and reassembled the rest of the system. Fuel Flow Test.mp4 Test 1 - 550cc injectors Ran the new fuel pump with its supplied diagonal strainer (different from OEM’s flat strainer) and my 550cc injectors using the same resized-injector map I had successfully used before. At first, it idled roughly and stalled when I applied throttle. Checked the spark plugs and found that they were fouled with carbon (likely from the earlier overly rich running when the injectors were clogged). After cleaning the plugs, the car started fine. However, it would only idle for 30–60 seconds before stalling, and while driving it would feel like a “fuel cut” after a few seconds - though it wouldn’t fully stall. Test 2 – Strainer swap Suspecting the diagonal strainer might not be reaching the tank bottom, I swapped it for the original flat strainer and filled the tank with ~45L of fuel. The issue persisted exactly the same. Test 3 – OEM injectors To eliminate tuning variables, I reinstalled the OEM 270cc injectors and reverted to the original map. Cleaned the spark plugs again just in-case. The stalling and “fuel cut” still remained. At this stage, I suspect an intermittent power or connection fault at the fuel pump hanger, caused during the cleaning process. This has led me to look into getting Frenchy’s fuel hanger and replacing the unit entirely. TL;DR: Cleaned and restored the fuel system (tank, lines, rail, pump). Tested 550cc injectors with the same resized-injector map as before, but the car stalls at idle and experiences what feels like “fuel cut” after a few seconds of driving. Swapped back to OEM injectors with original map to rule out tuning, but the issue persists. Now suspecting an intermittent power or connection fault at the fuel pump hanger, possibly cause by the cleaning process.
-

1.thumb.png.36afd656b26d55f5d425fc76e21561f2.png)


Recommended Posts
Create an account or sign in to comment
You need to be a member in order to leave a comment
Create an account
Sign up for a new account in our community. It's easy!
Register a new accountSign in
Already have an account? Sign in here.
Sign In Now