Jump to content
SAU Community

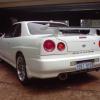
Hanaldo's R34 Gt(T) Skyline Build


Recommended Posts

I purchased a brand new alloy JJ airbox for $100 of SAU which was a score and then all i needed was a few little bits and pieces so all up maybe $110 and its already satin black so for me it was a bargain... You will most likely want a shiny one though :nyaanyaa:

Carbon nyaanyaa.gif

Link to comment
Share on other sites

Mmmm that would be nice... The JJ ones are $249 though -

post-47580-0-76309500-1332731795_thumb.jpg

AND with the amount of mods i had to do to make the alloy one sit nicely on the body, i wouldn't be overly happy doing that to a Carbon one :glare:

BUT would really suit you build....... LOL

A mate just purchased some Vacuum Forming doo-dad that can be used to make Carbon Fibre moulds etc.... Shame your on the other side of the work though :laugh:

Link to comment
Share on other sites

Right, yesterdays progress:

Bolted IAC valve to the new plenum:

540313_10150615207747541_519882540_9444660_2048642038_n.jpg

And finally bolted the plenum on. This part was a right pig I must add, I've got so many cuts on my arm its not funny, but it's mostly on now. Just the very front bolt that is proving to be impossible, no idea how I'm going to get that one on.

562771_10150615206892541_519882540_9444654_328810526_n.jpg

534844_10150615207412541_519882540_9444658_307875159_n.jpg

Needs less high mount wastegate and more high mount turbo :P

558797_10150615207272541_519882540_9444657_991709589_n.jpg

Then made the long trip to MTQ to pick up some silicon joiners to get started on the intercooler piping; saw this while I was there and thought it was funny :P

553670_10150615208412541_2099463309_n.jpg

535199_10150615208517541_519882540_9444662_1917345130_n.jpg

Back to business, measured up the piping and it doesn't look like it's going to be as hard as first thought. Need to find someone who can weld alloy so I can weld the IAC fitting on though, that will be the hard part confused.gif With that done there isn't a lot more that we could do without a drop saw, so moved onto trying to fit the throttle cable. More frustration, it doesn't fkn fit. Plazmaman have put the mounting bracket for it about 10mm too far forward, even with it fully adjusted there is too much play in the cable:

564219_10150615208742541_519882540_9444663_1909693353_n.jpg

305683_10150615208952541_519882540_9444665_709392236_n.jpg

Gives me about an inch of free play in the throttle and means I can't open the throttle fully, it only opens about 90% with the accelerator to the floor. Very pissed off about that as how hard would it be for Plazmaman to put the bracket 10mm further back and then there would be no problems at all, it would fit perfectly.

Anyway, after deciding playing around with that anymore was a waste of time, I finally got round to finishing off the washer bottle relocation:

559087_10150615209257541_519882540_9444668_1553432827_n.jpg

540043_10150615209417541_519882540_9444669_1407074738_n.jpg

319769_10150615209542541_519882540_9444670_1160706582_n.jpg

563805_10150615210037541_519882540_9444672_991090846_n.jpg

And that's pretty much it. Tried to start plumbing in the IAC valve again but didn't have the right size hose, so will pick some up tomorrow. Can then start plugging sensors back in and trying to figure out vacuum lines etc. I also messed around with the catch can some more, as Brad told me if I can mark the can where it fouls on the piping then there are no restrictions as to how it can be modified. So hopefully that won't affect the catch cans ability too much.

Link to comment
Share on other sites

Those CAT turbos are f*cking heavy!! I had to move them all around and repack them, not an easy job! Is James still there? I need to go visit them sometime, haven't been back since I left.

Ah yes, I forgot. James remembered me and gave me a discount, dude is a legend :P I told him you said hey and he said to tell you "the ranga has left, it's safe to come back" haha.

Link to comment
Share on other sites

Just thinking out loud here martin but have you checked you cant also adjust the throttle length by the actual pedal also?

I dont have my car on me to check but worth the 2 min look under the dash to see. Also put the throttle cable around the strut tower properly unless u already have.

Thinking out loud is very welcome in this thread mate :P Thanks for the suggestion, I'll have a look when I get back to it.

It didn't make much difference to the fitment where I ran the throttle cable. I have it going around the strut tower properly, but I even tried tucking it under the brake master cylinder, etc. Doesn't make a difference because the adjuster is screwed all the way out, that's where it has to sit. The bracket is quite simply too far forward, it needs to be about 10-15mm further back. how Plazmaman haven't sorted that out I have no idea, but it's wrong. You can see in that photo that if Plazmaman had simply positioned the bracket a little bit further back then it would fit perfectly.

Link to comment
Share on other sites

i had the same issue with my throttle cable on my CPC plenum, had to get the throttle cable bracket modded, luckily it was off the car at the time.

just a few minor speed bumps, you'll get there eventually mate :thumbsup:

Link to comment
Share on other sites

i had the same issue with my throttle cable on my CPC plenum, had to get the throttle cable bracket modded, luckily it was off the car at the time.

just a few minor speed bumps, you'll get there eventually mate :thumbsup:

The thing that is strange is that our two setups look like they are in the same position yet his cable is slack and mine isn't... Still gotta do some measurements :cheers:

Link to comment
Share on other sites

that is a bit weird, but his is originally a non-turbo model isnt it...?

Yep, but the cable looks to be the same in most ways... So not sure if they would be slightly different but i would doubt it as it would just cost more to produce for no advantage? :ermm:

PS - Do some work! :P

Link to comment
Share on other sites

UPDATES!!! :rant:

LOL :cool:

Lol sorry, car is too far away to work on during the week :( Closest I have to an update is I just went and bought $100 worth of hose, hose clamps, and y-pieces so I can get everything plumbed back in down.gif Money really doesn't go far these days haha...

i had the same issue with my throttle cable on my CPC plenum, had to get the throttle cable bracket modded, luckily it was off the car at the time.

just a few minor speed bumps, you'll get there eventually mate :thumbsup:

How does everyone feel about say, 50 washers back to back to space the bracket out? :P

The thing that is strange is that our two setups look like they are in the same position yet his cable is slack and mine isn't... Still gotta do some measurements :cheers:

Yeh this is confusing. Are you sure your cable hasn't been modified? Or that it is actually tight? Have you checked to see if you have any additional movement in the butterfly with your foot flat on the accelerator??

Mine is very very loose though, it's easily noticeable.

that is a bit weird, but his is originally a non-turbo model isnt it...?

I don't know how much of a difference this would make though. I mean the engine bays are the same, no difference there. Even if the workshop used the stock GT throttle cable instead of using the one from the GTT, the GT and GTT plenums are similar at least position wise, and the cable used to fit perfectly on the stock plenum. After a bit of research, it turns out I'm not the only R34 owner having this problem with a Plazmaman plenum: http://www.skyline-owners-club.com/forums/showthread.php?t=33374&page=4&highlight=Turbob12

So I'm quite sure that it's just an oversight on Plazmaman's behalf.

Link to comment
Share on other sites

get plasmaman to send you a 25mm long 4mm walled alloy tube to use as a spacer, easiest solution

Yehhh just means more waiting, and it really isn't a good solution anyway. I'll just have to get it sorted.

Plazmaman's sale team are muppets anyway, they don't know what they are talking about. I'm sure they would just tell me that the stock throttle cable fits and I must be doing something wrong.

Link to comment
Share on other sites

Wow that guys engine bay looks Teh Ghey! Not enough Black :domokun:

Pretty sure mine is sweet mate, checked it ages ago when it first went on and i still have a little adjustment left too....

Link to comment
Share on other sites

ok so proper solution get someone to tig weld it in a bit further up...

do you know someone who tig welds...? if not it'll take longer to get done than asking plasmaman for an adapter of sorts

Link to comment
Share on other sites

Ah yes, I forgot. James remembered me and gave me a discount, dude is a legend :P I told him you said hey and he said to tell you "the ranga has left, it's safe to come back" haha.

Yeah, James is an awesome bloke! Nick's gone? Hopefully I can get my job back then :P

Link to comment
Share on other sites

Right, time for some more updates. Got through a lot of work this weekend after a couple weeks without much progress, and I'm happy to say the car is very close to being finished! If it hadn't been for the setbacks with the brake booster check valve and the throttle cable not fitting, it mayyy have been possible to get it finished yesterday, but too bad :( Aiming to have it ready to start next week, and then I'll play around with the NIStune to see if I can get it to idle ok with the new injectors so we can see if it has any leaks or other issues. Will book it in for a tune once I know I can get all the issues sorted out this week, so with any luck it may be getting tuned either next week or the week after :D

Anyway, this is where we are at:

First things first, we wanted to get the intercooler piping sorted out, as we thought it would be the hardest job on the list. As it turned out, it was actually one of the easiest jobs. It was as simple as buying a 3" to 2.5" 90 degree reducer, a 2.5" 90 degree bend, a few trial fitments to see where we needed it to sit, modifying the existing cold side piping from the FMIC, and then trimming down the 2.5" 90 degree bend. I didn't get any pictures of the existing cooler piping before we cut it, but it's your standard FMIC crossover-type piping (you can see it in some of my earlier photos if you're interested):

IMG_0232.jpg

IMG_0234.jpg

(for those on the ball, you'll notice I decided to respray the one hard pipe while I had it off as it was somewhat dinged up as you can see in the above picture)

IMG_0250.jpg

The small metal bend is a piece of the original cooler piping. It was luckily the exact shape that we needed, and in the exact right place where we needed to cut the hard pipe. So finally something went our way. With that all measured and cut, this is how it sits:

IMG_0248.jpg

IMG_0233.jpg

IMG_0235.jpg

It fits perfectly. The small metal bend even has enough space to weld a fitting for the IAC valve on:

IMG_0249.jpg

IMG_0251.jpg

More winning! Yes, I'm aware of how tacky it all looks, but it will do for now. I just needed something to get it together so I could get the car on the dyno and tuned, then I can drive it to my fabricator so he can make me some nice stainless steel piping with a -12 Speedflow fitting for the IAC valve. So it will look much better in a few weeks, but this will do for now. I will also be flaring the ends of the piping that I cut so the silicon joiners have some assistance in holding 20+psi.

With that done, time to do the rest of the plumbing and wiring. Starting with the IAC valve, I plumbed it all up so it would be as neat as possible:

IMG_0239.jpg

IMG_0244.jpg

Unfortunately with so many hoses in one place, it is very difficult to get it looking nice. But I did the best I could, and all up those three hoses required about 2.5-3 meters for me to run it neatly haha. I still need to get the missing vacuum hose you can see there for the IAC valve, but as we needed to get the fitting welded on first I haven't bothered with that yet.

While I was at it, I also plumbed up the PCV valve, which I'm going to leave functional; and I plumbed in the rest of the vacuum hoses. So far I've gone through about 7 meters of 3/16 fuel hose, 5 meters of 5/16 fuel hose, 3 meters of 11/32 VL brake booster hose, and a couple of other lengths of various size hoses. I also bought brand new hose clamps to put on them all as I thought I may as well replace the standard 'pinch-type' ones while I was at it. Add in the various t-pieces, y-pieces, conduit, electrical connectors, and other various small pieces, and this is where costs start to spiral out of control. The hose and clamps alone have cost me about $160 so far, not including the braided line and EFI hose I used for the fuel system. Admittedly I have forked out a bit more so that I could replace things that didn't necessarily need replacing, but that's how my whole build has gone so far so no point stopping now :D I feel the output is worth the gain as well, as everything is looking very neat and shiny with so much being replaced.

Moving on, we then got stuck into the wiring. Starting with the TPS:

IMG_0237.jpg

We managed to run all the looms and plugs so that the only plug that needed extending was the IAC valve. I forgot to take any close up pictures of that, but if you have a look at the earlier pictures of the IAC then you can juuust see it there. I'm quite happy with how neatly we did that, especially as I used it as an opportunity to teach my mates younger brother (who is infatuated with my car more than I am haha :P ) how to solder. I figured any mistakes he made would be easy enough to fix up, and it meant the world to him so I'm quietly confident of my passage into heaven when the time comes laugh.gif Anyway, he did a very good job and I didn't have to change anything, so I got him to heat shrink it up and then put it all into some conduit for neatness.

Speaking of conduit, we decided to do the same with all the visible wiring looms such as the TPS, the injector harness, etc. etc.

IMG_0246.jpg

The injector harness looks neater, but bulkier, which ruins it a bit. I think it still looks better than the old factory tape, so I'm going to leave it. Thoughts??

For the rest of the wiring, the original plan was to hide it all underneath the plenum. After trialing that idea, we decided that whilst it looked ok from the top, it was very very messy underneath the plenum and would have made it incredibly hard to get to anything under there, let alone diagnose and locate any problems. So we scrapped that idea and pulled it all out again. What we ended up doing was making a bracket for some of the sensors, and then bunching most of the wiring together in the top left hand corner of the engine bay under my alarm box, near the grommet where the throttle cable and other things run back into the cabin:

IMG_0245.jpg

While I'm not exactly thrilled with how 'cop-friendly' it is or the way it looks, it still looks fine just looking at the engine bay unless you go poking your head into that corner. There were quite a few hoses and wires running back through that grommet there anyway, so we decided that considering it didn't make it look a lot messier, the ease of access aspect of it made it the best option. Of course we could have extended all the wiring and hidden it better, but I decided against that as anyone with a bit of electrical knowledge would know that joins in wiring are asking for trouble. So instead of risking countless electrical problems, I decided on the 'slightly messier but still ok' hiding spot for everything :)

Then it was just a case of a few finishing touches, like replacing the stock clamps on the radiator hoses that are notorious for cutting into the hose, and replacing and rerouting the hoses on my charcoal canister:

IMG_0241.jpg

IMG_0242.jpg

It's amazing how much of a difference something so simple can make, but just those hose clamps on the radiator hose neatened up the whole setup a massive amount. I'm also very happy with the hoses on the charcoal canister, as we managed to run them in such a way that what you can see in that photo is all you can see in real life too, it's all very well hidden. So with all that done, this is essentially how things are looking now (plus the intercooler piping which I had already removed again before these photos):

IMG_0240.jpg

IMG_0238.jpg

The only things left to do now are weld up the fitting for the IAC valve, source a replacement check valve for the brake booster hose, and figure out what the hell I'm going to do about the damn throttle cable. I had a look at the other end of the throttle cable to see if it could be adjusted in-cabin, but I can't see any easy way of doing it in there either. So still not sure what I'm going to do there. The other issue is the whole catch can situation. I'll be restoring the breathers to the factory setup for now, and I'll have to jam the factory overflow bottle back in there as well. Haven't heard back from Brad about how to sort it out, so it will have to be ditched for now. I'm tempted to just cut my losses and sell it and get someone local to fabricate something for me, but Brad is the best in the business so I'm reluctant to do so. Time shall tell, for now I'm just focusing on getting the car back on the road.

Edited by Hanaldo
Link to comment
Share on other sites

Create an account or sign in to comment

You need to be a member in order to leave a comment

Create an account

Sign up for a new account in our community. It's easy!

Register a new account

Sign in

Already have an account? Sign in here.

Sign In Now


  • Similar Content

  • Latest Posts

    • I think last I checked it was 35cm from fender to wheel center. I heard u can go up to 45-48cm before handling his impacted. But I need to check again. I know I was about 1.2 cm off being close to max recommended. 
    • You'd need to weld on an external gate to achieve that number though. I can't remember seeing anyone make 500hp at the wheels with the stock manifold / internally gated turbo.
    • Suspension Component Question Looking for some feedback based on people's experiences! I know this has been loosely covered in other threads but I can't find any direct answers/experience. I'm up for some bush/rod replacements and was interested in a hybrid approach between hardened rubber and pillowball kit. Why not choose one or the other? Well, this is for my daily driver, which I track once or twice a year. I like a stiff car and a sporty feel but I don't want to compromise the chassis too much with 100% pillowball gadgetry.  I know from experience and a tonne of reading that not all components affect ride quality in the same way - eg. in my case, coilover top mounts should be hardened rubber as pillowball transfers way too many undesirable qualities and doesn't have much more upside than a good hardened rubber. But, pillowball tension rods translate to much better turn-in/steering response and make the car significantly sharper, without negatively impacting ride quality in a significant way.  I'm not TOO bothered by NVH (to a degree). So, with context out of the way, does anyone have any experience with a hybrid approach as mentioned above? I'm going to replace all components over time so am seeking guidance on: - front tension rods - upper camber arms - rear lower control arm - rear traction rod - rear upper camber arm - rear toe adjuster rod  Secondly, is there any reason why this is a bad idea? Or any other info/wisdom that I might not be considering. Cheers 🫶
    • That's good to hear I'll stick with the stock I hear they are good for 500hp and I'm only shooting for 350-400 once I can get this thing sorted and get to actually building it. 
    • The stock one will outperform any aftermarket standard position exhaust manifold. If you don't believe me, do a back to back test (same turbo, same boost, same timing) and you'll be super surprised.
×
×
  • Create New...