Jump to content
SAU Community

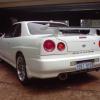
Hanaldo's R34 Gt(T) Skyline Build


Recommended Posts

Small update, the head is back on and looking sexy as :D :D

This guy :laugh:

Martin i hope you are going to coat the little bits like the radiator brackets etc? Come on man!!

The radiator mounts are rubber?? Haha. I was thinking about pulling all the things like alternator, brackets, etc. and getting them coated. But ultimately it means more time off the road, more money, blah blah blah. I'm really keen to just drive it again, especially with Powercruise coming up and I still need to run the new head gear in and then get it tuned. I can pretty things up some more later :)

your radiator has seen better days LOL

It has lol. Not sure what happened there, as the intercooler and aircon condenser are perfectly clean :/

Link to comment
Share on other sites

More updates :D

First off, my mate bolted the head back on and timed everything during the week after work. Tom I know you're reading this, so huge thanks to you mate :D

303648_10150995417042541_813002970_n.jpg

Quick shot of the inlet ports

523429_10150995416592541_403810490_n.jpg

303644_10150995416122541_533751804_n.jpg

Cam covers back on. Note, they aren't actually as blue/purple as they look in the pictures. Strange lighting or something I dunno.

226146_10150995415622541_1050252211_n.jpg

Cams in and timed

378659_10150995417572541_627663615_n.jpg

Timing cover on

377049_10150995418557541_101782815_n.jpg

293390_10150995419112541_1837596442_n.jpg

Exhaust mani back on. Hideous I know, but it's the last time it will be going back on.

225149_10150995419707541_1608029579_n.jpg

Radiator cleaned up again

378366_10150995420262541_1967729396_n.jpg

Time for some fun stuff, making up the turbo lines

549591_10150995422742541_1318368696_n.jpg

399740_10150995422297541_1406690024_n.jpg

527049_10150995420842541_1811005987_n.jpg

284634_10150995421847541_335579114_n.jpg

For the second water line, the factor hard pipe uses a push on fitting on one end so I couldn't go braided the whole way. I ended up using a 100 series straight hose end to a -6 male-to-male coupler, then a 100 series push on hose end on the other side. Like so

582743_10150995426852541_1986370523_n.jpg

Unfortunately I bought the wrong fitting for the oil drain, I need two 45 degree fittings rather than the 45 degree and straight that I bought. So will do that one later after I've got the right fittings.

In the mean time, I finished cleaning up the intake manifold and painted it up:

320192_10150995423727541_570133061_n.jpg

553858_10150995424237541_1075653381_n.jpg

Then it was time to put the radiator back in

531083_10150995425317541_1935719413_n.jpg

Cleaned up some more of the wiring, and in the process noticed how much my boost controller wiring dislikes my turbo

217979_10150995425807541_1401243971_n.jpg

Mate fixed that up by cutting, soldering and individually heat shrinking each wire, forgot to take photos. I will be running all the wiring close to the turbo through some firesleeve to hopefully prevent that happening in the future.

Our goal for the day was to get the inlet manifold back on, which we did

528027_10150995427492541_1037953441_n.jpg

391536_10150995428297541_893207659_n.jpg

With day light running out and not a lot left we could do, we decided to just sit the Plazmaman back on to see how it's looking:

528070_10150995429467541_1675824042_n.jpg

In doing so, we discovered that the front stud in the inlet manifold was very warped. When we removed the plenum we needed to use a pry bar to get it off the runners, and at the time assumed that the bolt holes had not been drilled out big enough. But when refitting it, we checked that the bolt holes are 8.5mm while the bolts are 8mm. So when we had a look at the studs, we noticed the front one had been severely warped.

So I will need to replace that stud before we can bolt the plenum back on. There are a number of issues like this all over, ie. the alternator plug has been mangled and needs replacing, I've misplaced my valley cover bolts, etc. etc. So it's close to being done but may still be a few weeks away.

Link to comment
Share on other sites

I used the Allen key head stainless bolts for the valley cover and cam covers man, pretty cheap and look sweet az!!

Updates look awesome, good to see it coming together....

Link to comment
Share on other sites

Yep I'll do the same, gonna go pick some up today :D

It's the fkn alternator plug that is shitting me at the moment. Does anyone know if Bosch or someone do a replacement plug for these things? Will post up in the maintenance section.

Link to comment
Share on other sites

just read this thread. great right up. good to see the details you are putting in :)

hopefully you get this thing back on the road really soon!!

:yes: makes my attempt look lame

Link to comment
Share on other sites

Thanks guys :D

Small update today, this arrived in the mail:

378597_10150997135677541_1765669828_n.jpg

Also sorted out the bolts for the carbon covers, though some holes will need to be redrilled. And I bought new auxiliary belts. Tried to track down a new alternator plug but it's proving to be a farkin pain in the ass.

Link to comment
Share on other sites

Another update. Car is ALMOST ready to go! I reckon maybe this weekend, if we get our act together. First of all, I got the fuel rail sorted out, this is the old plug:

303590_10151005675577541_360047578_n.jpg

Unfortunately the rail got a bit damaged in the process which is a bit depressing, but we managed to fix it up so it's just cosmetic damage. Still a bit miffed because the rail is essentially just for cosmetics, but I'm so keen to get the car going again I'm just gonna move on. With that done, we were able to fit the injectors and rail back in:

284760_10151005675867541_602814799_n.jpg

Still haven't replaced the stud for the plenum, so that was as far as we got there. But I went and got the 45 degree fitting and made up the turbo oil drain:

294546_10151005675677541_354062847_n.jpg

419327_10151005676287541_811580159_n.jpg

And used some fire sleeve to try to protect the wiring that wasn't loving the turbo:

546713_10151005676517541_1449295752_n.jpg

That's about as far as we got this weekend, couple of late nights meant we were low on energy. But my mate did also find that the Hyundai 'race motor' (inside joke :P ) we have laying around uses the exact same alternator plug as my car, so that was a win! Will replace that next weekend. Then the only thing holding it back is the manifold to turbo studs, which should HOPEFULLY be sorted during the week. Then all that's left to do is put the auxiliary belts back on and reassemble the intake and exhaust sides! Almost time to get excited!

Link to comment
Share on other sites

Ahh frustrating day. After another late night last night, this is where I got:

First, replaced the turbo studs with more of the same from MTQ, fingers crossed they don't warp again but I don't have much faith :thumbsdown: Then bolted the turbo back up:

386022_10151012488967541_161390991_n.jpg

From here I just kept on going with the hot side until it was all back together:

184133_10151012489207541_340644545_n.jpg

Then this morning, we put the new auxiliary belts on:

394329_10151012489407541_1320333851_n.jpg

Fit in the catch can before doing up the intake side of things, decided I'm going to get the washer bottle modified so I'm not crushing the headlight wiring, cos it's tight in there:

643956_10151012489682541_717944814_n.jpg

395261_10151012489547541_1734147040_n.jpg

Then it was pretty much a case of putting everything back together, which wasn't too difficult. So we bolted down the plenum and connected up all the vacuum lines and IAC lines and everything, took about an hour or so. So with the car ALMOST ready to start, all I needed to do was make up the hoses for the catch can... I made up the first one no problem, looking great. Then this happened:

260022_10151012490447541_1299521968_n.jpg

Anyone who has put together braided hose before will know how easy it is to thread, but TWO threads. Two threads is all that is stopping this:

644490_10151012490297541_1281426674_n.jpg

Looking like this:

253466_10151012490057541_1209092221_n.jpg

And firing up, probably for another week or so. So god damn frustrated. Just want to drive the f**king thing.

So anyway, not a lot I can do now, the car is done except for that hose. Will pick up a fitting during the week when I can, so it will start next week.

Link to comment
Share on other sites

Is it just a breather hose? If so just leave it vented to atmo just so you can start it! The idle from those cams will remove all the pain suffered during the build.

Oh and BTW that engine bay looks awesome!! Wish i had the coin to make mine look that neat.

Edited by msports180
Link to comment
Share on other sites

Yes, that is what we did. Spat fuel everywhere when I first primed the fuel pump, had to take the end fittings back out and put a little thread sealant on them. But then started first turn first time, no bad noises, everything ok :D Spot on about the cams! Fark me they sound amazing! I was expecting maybe a little change to the note, but it's completely different! Here's a video of first start up which unfortunately doesn't do them justice:

That was yesterday. Then this morning, feeling energized by having started the car, I decided I was going to just force the fitting onto the hose and bind it up if necessary, just for the mean time so I could get the thing home. BUT, when I went to put the hose end together, it squared itself up and went together easily! I took it apart again to double check, and indeed it hasn't cross-threaded at all! So with that all good, I managed to finish the thing up! A pity about the Speedflow fitting and push on hose, sort of clutters things up a bit.

576973_10151013646372541_201449150_n.jpg

But here it is, all back together and running!

644709_10151013646232541_534907937_n.jpg

(Warped) front bar back on:

402332_10151013646847541_1259206763_n.jpg

Here is another video of the car idling while we were bleeding the cooling system. Funny little moment at the end :P

So basically, the car is done. I would have driven it home today, except the brakes wouldn't bleed properly :( Had clear fluid to all 4 corners with no air coming out, and the pedal feels firm and as it should when the engine is off. But start the engine up and the pedal goes to the floor. So I'm thinking there is possibly a leak or a problem with the brake booster line. Trust my car to have issues with the brakes after all the work we did to the engine :glare: lol. Anyway I ran out of time today, but will hopefully head back up to my mates tomorrow after work to sort it out, then I'll drive it home.

Edited by Hanaldo
Link to comment
Share on other sites

Yes, that is what we did. Spat fuel everywhere when I first primed the fuel pump, had to take the end fittings back out and put a little thread sealant on them. But then started first turn first time, no bad noises, everything ok :D Spot on about the cams! Fark me they sound amazing! I was expecting maybe a little change to the note, but it's completely different! Here's a video of first start up which unfortunately doesn't do them justice:

That was yesterday. Then this morning, feeling energized by having started the car, I decided I was going to just force the fitting onto the hose and bind it up if necessary, just for the mean time so I could get the thing home. BUT, when I went to put the hose end together, it squared itself up and went together easily! I took it apart again to double check, and indeed it hasn't cross-threaded at all! So with that all good, I managed to finish the thing up! A pity about the Speedflow fitting and push on hose, sort of clutters things up a bit.

576973_10151013646372541_201449150_n.jpg

But here it is, all back together and running!

644709_10151013646232541_534907937_n.jpg

(Warped) front bar back on:

402332_10151013646847541_1259206763_n.jpg

Here is another video of the car idling while we were bleeding the cooling system. Funny little moment at the end :P

So basically, the car is done. I would have driven it home today, except the brakes wouldn't bleed properly :( Had clear fluid to all 4 corners with no air coming out, and the pedal feels firm and as it should when the engine is off. But start the engine up and the pedal goes to the floor. So I'm thinking there is possibly a leak or a problem with the brake booster line. Trust my car to have issues with the brakes after all the work we did to the engine :glare: lol. Anyway I ran out of time today, but will hopefully head back up to my mates tomorrow after work to sort it out, then I'll drive it home.

Does your car have abs? I had the exact same problem when i installed Alcons on my car try cracking the lines to the abs box and make sure there is no air in there :thumbsup:
Link to comment
Share on other sites

Im almost 100% that will sort it Marty I done my head for days when i had that exact same issue Even blew $120 on a vacuum brake bleeder lol Just chase the lines from the BMC over to the abs box and give em a crack.

Lemme know how it goes mate as im hoping all my cussing and carrying on out the front of my house/making an ass outta myself in front of the neighbours every afternoon after work will benefit somebody lol :P

Link to comment
Share on other sites

I'm also pretty positive that will be it, as we had to remove the brake lines from the master cylinder to clear the plenum when we were taking the head off... So there would be air in the ABS module for sure. Did it work just cracking the lines, from what I have read you need a special service tool to bleed the ABS unit??

Link to comment
Share on other sites

Create an account or sign in to comment

You need to be a member in order to leave a comment

Create an account

Sign up for a new account in our community. It's easy!

Register a new account

Sign in

Already have an account? Sign in here.

Sign In Now


×
×
  • Create New...