Jump to content
SAU Community

Recommended Posts

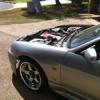
Selling some bits off my GTR,

Up for grabs

SSR SP1R's 18x10.5 inch +12 offset

These are a polished finish with 80% tread 265/35R18 tyres with all original SAR valve caps

$3400ono + Freight

Genuine Bride Zieg 3 FRP fixed Back seats with matching Bride Rails. These are the graduation fabric design and are in great condition.

Very nice seats

$1800 Ono plus freight

Items located in Townsville north Queensland

Best immediate contact via pm

Cheers Marty

Link to comment
https://www.sau.com.au/forums/topic/404583-high-end-jap-shit-for-sale/
Share on other sites

I would also like to add a few more parts up for grabs as the entire car will be stripped

Nismo 320kp/h instrument cluster (white face) with matching triple centre gauges. Odo reads 66***km's all working great and way better than the stock junk

$800 + freight Ono

Vipec plug in ecu with accessory loom. Will leave in the ecu casing. Miles better than power fc's atleast on my car and get rid of those shonky air flow metre's

$1000 + freight Ono

JJR oil catch can/washer bottle with weld in -10 fittings

$100 Ono plus freight

JJR 100mm GTR intercooler, great condition and flows well

$150 + freight Ono

There will be alot more up for grabs as the entire BCNR33 will be stripped clean of everything.

Pm me if you have any questions or parts that you may be chasing.

Cheers Marty

Pm replied.

Hi guys just at work atm however I will be able to further talk about any details and forwarding pictures after 5pm today.

Your patience is greatly appreciated,

Many thanks Marty

Not a drama at all, will Pm you of sale falls through.

Pm's replied

A bit more back ground on the car

Engine:

Standard RB26 (un opened)

Standard fuel rail with Seimens 750cc injectors

Exclusively run on Royal Purple 10W40 oil

Serviced every 6 months or 5000km's

Engine covers powdercoated in Harley Davidson black cherry by Chris from Craved Coatings

Breathers have -10 fittings for braided lines

Induction:

Precision Billet Series 6262 0.82 ex housing with anti surge front cover

Hks copy 60mm wastegate with 21psi base pressure springs

Polished 4in intake with drift filter (90deg)

Road Runner fabrications custom steam pipe exhaust manifold

Custom stainless 3in dump and front pipe

The custom piping on the cold side will suit only R33 I'd say has a Turbosmart Raceport 52mm BOV

Also the vehicle does have HKS HypermaxII coilovers $700 ono

Exedy Compe D twin plate with chrome moly flywheel heaps of meat left on it and has never slipped.. Ever. $1300 Ono or as package with good condition GTR 5 speed box $2000 Ono plus freight ofcourse

Complete engine will be $4500. This will include dump and front plus Hotwire and cold side piping with BOV

Long motor will be $1800

Turbine kit will be complete for $2800

Will only separate if there are buyers for all the parts other wise it's first in best dressed on the complete package/turbo kit

Cheers Marty

All requested pictures have been emailed through.

Major work will be carried out in the up coming weekend (motor, box etc will be removed)

Thank you so much for everyone's patience.

Lol to easy Rob will be a tasty upgrade for the Sil80!

Vipec payment has cleared. Sold!

Series III rear trims, parcel shelf, front door trims and rear seat SOLD

Complete Alpine stereo Sold

R33 pewter boot lock/badge Sold

Cheers Marty

Complete Brembo's, rear hubs and handbrake assembly sold.

GTR 5 speed box with shifter, transfer case and Nismo duracon shift knob (black) can throw in shifter boot if needed $1000 Ono plus freight

RS*R 3 1/4 inch catback exhaust, very nice RB bark that comes from this in good condition will also fit GTST as hangers line up $250 plus freight

Cheers Marty

Create an account or sign in to comment

You need to be a member in order to leave a comment

Create an account

Sign up for a new account in our community. It's easy!

Register a new account

Sign in

Already have an account? Sign in here.

Sign In Now


  • Similar Content

  • Latest Posts

    • Power is fed to the ECU when the ignition switch is switched to IGN, at terminal 58. That same wire also connects to the ECCS relay to provide both the coil power and the contact side. When the ECU sees power at 58 it switches 16 to earth, which pulls the ECCS relay on, which feeds main power into the ECU and also to a bunch of other things. None of this is directly involved in the fuel pump - it just has to happen first. The ECU will pull terminal 18 to earth when it wants the fuel pump to run. This allows the fuel pump relay to pull in, which switches power on into the rest of the fuel pump control equipment. The fuel pump control regulator is controlled from terminal 104 on the ECU and is switched high or low depending on whether the ECU thinks the pump needs to run high or low. (I don't know which way around that is, and it really doesn't matter right now). The fuel pump control reg is really just a resistor that controls how the power through the pump goes to earth. Either straight to earth, or via the resistor. This part doesn't matter much to us today. The power to the fuel pump relay comes from one of the switched wires from the IGN switch and fusebox that is not shown off to the left of this page. That power runs the fuel pump relay coil and a number of other engine peripherals. Those peripherals don't really matter. All that matters is that there should be power available at the relay when the key is in the right position. At least - I think it's switched. If it's not switched, then power will be there all the time. Either way, if you don't have power there when you need it (ie, key on) then it won't work. The input-output switching side of the relay gains its power from a line similar (but not the same as) the one that feeds the ECU. SO I presume that is switched. Again, if there is not power there when you need it, then you have to look upstream. And... the upshot of all that? There is no "ground" at the fuel pump relay. Where you say: and say that pin 1 Black/Pink is ground, that is not true. The ECU trigger is AF73, is black/pink, and is the "ground". When the ECU says it is. The Blue/White wire is the "constant" 12V to power the relay's coil. And when I say "constant", I mean it may well only be on when the key is on. As I said above. So, when the ECU says not to be running the pump (which is any time after about 3s of switching on, with no crank signal or engine speed yet), then you should see 12V at both 1 and 2. Because the 12V will be all the way up to the ECU terminal 18, waiting to be switched to ground. When the ECU switches the fuel pump on, then AF73 should go to ~0V, having been switched to ground and the voltage drop now occurring over the relay coil. 3 & 5 are easy. 5 is the other "constant" 12V, that may or may not be constant but will very much want to be there when the key is on. Same as above. 3 goes to the pump. There should never be 12V visible at 3 unless the relay is pulled in. As to where the immobiliser might have been spliced into all this.... It will either have to be on wire AF70 or AF71, whichever is most accessible near the alarm. Given that all those wires run from the engine bay fusebox or the ECU, via the driver's area to the rear of the car, it could really be either. AF70 will be the same colour from the appropriate fuse all the way to the pump. If it has been cut and is dangling, you should be able to see that  in that area somewhere. Same with AF71.   You really should be able to force the pump to run. Just jump 12V onto AF72 and it should go. That will prove that the pump itself is willing to go along with you when you sort out the upstream. You really should be able to force the fuel pump relay on. Just short AF73 to earth when the key is on. If the pump runs, then the relay is fine, and all the power up to both inputs on the relay is fine. If it doesn't run (and given that you checked the relay itself actually works) then one or both of AF70 and AF71 are not bringing power to the game.
    • @PranK can you elaborate further on the Colorlock Dye? The website has a lot of options. I'm sure you've done all the research. I have old genuine leather seats that I have bought various refurbing creams and such, but never a dye. Any info on how long it lasts? Does it wash out? Is it a hassle? What product do I actually need? Am I just buying this kit and following the steps the page advises or something else? https://www.colourlockaustralia.com.au/colourlock-leather-repair-kit-dye.html
    • These going to fit over the big brakes? I'd be reeeeeeeeaaaall hesitant to believe so.
    • The leather work properly stunned me. Again, I am thankful that the leather was in such good condition. I'm not sure what the indent is at the top of the passenger seat. Like somebody was sitting in it with a golf ball between their shoulders. The wheels are more grey than silver now and missing a lot of gloss.  Here's one with nice silver wheels.
    • It's amazing how well the works on the leather seats. Looks mint. Looking forward to see how you go with the wheels. They do suit the car! Gutter rash is easy to fix, but I'm curious about getting the colour done.
×
×
  • Create New...