Jump to content
SAU Community

Recommended Posts

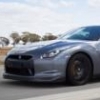
As of last weekend, this is my new 'daily'. I previously owned a ~620rwhp R33 GT-R with a T04Z, built motor etc etc. That was a great car, but by the time I worked out how much I had spent on it, and what I still wanted to do with it, it was actually cheaper to just bite the bullet and by the R35.

Specs are:

2009 Nissan R35 GT-R

Dark Metal Grey

32,000kms

There are quite a few mods in the pipeline, and I have already fitted a full exhaust system (Midpipe and Catback) and 15mm spacers on the front, with 20mm spacers on the rear.

I have a few goals for the car:

Goals: (will tick them off as they get completed)

- 10.5* or less 1/4 mile pass

- 54.* or less Wanneroo Short-track time

- 550hp at the wheels

The idea behind this car is to be able to achieve my goals for under $10,000. As such, the planned upgrades are as follows:

Empire Performance Midpipe ( http://myworld.ebay....ire_performance )

Empire Performance Catback ( http://myworld.ebay....ire_performance )

COBB Accessport NIS-006 with TCM control ( http://justjap.com/s...ufacturerid=101 )

Empire Performance Intake + Intercooler kit

Bosch EV14 1100cc injectors (http://www.gtrlife.c...-in-fuel-pumps/)

SiR in-tank fuel pumps (http://www.gtrlife.c...-in-fuel-pumps/)

SiR Stage 1 turbo upgrade (http://www.gtrlife.c...rbos-2500-core/)

I'm hoping with these mods it'll do about 550rwhp on 16-18psi (may not actually need the turbos to do this, but we'll play it by ear).

Some pics :)

8309029121_f98567a1c8_b.jpg

8280972928_3b1f7ca51d_b.jpg

8279916955_eeed4f5e61_b.jpg

8280979768_515886b072_b.jpg

I've owned the car for almost 2 weeks now, so it's definitely time for mods. Here's the latest:

Dyno'd it completely 100% stock to get a good baseline figure. It made 415awhp at only 11psi.... not a bad base to work with!!

R35-GTR-StockDyno1600x1200_zpsce16e9e0.jpeg

Right after that, we fit the new Empire Performance exhaust and mid-pipe. The weight saving in this is HUGE. I'm guessing the new midpipe is about 15kg's lighter, but I'll weigh the old one shortly.

Old Midpipe:

photo5-2_zpsd81cbdc3.jpg

Old vs New:

photo4-1_zps6636b9ef.jpg

New midpipe and catback:

photo1-1_zpsc2f51bb2.jpg

photo_zps8cc01c05.jpg

photo3-3_zps51348489.jpg

Now it sounds like this:

:)

welcome, mod list looks great

you won't need aftermarket turbos to crack 550awhp, you can achieve that quite easily on stock turbos with e85

but you would need them to comfortably crack a mid 10 1/4 on r compound/stock tyres

id be very cautious about buying american mod'd stock frame turbos, despite the allure of great pricing. willall racing in SA offer a similar high flow oem turbo with added benefit of local support and proven reliability

I'll look into the turbo's in a lot more detail as the time comes. I won't be going to that stage for probably a year or so anyway, so it gives me plenty of time to research.

I forgot to add, I'll need dump-pipes as well, which are already bought.

Not sure why the videos didn't work! Can't seem to ember HTML code here...

Free-rev:

Fly-bye / downshift:

Edited by Brockas

Not sure why the videos didn't work! Can't seem to ember HTML code here...

No need to use the embed, just paste the direct link, works fine - we've setup to recognise straight links (saves time) :)

Looks very nice,that colour was my first choice but ended up with black,i bought mine 9 months ago with 8000ks,it was in good cond so i did not wait for a grey one.

I got a midpipe a few months ago which is great,and just instaled a cobb 006,you will like this for power but most of all the tcm transforms the 09 tranny!

Anyway enjoy your car,its nice to see another perth boy with a r35.

How much did you pay for the car?

Beautiful car, impressive stock power too!

And yes please tell us how much you paid!

$105k + on roads.

I got a midpipe a few months ago which is great,and just instaled a cobb 006,you will like this for power but most of all the tcm transforms the 09 tranny!

Anyway enjoy your car,its nice to see another perth boy with a r35.

Yup, am looking forward to the COBB installation. The transmission had it's software 'updated' by Magic Nissan here in Perth, and they apparently put all the 2012 settings into it (without LC5).

I still think there are improvements to be had though.

Cheers :)

Yup, am looking forward to the COBB installation. The transmission had it's software 'updated' by Magic Nissan here in Perth, and they apparently put all the 2012 settings into it (without LC5).

Interesting, I was under the impression this cannot be done without a Cobb???? They probably just updated the touch points and done :P

Edited by Wardski

Something i have noticed with the TCM which i have not seen mentioned anywhere as far as i know is that on the standard software,if you have it in R for gearshifts,when you go from auto to manual and vice versa you have to put it back to R each time.

With the cobb software it stays in R when you switch from auto to manual and back again,nifty feature as this would always annoy me.

Interesting, I was under the impression this cannot be done without a Cobb???? They probably just updated the touch points and done :P

They took about 4 hours to do it (and didn't charge me) so I'm not entirely sure what they did. All I know is it made a very noticeable difference to the way the car drives. It's substantially better now.

Something i have noticed with the TCM which i have not seen mentioned anywhere as far as i know is that on the standard software,if you have it in R for gearshifts,when you go from auto to manual and vice versa you have to put it back to R each time.

With the cobb software it stays in R when you switch from auto to manual and back again,nifty feature as this would always annoy me.

That is a handy feature. I have no idea why they set it to kick out of R mode from the factory, very annoying!

  • 3 weeks later...

Something i have noticed with the TCM which i have not seen mentioned anywhere as far as i know is that on the standard software,if you have it in R for gearshifts,when you go from auto to manual and vice versa you have to put it back to R each time.

With the cobb software it stays in R when you switch from auto to manual and back again,nifty feature as this would always annoy me.

Only with the NIS-006

Congrats on your purchase.

The older model does run relatively low boost compared to more recent models.

My MY11 runs between 13.5 & 14psi between 3200 & 6600 rpm, peaking at 4500 rpm, so there’s some very easy power to be had with an increase in boost.

Fyi, get your tuner to display DIN rather than the old USA standard SAE J1349, so use KW & NM with DIN.

That dynapack torque graph is accurate, because it shows the twin torque peaks that occur at around 4000 & 5000rpm in the R35.

If you can, do a dyno run straight after the exhaust, to measure the difference, then again after the tune (which is what I did).

Good luck.

Brian

  • 3 weeks later...

Yup, I'll endeavour to get that done. Did you notice any HP increase from just the exhaust?

I just picked up the following:

COBB Accessport NIS-006

SiR 1150cc injectors

SiR 290lph fuel pumps

SPD 65mm turbo inlets

Empire 76mm Intake kit

Empire FMIC hard pipe kit

Empire Downpipes

Looking forward to seeing what it makes with these mods on 15-18psi :)

Create an account or sign in to comment

You need to be a member in order to leave a comment

Create an account

Sign up for a new account in our community. It's easy!

Register a new account

Sign in

Already have an account? Sign in here.

Sign In Now


  • Similar Content

  • Latest Posts

    • I wanted to try and preserve the front bumper as long as possible, they're not cheap and are made to order in Japan. Taking inspiration from my previous K11 Micra build where I made an undertray for the Impul bumper, I did the same for this BN Sports bumper but a little slimmed down.  This time round I only made a 'skid plate' (if that's the correct wording/term) for just the bumper surface area, the Micra version covered the gap like an undertray. Starting off with a sheet of mild steel approx. 0.9mm thick 4ft x 2ft in size. I traced around the bumper, cut it out and cleaned the edges. Luckily I was able to get two halves from one piece of metal In the video I installed it as is, but I've since then I've removed it to spray and add a rubber edging trim. The rubber trim is suitable for 1-2mm and it's a really nice tight fit. The bolts had to be loosened due to the plates being too tight against the bumper, the trim wouldn't push on I used some stainless M6 flat headed bolts for a flusher finish (rather than hex heads poking down), I believe this style fastener is used for furniture too incase you struggle to source some. The corner's are a little wider, but this may be an advantage incase I get close to bumping it  The front grill got some attention, finally getting round to repairing it. Upon removal one fixing pulled itself out of the plastic frame, one side is M8 that fixes inside of the frame, where as the other side is M5. Not knowing I could get replacements, I cut down an M8 bolt, threaded it inside the frame along with a decent amount of JB Weld.  The mesh was replaced to match the bumper. One hole on the bonnet/hood had to be drilled out to 8mm to accommodate the new stud, once the glue had set it could be refitted. I think the reason the grill was double meshed was to hide the horn/bonnet latch (which makes sense) but I much prefer it matching the bumper Bumper refitted and it's looking much better IMO The Youtube video can be seen here: https://www.youtube.com/watch?v=bVZP35io9MA
    • The video for the servicing and fuel filter change can be seen here: https://www.youtube.com/watch?v=uLJ65pmQt44 One of the main jobs I wanted to do before the car officially went on the road, was to remove the awful looking blue silicone hoses. There's nothing wrong with having coloured silicone hoses, but I realise as I'm getting older I prefer monotone engine bays with a splash of colour on the engine cover(s). I cover this in a lot more detail in the Youtube video, so unfortunately there's limited photos of the process. The intercooler, upper radiator, boost vacuum and upper breather hoses were all changed to black silicone with mikalor clamps. The only blue left is a blanking cap at the back of the inlet manifold and the GReddy pulleys (which will be replaced for stock when the cambelt gets replaced) While the intercooler pipes were off I gave them a quick clean/polish too A before photo I do have a replacement air filter on its way. Fuse box covers were painted blue, they're now satin black Another job on the list while the bumper was off, is to add some mesh https://live.staticflickr.com/65535/54737966256_99b28bfa30_c.jpg[/img] I was hoping to use some thin wire to secure it, but it seems I've misplaced it and the wire I had was too thick to twist easily. I ended up using cable ties for the time being https://live.staticflickr.com/65535/54737131882_c2b7989dcc_c.jpg[/img] Was pleasant to see this https://live.staticflickr.com/65535/54737131627_8b2aab13b3_c.jpg[/img] The last thing to do was to fix the front grill and re-mesh that to match but I ran out of time The Youtube video can be seen here: https://www.youtube.com/watch?v=R4FsF6tgizE&t=23s
    • Hi all,I already introduced myself in the Victoria section, but only saw this section now lol XD New to forums and new to skylines. Hoping to buy my new skyline within October
×
×
  • Create New...