Jump to content
SAU Community

Recommended Posts

  • 1 month later...
  • 2 weeks later...

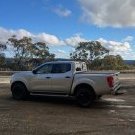
Well it was a rainy day didn't stop at all, well not enough to even dry the track out but went out and had fun anyways managed to keep it on the black stuff and had no spins.

had about 8 little moments but was a great learning curve, not sure on time's ill have to go through the footage but didn't break any records :)

the car ran great all day, temps were spot on 80 water and 100 oil. didn't have to worry about tyres but got the brakes nice and toasty a couple of times as i was doing to many consecutive hot laps HAHA

might looking into some better exiting ducts for the oil coolers by chopping up the front guards.

here are a couple of pic's will get the footage up later.

post-83704-0-66029200-1434617024_thumb.jpg

post-83704-0-12180000-1434617026_thumb.jpg

  • Like 4

Here is a little bit of footage nothing spectacular nor breaking any records but still good fun and a great learning curve

https://www.youtube.com/watch?v=JpF5fz8aec4&feature=youtu.be

https://www.youtube.com/watch?v=pdip6Y_rwRY&feature=youtu.be

Well I finally got some time to work on the 7 yesterday, started by repairing the front bar fixing the hole they made for a tow point and making a mould of the drivers side combination lamp housing as it was cut out to make way for some air filters/duct's.

post-83704-0-36529800-1436164532_thumb.jpg

post-83704-0-13274600-1436164537_thumb.jpg

post-83704-0-79315300-1436164544_thumb.jpg

post-83704-0-45687500-1436164550_thumb.jpg

post-83704-0-89701900-1436164558_thumb.jpg

  • Like 1

and then the fun started cutting up the front bar...........

1st photo shows the stock hole on the right and the modified hole on the left
2nd photo shows the cut out's i made

3rd photo shows the 40mm gap i have enlarged it by

4th shows the oil cooler behind the cut out and the 5th shows with the piece put back in increasing the hole by 40mm

6th photo shows what it should look like once complete

post-83704-0-25113400-1436164666_thumb.jpg

post-83704-0-17314100-1436164672_thumb.jpg

post-83704-0-94957700-1436164684_thumb.jpg

post-83704-0-06879200-1436164692_thumb.jpg

post-83704-0-07989000-1436164874_thumb.jpg

post-83704-0-08869200-1436165211_thumb.jpg

  • 3 weeks later...

Saturday arvo I finished off filling in with fibreglass and then a Mate and I spent majority of Sunday rubbing it back, had to refibreglass from the front as it had sunken in on one of the sections but otherwise looking good!!!.......... almost ready for highfill

post-83704-0-28572000-1437470725_thumb.jpg

post-83704-0-01327900-1437470727_thumb.jpg

Yes it's going to be V mounted, was cheaper to buy this than even a core of the same size. so will just cut off the pipes and turn them around :)

ahh cool beans. Don't wait dat heat soak for the FD. Mazda messed up the cooling hardcore in the FD lol.

Well my pulley kit turned up on Friday so I could go ahead with fitting that, removing the air pump (5kg) and remove the center exhaust with the cat in it (13.8kg)
appon removing all the pulleys the only one that wasn't in the kit was the power steering idler pulley pulled it off to check it luckily I did as it still spun alright but sounded very dry, so i picked up a new one and pressed it in. Just waiting on a call the my straight pipe is ready for pick up.

then to move onto removing all the air pump pipes and block them all off with the emissions blanking of plates :)

post-83704-0-51343800-1438586633_thumb.jpg

post-83704-0-77354700-1438586635_thumb.jpg

post-83704-0-31871800-1438586636_thumb.jpg

  • Like 3

its a very nice car and you're doing it justice, but fark i would not have the patience or determination to replace/repair so many poorly implemented items.

i would probably bin the whole front end and start from scratch.

thankfully, its not my car.

If I had of known it would be so much drama with the solenoids/twin turbo and all the money I wasted in getting it running, I probably would've bit the bullet and went single straight away but hay you learn as you go.

and doing things on a budget makes you think outside of the box. it'll all be worth it in the end :)

Create an account or sign in to comment

You need to be a member in order to leave a comment

Create an account

Sign up for a new account in our community. It's easy!

Register a new account

Sign in

Already have an account? Sign in here.

Sign In Now


  • Similar Content

  • Latest Posts

    • This. A 3d wheel alignment is like $120...just take it to the shop. Since theres probably multiple adjustments that need to be made after changing something. Mine has front/rear lower arms, traction rods, tension rods, camber arms, toe arms, front upper arms, hicas kit, sway bars and coilovers. I measure from the edge of the bolt holes on the originals and set the same length on all the adjustable stuff to dial it as close as I could to OEM. Took it straight for alignment; it didnt feel right at all...after alignment, it feels perfect. Similarly i've just changed the springs on another car; and I still needed multiple adjustments to bring it back in spec.
    • A full Veilside kitted JZA80 Supra in Meriken park in Kobe city a few weeks back
    • Its a well known brand in New Zealand; its a rebrand of the Rhino RAV3.  I don't know what the wiring difference *is* between the rev.1 (installed about 15 years ago) and rev.2; but as you say I would think its reasonable that it uses the same immobiliser relay circuits. I had a look but couldnt see a similar harness; but didnt move things around since I didnt want to mess with it   It was one of AVS well known Authorised Installers; I spoke to AVS themselves about it but theyre unsure hence seeking advice more so from the skyline community who are more familiar with the actual car and its wiring. Im in Auckland; but the installer is on the other side of the city so hes very reluctant to come back to even look at it to confirm something isnt connected into the wrong wire.  I dont want to drop the name since they *did* do a really good job for the most part. Everything is very tidy and he fully replaced all the alarm wiring, all the sensors, the wiring to the door motors, installed a switch which was never installed in the first place...really happy with the alarm install itself..just not this one issue. We all make mistakes, if it is the alarm, I just want my fuel pump getting proper switched, fused, power as it was; without having to shell out for an auto electrician to switch a wire and tell me it was the alarm. 
    • Even with the piston at TDC there was room for it to drop, but I don't think it can drop fully into the cylinder, the problem you have is that you need something pushing against the valve to hold it up so you have enough room to put the new stem seal on and the spring etc.  I used compressed air only because putting rope in the cylinder seemed a bit risky to me, I know people have done it countless times before like this. Overall it's a pain in the ass job. Honestly you'd probably be better off taking the head off because the risk of dropping something in the engine and the finicky-ness of it all is very stressful. If you are going to attempt it though i 10000% recommend a 36050 valve spring/keeper tool. I had both the traditional lever type and after doing 1 cylinder it was absolute pain to get those valve keepers in place, even with 2 people. That 36050 is amazing, you do have to push hard to get them in place but it works perfectly almost every time. Back to my actual issue I think my engine is just tired and old and the rings have gone bad. The comp numbers (cold, no oil) were: Cyl 1 -129psi Cyl 2 - 133psi Cyl 3 - 138psi Cyl 4 - 137psi Cyl 5 - 157psi Cyl 6 - 142psi   Cylinder 5 and 6 having the most carbon on them.
    • Who did you have do the installation? I actually know someone who is VERY familiar with the AVS gear. The main point of contact though would be your installer.   Where are you based in NZ?
×
×
  • Create New...