Jump to content
SAU Community

Recommended Posts

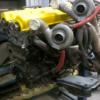
So it is in... I'm going to have to have a little fiddle with the sway bay. Looks like it needs lowered a smidgen the give a little more clearance for the sump pump.

Power steering hoses need relocating a little as will the header tank.

It all sits nice and low. Looks like I will be able to run the strut brace still.

post-15176-14217429190155_thumb.jpg

post-15176-14217432175935_thumb.jpg

looking good and enjoying the build :)

When someone is actually doing the work it makes it interesting to follow, mine is boring , no hands on or attention to detail..

Edited by Nismo 3.2ish

The coilovers are an old old set of tiens for r33 gtr. There way too short in the front, wound up for maximum front ride height, but they still bottom out. The rear ones are good on length. The spring rates are a little hard to calculate because there conical. The best I could work out they are around 12kg/mm front and 9kg/mm rear. The sway bars are also an ancient cmr set from a front and rear cut I came across 10 years ago. The rear cradle has had the squat angle and roll centures changed. The diff is solid mounted at the rear with a change to the pinion angle too. Adjustable camber arms etc as well. The front has seen a change of roll centure, camber adjustments through the adjustable lca, adj castor arms, off set stearing brackets on the rack to fix a bump steer issue that was a result of the rc change also allows acaman adjustments. Brakes are std calipers with braided lines using Hawk HT10 pads and DBA 4000 rotors front and rear. Wheels are 17x9.5 +18 with Kumho V710 245/45/17 medium compound. That should about cover it.

Edited by Noddy

Thanks Noddy.

I changed my rear hubs to R34 GTR ones so I could accommodate the GTR suspension also. I have a std set of R34 GTR suspension in it at the moment to get some measurements and it is way low in the front. I was talking to MCA about it and they gave me a few measurement points so they could supply some red shocks to suit.

Good to see you have plenty of speed with that set up.

Thank you.

Lol, you reminded me that mine has a 32 GTR diff axels and hubs. It is a hoot to drive, esp when im chasing down other skylines or zeds. I have found plenty of mechanical grip in mine. Come visit 1 day, I'll show you what I have found over the years.

The coilovers are an old old set of tiens for r33 gtr. There way too short in the front, wound up for maximum front ride height, but they still bottom out. The rear ones are good on length. The spring rates are a little hard to calculate because there conical. The best I could work out they are around 12kg/mm front and 9kg/mm rear. The sway bars are also an ancient cmr set from a front and rear cut I came across 10 years ago. The rear cradle has had the squat angle and roll centures changed. The diff is solid mounted at the rear with a change to the pinion angle too. Adjustable camber arms etc as well. The front has seen a change of roll centure, camber adjustments through the adjustable lca, adj castor arms, off set stearing brackets on the rack to fix a bump steer issue that was a result of the rc change also allows acaman adjustments. Brakes are std calipers with braided lines using Hawk HT10 pads and DBA 4000 rotors front and rear. Wheels are 17x9.5 +18 with Kumho V710 245/45/17 medium compound. That should about cover it.

We also converted to R33 GTR shocks in our R33 GTS-T because of the greater range of shocks available for GTR's. We settled for Bilstein PSS9's as they can be serviced and re-valved locally.

In the front end we had similar problems with overall the shock length being too short as GTR shocks are 50 mm shorter than GTS-Ts, so we copied what the 4WD guys do and fabricated spacers to go between the top of the shock and the mounting point. This was a simple way to extend the overall shock length.

post-24210-0-70480900-1422013826_thumb.jpg

post-24210-0-18357600-1422013809_thumb.jpg

In the rear end we installed a complete R33 GTR rear cradle.

post-24210-0-28913400-1422013792_thumb.jpg

In hindsight one improvement to the alloy spacers would have been to use helicoil insets for the threads as the alloy is soft and you have to be careful not to damage the threads.

For ease of change over we came by a complete GTR cradle which we then refurbished with all new bushes etc. and then just did a straight swap. The benefit was a good diff, stronger axles, more bracing in the cradle, alloy hubs and the capacity to run GTR shocks.

I had a new set of GTR sub frame bushes in the parts box so we installed them at the same time. As you can see from the above picture GTR bushes are longer and have the effect of spacing the entire cradle 20 mm lower than GTS-T bushes. The impact of this is something that we did not realise at the time.

We are not using pineapples and I am still getting my head around calculating roll centre and the impact of ride height on roll centre. We run standard arms on all of our cars and obtain adjustment with adjustable bushes. We started off with a ride height of 330 mm and had a range of power down issues with that set up. We run our other GTS-Ts at 350 mm and they seem to work well and our GTR sits at 370 mm. The other issue we had was a lot of squat in power down to the point that at WSID the outside 5 cm of tyre was not even being used.

With this information we raised the rear ride height to 370 mm and reduced the rear camber to -1.00 degree. We also softened up the rear end by going down to a 5 kg springs. The result of these changes has been much better power down, mid corner stability and the ability to keep wheels on the ground when the surface is not perfectly smooth.

What we probably should do is have the car corner weighted by Heismans in Sydney who can also work out where we are regarding roll centres. Any advice that you could provide would also be very appreciated.

  • Like 1

I have used an r32 GTR subframe complete with diff, axels, hubs etc. In stead of replacing the bushes I cut them down. 1mm cutting blade, removing all the rubber away level with the top of the cradle. I made 4 washers with an exturnal dia matching the cradle, the inner hole for a neat fit over the tube the body pin slides through and partedthem off 2mm thick. After stich welding the outer edges I cut the tube off flush with the top of the washer and weldedi it in too. Effectively I've solid mounted it to the body so it has been raised up as far as possible. This helps to keep the rear geometry roughly in the same position whilst lowering the body and center of gravity. It also keeps the roll centure happy.

The rear bushes for the diff were pretty sad in it too. So, we measured very carefully and cut the whole section out and replaced it with 4mm plate. 3 sets of holes were drilled, first in the std location, and then 20mm above and below. Looking for better grip and drive from the rear we looked to some drag racing concepts like pinion angle. Kinda made a difference.

The most drematic improvement for drive out of corners came from playing around with the squat angle of the cradle. Spacing the front of the cradle down about 12mm was fantastic. 20mm should be better right... nope it started to get messy under brakes in the rear.

Up front I've remade the lca with rose joints for camber and track adjustments and moved the mounting point up higher in the cross member to match the changes in the rear. In actual fact, I developed the front first because it was suffering lots of mid corner and exit understeer. Thats when I started looking very closely at geometry and bump steer etc.

Fixing the rc in the front accidentally created lots of bump steer. So I made an offset extension for the steering rack to put the tie rods back is the same alignment as the lca. Bump steer fixed and almost 0 accerman at the same time.

I find I can carry a lot more apex speed which has helped me to keep up with more powerful cars. Turns in and keeps on turning throughout a corner. The rear end puts power down as well as anything I know of and drives off the corners. No more axel tramp.

Corner weighting is another story. Done properly it makes the ballance so much better, especially the weight transfer side to side more than front to back.

Edited by Noddy
  • 2 weeks later...
  • 10 months later...

I kind of just fell off the face of the planet just there didn't I...

My year got very busy with a wedding, repairing the levin, honeymoon and house renovations, all have stolen time away from my beloved skyline. the sadest part of all is that I am going to have to move to toowoomba this year and most likely to a smaller shed. I think I might have to part the old girl out and sell it off.

Edited by Noddy

It happens to the best of us, life rears its ugly head and gets in the way of our passions!. Stick with it mate, the desire always returns eventually!

Mine has been in bits for 3 years and my motivation has only just come flooding back now.

All the best with it.

I kind of just fell off the face of the planet just there didn't I...

My year got very busy with a wedding, repairing the levin, honeymoon and house renovations, all have stolen time away from my beloved skyline. the sadest part of all is that I am going to have to move to toowoomba this year and most likely to a smaller shed. I think I might have to part the old girl out and sell it off.

If you can afford to ans have the space, buy a shipping container. The car will fit in it and its like a lock up garage.

You can get them starting from around $1,000 if you have contacts, $2500 and upwards if you don't.

  • Like 1

Create an account or sign in to comment

You need to be a member in order to leave a comment

Create an account

Sign up for a new account in our community. It's easy!

Register a new account

Sign in

Already have an account? Sign in here.

Sign In Now


  • Similar Content

  • Latest Posts

    • Hi, is the HKS  Tower Bar still available ? negotiable ? 🤔
    • From there, it is really just test and assemble. Plug the adapter cables from the unit into the back of the screen, then the other side to the car harness. Don't forget all the other plugs too! Run the cables behind the unit and screw it back into place (4 screws) and you should now have 3 cables to run from the top screen to the android unit. I ran them along the DS of the other AV units in the gap between their backets and the console, and used some corrugated tubing on the sharp edges of the bracket so the wires were safe. Plug the centre console and lower screen in temporarily and turn the car to ACC, the AV should fire up as normal. Hold the back button for 3 sec and Android should appear on the top screen. You need to set the input to Aux for audio (more on that later). I put the unit under the AC duct in the centre console, with the wifi antenna on top of the AC duct near the shifter, the bluetooth antenna on the AC duct under the centre console The GPS unit on top of the DS to AC duct; they all seem to work OK there are are out of the way. Neat cable routing is a pain. For the drive recorder I mounted it near the rear view mirror and run the cable in the headlining, across the a pillar and then down the inside of the a pillar seal to the DS lower dash. From there it goes across and to one USB input for the unit. The second USB input is attached to the ECUtec OBD dongle and the 3rd goes to the USB bulkhead connected I added in the centre console. This is how the centre console looks "tidied" up Note I didn't install the provided speaker, didn't use the 2.5mm IPod in line or the piggyback loom for the Ipod or change any DIP switches; they seem to only be required if you need to use the Ipod input rather than the AUX input. That's it, install done, I'll follow up with a separate post on how the unit works, but in summary it retains all factory functions and inputs (so I still use my phone to the car for calls), reverse still works like factory etc.
    • Place the new daughterboard in the case and mount it using the 3 small black rivets provided, and reconnect the 3 factory ribbon cables to the new board Then, use the 3 piggyback cables from the daughterboard into the factory board on top (there are stand offs in the case to keep them apart. and remember to reconnect the antenna and rear cover fan wires. 1 screw to hold the motherboard in place. Before closing the case, make a hole in the sticker covering a hole in the case and run the cable for the android unit into the plug there. The video forgot this step, so did I, so will you probably. Then redo the 4 screws on back, 2 each top and bottom, 3 each side and put the 2 brackets back on.....all ready to go and not that tricky really.      
    • Onto the android unit. You need to remove the top screen because there is a daughterboard to put inside the case. Each side vent pops out from clips; start at the bottom and carefully remove upwards (use a trim remover tool to avoid breaking anything). Then the lower screen and controls come out, 4 screws, a couple of clips (including 3 flimsy ones at the top) and 3 plugs on the rear. Then the upper screen, 4 screws and a bunch of plugs and she is out. From there, remove the mounting brackets (2 screws each), 4 screws on the rear, 2 screws top and bottom and 3 screws holding in the small plates on each side. When you remove the back cover (tight fit), watch out for the power cable for the fan, I removed it so I could put the back aside. The mainboard is held in by 1 screw in the middle, 1 aerial at the top and 3 ribbon cables. If you've ever done any laptop stuff the ribbon cables are OK to work with, just pop up the retainer and they slide out. If you are not familiar just grab a 12 year old from an iphone factory, they will know how it works The case should now look like this:
    • Switching the console was tricky. First there were 6 screws to remove, and also the little adapter loom and its screws had to come out. Also don't forget to remove the 2 screws holding the central locking receiver. Then there are 4 clips on either side....these were very tight in this case and needed careful persuading with a long flat screw driver....some force required but not enough to break them...this was probably the fiddliest part of the whole job. In my case I needed both the wiring loom and the central locking receiver module to swap across to the new one. That was it for the console, so "assembly is the reverse of disassembly"
×
×
  • Create New...