Jump to content
SAU Community

Recommended Posts

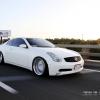
Long story short bought my car back in Mid 2009 as a P Plater, took me a month to find a ivory pearl white one I wanted.

post-33487-0-65690600-1428737207_thumb.jpg

It was stock as a rock and I was full into the stanced and offset style back then. After a few weeks I found some wheels I liked and needed to buy.

Evolution Intensive Hunks in Chrome with huge dish
Japanese made

19x9.5" +17 fronts 245/35 tyres
19x11" +10 rears 275/30 tyres

Whacked them on the car and boy it was Mexican as holy moly.

post-33487-0-51609600-1428737354_thumb.jpg

Drove around like that for a few weeks but the ride height was hideous, looked like I had a 2" lift kit in the sucker so that needed to change.

Came across some 40 mm lowered eibach springs, bought them, installed them and the ride height was looking good. Wasn't tucking tyre but way better then before nor was it as Mexican but still had a good amount of poke.

post-33487-0-44498200-1428737503_thumb.jpg

post-33487-0-91437700-1428737518_thumb.jpg

I Got bored with the performance of the car so the engine needed attention.

few months down the track i did a few bolt on mods including intake, cat back exhaust , Plenum Spacer and SAFC II.

Forgot to mention when i bought the car i went to the track and managed a 14.7 in stock form, with the mods and the big wheels i managed a 14.0

i was happy with that for a P Plater back then.

post-33487-0-08716900-1428738719_thumb.jpg

post-33487-0-65301000-1428738742_thumb.jpg

Performance was done and now back to the look of the car, the height needed to come down more, i found a cheap set of d2 coilovers and i Didn't have any intentions on tracking or racing the car, just needed it to slam the car. Suited my needs perfectly.
Rocked up a week later installed them and put it to the lowest setting as possible in the rears and matched it for the fronts.

Viola, my stance game was looking strong, it was looking awesome.

post-33487-0-29503300-1428737561_thumb.jpg

post-33487-0-17238400-1428737602_thumb.jpg

So i've had the car about a year at that point of time, within the next year i went through about 3 rims or so.

post-33487-0-21037100-1428738887_thumb.jpg

post-33487-0-37564800-1428738914_thumb.jpg

post-33487-0-99394900-1428739078_thumb.jpg

post-33487-0-36632600-1428739106_thumb.jpg

post-33487-0-25651500-1428739321_thumb.jpg

post-33487-0-77468600-1428739348_thumb.jpg

post-33487-0-39038200-1428739382_thumb.jpg

post-33487-0-05007100-1428739403_thumb.jpg

Link to comment
https://www.sau.com.au/forums/topic/455613-bees-lsv35-skyline/
Share on other sites

In mid to late 2011 i blew my motor, it was a sad day to say the least.

I got the car back home and it sat in the garage for about a year before i decided what i wanted to do with it.

post-33487-0-21535200-1428767265_thumb.jpg

i started to pull the motor out and checked the sump, as i thought, i spun bearings after looking at my sump.

post-33487-0-38911700-1428767336_thumb.jpg

post-33487-0-93808100-1428767374_thumb.jpg

off to my mates workshop, NextUp Performance and started planning my build out.

post-33487-0-52212000-1428767452_thumb.jpg

This was the start of something great, which was around 2012.

My new motor and box

A L98 6.0L motor out of a 2008 VE SS I purchased off my mate and a TH400 3 speed transbraked auto gearbox that i got built.

The 6.0L had a standard bottom end but it has valve springs/pushrods and lifters and a cam upgrade that previously made 620rwhp through a supercharger.

post-33487-0-78242400-1428767724_thumb.jpg

My plan was orginally to just keep it N/A and run a nice shot up of nitrous up its clacker.

but after a few months down the track i spoke to mates and i decided to go down the turbo route as this was the future plan after it was N/A.

gathering more parts for the next year or so which included

TCE Torque converter

Shifter
Flex Plate
Engine Accessories

Fuel system ( 3L surge tank, 4x 044 fuel pumps, 2 carter lift pumps, 2 fuel filters)

Haltech PS2000 ( which i've changed to a ELITE now)

Haltech Dash

Precision CEA 7675 turbo

Turbosmart 50mm pro gate

Holley Fuel rails

Drag wing

bought these parts slowly when i could afford it.

i then decided to change to a bigger cam from the orignal 233/233 that it had to a nice and lumpy 238/242 with the same lobe seperation but with abit more lift. I also did aftermarket head gaskets and ARP Headbolts as i did not want to lift the head with boost pressures as LS's are known to do.

That was sorted , so in the past year, i've slowly started to put the push on this build.

first off the engine had to be custom mounted, Cross memeber was notched and plated to suit the sump we modified as i wanted the motor sitting as low and as far back as possible.

Motor got mounted and the tranny,

Fabulous Fabrication did an amazing job on this, Next the big job was to get turbo manifolds done. Few days later working on and off on my car they were completed, i couldn't of been happier. Everything had to be taken into account from fitment to space for other things like alternator, piping, exhaust etc etc which was a headache to be honest

post-33487-0-94989800-1428768338_thumb.jpgpost-33487-0-07630100-1428769163_thumb.jpg

Motor was back out so i could paint it black, i wanted it to be stealth so everything was going black.

post-33487-0-88852500-1428768288_thumb.jpg

At this point i was still buying parts for the motor, like intake manifold, i ended up going with a holley single plane manifold as i heard and reasearched they are good for forced induction applications. With that i had to get a elbow to suit so a 6061 aluminum elbow was the choice to mate up to the standard fly by wire throttle body.

post-33487-0-38255600-1428769542_thumb.jpg

Bought some front wheels for it too, looked sooo goood.

Weld racing V series Front runner 17x4.5"

post-33487-0-71035400-1428770358_thumb.jpgpost-33487-0-21200400-1428770391_thumb.jpg

Motor went back in, measured up tailshaft length to get made, turn around time was about a week.

Tailshaft arrived, that got mounted.

Prior to that, a few months ago I had a good chat to Fabulous Fabrications and the Boy at Next Up Performance which will be tuning the car after.

We decided that the turbo manifold weren't gonna work for the size of radiator we wanted to run, wasn't going to be big enough.

This was actually good thing, as i didnt really have that much room for a big intercooler so i bought a 450x300x110 intercooler.

Few weeks ago Fabulous Fabrication moved the turbo further forward thus modifying the manifolds again leaving us more room to fit a larger sized radiator, measured up the room we have and a custom PWR radiator 500x500x50 is getting made as we speak.

Fabulous Fabrication also mount the Intercooler and did the hot side intercooler piping with a Plazaclamp, it looked wicked cool.

He also modified the intake side from a 3" inlet to a 4" inlet.

post-33487-0-54472200-1428770560_thumb.jpgpost-33487-0-11329400-1428770580_thumb.jpg

  • Like 4

gee that escalated. what are/were your plans for the build?

surely diagnosing what caused the first motor to die and then build up a mean VQ would have been cheaper/easier? (though i can understand people being over V6's)

VQ35's are known to use oil, so low oils caused spun bearings, parlty my fault as I should've checked oils.

To completely build a VQ and purchase a turbo kit and supporting mods, ecu/fuel system etc etc, from the states would work out roughly the same in price.

Intentions of the build is just a street car with the intentions of drag racing it.

whack some chevy badges on it to really rustle some people's jimmies! :P

Love it mate, can't wait to see more progress.

May I ask the reasoning behind a turbo kit over the more commonly done supercharger kit for LS?

That did cross my mind a few times lol :L

personal preference pretty much, also I find the power delivery of a turbo much more fun and aggressive than a supercharger.

That did cross my mind a few times lol :L

personal preference pretty much, also I find the power delivery of a turbo much more fun and aggressive than a supercharger.

doooooo eeeeet

Fair enough re: the turbo. Hope your set-up is everything you want it to be :) congrats on doing something different. I like different

Definately Big Transformation over the years.

Brake upgradea week ago thanks to PN-Mad
r32 GTR 4pot calipers, Drilled rotors and pads 296x32mm VS standard piston 296x26mm

post-33487-0-35324000-1429272210_thumb.jpg post-33487-0-35155500-1429272291_thumb.jpg

Working away doesn't give me time to work on the car so My good mate did my fuel system tonight, all plumbed up.

post-33487-0-15234900-1429272365_thumb.jpg

post-33487-0-37120300-1429272399_thumb.jpg

post-33487-0-13911500-1429272430_thumb.jpg

  • Like 1
  • 2 weeks later...
  • 1 month later...

Been slack with the posts, here's and update.

Car has been running and driving for over a month now, really happy with the outcome and can't thank my boys enough at Next Up Performance.

My car makes a solid 525rwhp on 10psi with United E85

The night before QLD May 2015 Powerplay ready for the dyno.

post-33487-0-49053300-1435456150_thumb.jpg

Car on the dyno awaiting tune.

post-33487-0-50317200-1435456325_thumb.png

Rolls off dyno what a better way to celebrate, Shed Skids!!

https://instagram.com/p/2apzngkAJS/

  • Like 2

Create an account or sign in to comment

You need to be a member in order to leave a comment

Create an account

Sign up for a new account in our community. It's easy!

Register a new account

Sign in

Already have an account? Sign in here.

Sign In Now


  • Similar Content

  • Latest Posts

    • As discussed in the previous post, the bushes in the 110 needed replacing. I took this opportunity to replace the castor bushes, the front lower control arm, lower the car and get the alignment dialled in with new tyres. I took it down to Alignment Motorsports on the GC to get this work done and also get more out of the Shockworks as I felt like I wasn't getting the full use out of them.  To cut a very long story short, it ended up being the case the passenger side castor arm wouldn't accept the brand new bush as the sleeve had worn badly enough to the point you could push the new bush in by hand and completely through. Trying a pair of TRD bushes didn't fix the issue either (I had originally gone with Hardrace bushes). We needed to urgently source another castor arm, and thankfully this was sourced and the guys at the shop worked on my car until 7pm on a Saturday to get everything done. The car rides a lot nicer now with the suspension dialled in properly. Lowered the car a little as well to suit the lower profile front tyres, and just bring the car down generally. Eternally thankful for the guys down at the shop to get the car sorted, we both pulled big favours from our contacts to get it done on the Saturday.  Also plugged in the new Stedi foglights into the S15, and even from a quick test in the garage I'm keen to see how they look out on the road. I had some concerns about the length of the LED body and whether it'd fit in the foglight housing but it's fine.  I've got a small window coming up next month where I'll likely get a little paint work done on the 110 to remove the rear wing, add a boot wing and roof wing, get the side skirt fixed up and colour match the little panel on the tail lights so that I can install some badges that I've kept in storage. I'm also tempted to put in a new pair of headlights on the 110.  Until then, here's some more pictures from Easter this year. 
    • I would put a fuel pressure gauge between the filter and the fuel rail, see if it's maintaining good fuel pressure at idle going up to the point when it stalls. Do you see any strange behavior in commanded fuel leading up to the point when it stalls? You might have to start going through the service manual and doing a long list of sensor tests if it's not the fuel system for whatever reason.
    • Hi,  Just joined the forum so I could share my "fix" of this problem. Might be of use to someone. Had the same hunting at idle issue on my V36 with VQ35HR engine after swapping the engine because the original one got overheated.  While changing the engine I made the mistake of cleaning the throttle bodies and tried all the tricks i could find to do a throttle relearn with no luck. Gave in and took it to a shop and they couldn't sort it. Then took it to my local Nissan dealership and they couldn't get it to idle properly. They said I'd need to replace the throttle bodies and the ecu probably costing more than the car is worth. So I had the idea of replacing the carbon I cleaned out with a thin layer of super glue and it's back to normal idle now. Bit rough but saved the car from the wreckers 🤣
    • After my last update, I went ahead with cleaning and restoring the entire fuel system. This included removing the tank and cleaning it with the Beyond Balistics solution, power washing it multiple times, drying it thoroughly, rinsing with IPA, drying again with heat gun and compressed air. Also, cleaning out the lines, fuel rail, and replacing the fuel pump with an OEM-style one. During the cleaning process, I replaced several hoses - including the breather hose on the fuel tank, which turned out to be the cause of the earlier fuel leak. This is what the old fuel filter looked like: Fuel tank before cleaning: Dirty Fuel Tank.mp4   Fuel tank after cleaning (some staining remains): Clean Fuel Tank.mp4 Both the OEM 270cc and new DeatschWerks 550cc injectors were cleaned professionally by a shop. Before reassembling everything, I tested the fuel flow by running the pump output into a container at the fuel filter location - flow looked good. I then fitted the new fuel filter and reassembled the rest of the system. Fuel Flow Test.mp4 Test 1 - 550cc injectors Ran the new fuel pump with its supplied diagonal strainer (different from OEM’s flat strainer) and my 550cc injectors using the same resized-injector map I had successfully used before. At first, it idled roughly and stalled when I applied throttle. Checked the spark plugs and found that they were fouled with carbon (likely from the earlier overly rich running when the injectors were clogged). After cleaning the plugs, the car started fine. However, it would only idle for 30–60 seconds before stalling, and while driving it would feel like a “fuel cut” after a few seconds - though it wouldn’t fully stall. Test 2 – Strainer swap Suspecting the diagonal strainer might not be reaching the tank bottom, I swapped it for the original flat strainer and filled the tank with ~45L of fuel. The issue persisted exactly the same. Test 3 – OEM injectors To eliminate tuning variables, I reinstalled the OEM 270cc injectors and reverted to the original map. Cleaned the spark plugs again just in-case. The stalling and “fuel cut” still remained.   At this stage, I suspect an intermittent power or connection fault at the fuel pump hanger, caused during the cleaning process. This has led me to look into getting Frenchy’s fuel hanger and replacing the unit entirely. TL;DR: Cleaned and restored the fuel system (tank, lines, rail, pump). Tested 550cc injectors with the same resized-injector map as before, but the car stalls at idle and experiences what feels like “fuel cut” after a few seconds of driving. Swapped back to OEM injectors with original map to rule out tuning, but the issue persists. Now suspecting an intermittent power or connection fault at the fuel pump hanger, possibly cause by the cleaning process.  
×
×
  • Create New...