Jump to content
SAU Community

Recommended Posts

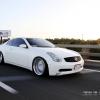
Long story short bought my car back in Mid 2009 as a P Plater, took me a month to find a ivory pearl white one I wanted.

post-33487-0-65690600-1428737207_thumb.jpg

It was stock as a rock and I was full into the stanced and offset style back then. After a few weeks I found some wheels I liked and needed to buy.

Evolution Intensive Hunks in Chrome with huge dish
Japanese made

19x9.5" +17 fronts 245/35 tyres
19x11" +10 rears 275/30 tyres

Whacked them on the car and boy it was Mexican as holy moly.

post-33487-0-51609600-1428737354_thumb.jpg

Drove around like that for a few weeks but the ride height was hideous, looked like I had a 2" lift kit in the sucker so that needed to change.

Came across some 40 mm lowered eibach springs, bought them, installed them and the ride height was looking good. Wasn't tucking tyre but way better then before nor was it as Mexican but still had a good amount of poke.

post-33487-0-44498200-1428737503_thumb.jpg

post-33487-0-91437700-1428737518_thumb.jpg

I Got bored with the performance of the car so the engine needed attention.

few months down the track i did a few bolt on mods including intake, cat back exhaust , Plenum Spacer and SAFC II.

Forgot to mention when i bought the car i went to the track and managed a 14.7 in stock form, with the mods and the big wheels i managed a 14.0

i was happy with that for a P Plater back then.

post-33487-0-08716900-1428738719_thumb.jpg

post-33487-0-65301000-1428738742_thumb.jpg

Performance was done and now back to the look of the car, the height needed to come down more, i found a cheap set of d2 coilovers and i Didn't have any intentions on tracking or racing the car, just needed it to slam the car. Suited my needs perfectly.
Rocked up a week later installed them and put it to the lowest setting as possible in the rears and matched it for the fronts.

Viola, my stance game was looking strong, it was looking awesome.

post-33487-0-29503300-1428737561_thumb.jpg

post-33487-0-17238400-1428737602_thumb.jpg

So i've had the car about a year at that point of time, within the next year i went through about 3 rims or so.

post-33487-0-21037100-1428738887_thumb.jpg

post-33487-0-37564800-1428738914_thumb.jpg

post-33487-0-99394900-1428739078_thumb.jpg

post-33487-0-36632600-1428739106_thumb.jpg

post-33487-0-25651500-1428739321_thumb.jpg

post-33487-0-77468600-1428739348_thumb.jpg

post-33487-0-39038200-1428739382_thumb.jpg

post-33487-0-05007100-1428739403_thumb.jpg

Link to comment
https://www.sau.com.au/forums/topic/455613-bees-lsv35-skyline/
Share on other sites

In mid to late 2011 i blew my motor, it was a sad day to say the least.

I got the car back home and it sat in the garage for about a year before i decided what i wanted to do with it.

post-33487-0-21535200-1428767265_thumb.jpg

i started to pull the motor out and checked the sump, as i thought, i spun bearings after looking at my sump.

post-33487-0-38911700-1428767336_thumb.jpg

post-33487-0-93808100-1428767374_thumb.jpg

off to my mates workshop, NextUp Performance and started planning my build out.

post-33487-0-52212000-1428767452_thumb.jpg

This was the start of something great, which was around 2012.

My new motor and box

A L98 6.0L motor out of a 2008 VE SS I purchased off my mate and a TH400 3 speed transbraked auto gearbox that i got built.

The 6.0L had a standard bottom end but it has valve springs/pushrods and lifters and a cam upgrade that previously made 620rwhp through a supercharger.

post-33487-0-78242400-1428767724_thumb.jpg

My plan was orginally to just keep it N/A and run a nice shot up of nitrous up its clacker.

but after a few months down the track i spoke to mates and i decided to go down the turbo route as this was the future plan after it was N/A.

gathering more parts for the next year or so which included

TCE Torque converter

Shifter
Flex Plate
Engine Accessories

Fuel system ( 3L surge tank, 4x 044 fuel pumps, 2 carter lift pumps, 2 fuel filters)

Haltech PS2000 ( which i've changed to a ELITE now)

Haltech Dash

Precision CEA 7675 turbo

Turbosmart 50mm pro gate

Holley Fuel rails

Drag wing

bought these parts slowly when i could afford it.

i then decided to change to a bigger cam from the orignal 233/233 that it had to a nice and lumpy 238/242 with the same lobe seperation but with abit more lift. I also did aftermarket head gaskets and ARP Headbolts as i did not want to lift the head with boost pressures as LS's are known to do.

That was sorted , so in the past year, i've slowly started to put the push on this build.

first off the engine had to be custom mounted, Cross memeber was notched and plated to suit the sump we modified as i wanted the motor sitting as low and as far back as possible.

Motor got mounted and the tranny,

Fabulous Fabrication did an amazing job on this, Next the big job was to get turbo manifolds done. Few days later working on and off on my car they were completed, i couldn't of been happier. Everything had to be taken into account from fitment to space for other things like alternator, piping, exhaust etc etc which was a headache to be honest

post-33487-0-94989800-1428768338_thumb.jpgpost-33487-0-07630100-1428769163_thumb.jpg

Motor was back out so i could paint it black, i wanted it to be stealth so everything was going black.

post-33487-0-88852500-1428768288_thumb.jpg

At this point i was still buying parts for the motor, like intake manifold, i ended up going with a holley single plane manifold as i heard and reasearched they are good for forced induction applications. With that i had to get a elbow to suit so a 6061 aluminum elbow was the choice to mate up to the standard fly by wire throttle body.

post-33487-0-38255600-1428769542_thumb.jpg

Bought some front wheels for it too, looked sooo goood.

Weld racing V series Front runner 17x4.5"

post-33487-0-71035400-1428770358_thumb.jpgpost-33487-0-21200400-1428770391_thumb.jpg

Motor went back in, measured up tailshaft length to get made, turn around time was about a week.

Tailshaft arrived, that got mounted.

Prior to that, a few months ago I had a good chat to Fabulous Fabrications and the Boy at Next Up Performance which will be tuning the car after.

We decided that the turbo manifold weren't gonna work for the size of radiator we wanted to run, wasn't going to be big enough.

This was actually good thing, as i didnt really have that much room for a big intercooler so i bought a 450x300x110 intercooler.

Few weeks ago Fabulous Fabrication moved the turbo further forward thus modifying the manifolds again leaving us more room to fit a larger sized radiator, measured up the room we have and a custom PWR radiator 500x500x50 is getting made as we speak.

Fabulous Fabrication also mount the Intercooler and did the hot side intercooler piping with a Plazaclamp, it looked wicked cool.

He also modified the intake side from a 3" inlet to a 4" inlet.

post-33487-0-54472200-1428770560_thumb.jpgpost-33487-0-11329400-1428770580_thumb.jpg

  • Like 4

gee that escalated. what are/were your plans for the build?

surely diagnosing what caused the first motor to die and then build up a mean VQ would have been cheaper/easier? (though i can understand people being over V6's)

VQ35's are known to use oil, so low oils caused spun bearings, parlty my fault as I should've checked oils.

To completely build a VQ and purchase a turbo kit and supporting mods, ecu/fuel system etc etc, from the states would work out roughly the same in price.

Intentions of the build is just a street car with the intentions of drag racing it.

whack some chevy badges on it to really rustle some people's jimmies! :P

Love it mate, can't wait to see more progress.

May I ask the reasoning behind a turbo kit over the more commonly done supercharger kit for LS?

That did cross my mind a few times lol :L

personal preference pretty much, also I find the power delivery of a turbo much more fun and aggressive than a supercharger.

That did cross my mind a few times lol :L

personal preference pretty much, also I find the power delivery of a turbo much more fun and aggressive than a supercharger.

doooooo eeeeet

Fair enough re: the turbo. Hope your set-up is everything you want it to be :) congrats on doing something different. I like different

Definately Big Transformation over the years.

Brake upgradea week ago thanks to PN-Mad
r32 GTR 4pot calipers, Drilled rotors and pads 296x32mm VS standard piston 296x26mm

post-33487-0-35324000-1429272210_thumb.jpg post-33487-0-35155500-1429272291_thumb.jpg

Working away doesn't give me time to work on the car so My good mate did my fuel system tonight, all plumbed up.

post-33487-0-15234900-1429272365_thumb.jpg

post-33487-0-37120300-1429272399_thumb.jpg

post-33487-0-13911500-1429272430_thumb.jpg

  • Like 1
  • 2 weeks later...
  • 1 month later...

Been slack with the posts, here's and update.

Car has been running and driving for over a month now, really happy with the outcome and can't thank my boys enough at Next Up Performance.

My car makes a solid 525rwhp on 10psi with United E85

The night before QLD May 2015 Powerplay ready for the dyno.

post-33487-0-49053300-1435456150_thumb.jpg

Car on the dyno awaiting tune.

post-33487-0-50317200-1435456325_thumb.png

Rolls off dyno what a better way to celebrate, Shed Skids!!

https://instagram.com/p/2apzngkAJS/

  • Like 2

Create an account or sign in to comment

You need to be a member in order to leave a comment

Create an account

Sign up for a new account in our community. It's easy!

Register a new account

Sign in

Already have an account? Sign in here.

Sign In Now


  • Similar Content

  • Latest Posts

    • For once a good news  It needed to be adjusted by that one nut and it is ok  At least something was easy But thank you very much for help. But a small issue is now(gearbox) that when the car is stationary you can hear "clinking" from gearbox so some of the bearing is 100% not that happy... It goes away once you push clutch so it is 100% gearbox. Just if you know...what that bearing could be? It sounding like "spun bearing" but it is louder.
    • Yeah, that's fine**. But the numbers you came up with are just wrong. Try it for yourself. Put in any voltage from the possible range and see what result you get. You get nonsense. ** When I say "fine", I mean, it's still shit. The very simple linear formula (slope & intercept) is shit for a sensor with a non-linear response. This is the curve, from your data above. Look at the CURVE! It's only really linear between about 30 and 90 °C. And if you used only that range to define a curve, it would be great. But you would go more and more wrong as you went to higher temps. And that is why the slope & intercept found when you use 50 and 150 as the end points is so bad halfway between those points. The real curve is a long way below the linear curve which just zips straight between the end points, like this one. You could probably use the same slope and a lower intercept, to move that straight line down, and spread the error out. But you would 5-10°C off in a lot of places. You'd need to say what temperature range you really wanted to be most right - say, 100 to 130, and plop the line closest to teh real curve in that region, which would make it quite wrong down at the lower temperatures. Let me just say that HPTuners are not being realistic in only allowing for a simple linear curve. 
    • I feel I should re-iterate. The above picture is the only option available in the software and the blurb from HP Tuners I quoted earlier is the only way to add data to it and that's the description they offer as to how to figure it out. The only fields available is the blank box after (Input/ ) and the box right before = Output. Those are the only numbers that can be entered.
    • No, your formula is arse backwards. Mine is totally different to yours, and is the one I said was bang on at 50 and 150. I'll put your data into Excel (actually it already is, chart it and fit a linear fit to it, aiming to make it evenly wrong across the whole span. But not now. Other things to do first.
    • God damnit. The only option I actually have in the software is the one that is screenshotted. I am glad that I at least got it right... for those two points. Would it actually change anything if I chose/used 80C and 120C as the two points instead? My brain wants to imagine the formula put into HPtuners would be the same equation, otherwise none of this makes sense to me, unless: 1) The formula you put into VCM Scanner/HPTuners is always linear 2) The two points/input pairs are only arbitrary to choose (as the documentation implies) IF the actual scaling of the sensor is linear. then 3) If the scaling is not linear, the two points you choose matter a great deal, because the formula will draw a line between those two points only.
×
×
  • Create New...