Jump to content
SAU Community

Recommended Posts

January 2017 - Since moving to Sydney (don't know if I mentioned that?), the horn has been getting quite a workout. With only one of the horns working, I decided to upgrade to a set of Hella Supertones. Wanting to keep the engine bay looking neat, I pulled the fuse box out and upgraded the factory wiring, rather than using the supplied relay. I was unsure about having two bright red horns behind the grill, but they're not actually too visible

IMG_20170129_131835.thumb.jpg.937ea8494b8335bf701c7efeed77d127.jpg

IMG_20170129_131844.thumb.jpg.afb319d1684a8f55fdad656962df22f3.jpg

February 2017 - I'd being keeping an eye out for a while for a Nismo 320km gauge cluster, but the only ones I could ever find for a reasonable price were the white version, and I much prefer the black. I found one on Yahoo Auctions for a really good price because of a dead tacho, so I grabbed that, did a bit of electrical tinkering, and now it's working perfectly. Since I don't have an Active LSD, I wired up the warning light to the alarm LED, which fits in nicely with my 'keep everything looking stock' theme.

IMG_20170204_095948.thumb.jpg.0413c035a739fa57637baf219d5541fe.jpg

IMG_20170203_161613.thumb.jpg.58bb212479701cf68f0ba08758b4d44e.jpg

IMG_20170205_150412.thumb.jpg.3f48fe564b24302d32eceda0255a3785.jpg

IMG_20170217_164153.thumb.jpg.eec276960866b1d433d011c12a7a3b7b.jpg

I also modified the gear shift surround to mount the wideband gauge where the cigarette lighter was, as it never gets used. I got a scrap piece of plastic and cut a hole in it to fit the gauge, then used epoxy to stick it on, and drilled some small holes to screw the gauge on. It looks rough as, but it's surprisingly strong, it won't be falling apart any time soon

IMG_20170315_163757.thumb.jpg.d39fc2cd479442f01d03bb9cbd3ed5af.jpg

IMG_20170315_163630.thumb.jpg.b8572f96cb08d358bd92f211d4813504.jpg

IMG_20170315_163541.thumb.jpg.ccdfe3f1425bc3c40258316ca54c5241.jpg

IMG_20170315_163554.thumb.jpg.e730ae4d9bec1a859ab1918e12cc72fe.jpg

  • Like 2
  • 2 weeks later...

A few updates from earlier this month:

After putting up with a crappy battery for quite a few years, I finally replaced it with a nice new Optima yellow top (D51R-T1). I can now leave the car for more than a couple of days, and it will still start, amazing!

Next up, changed my old beaten up front pipe for a new Blitz item, with 70mm inlets to 80mm outlet

IMG_20170307_165509.thumb.jpg.96ea3ea3e854e25b09cee9865b0ddcdf.jpg

And just as exciting as the shiny new front pipe, some shiny new brake line clips. These are the same part as clips for a S14 (46289-15U10)

IMG_20170307_124813.thumb.jpg.15716a63b61f6b3df38cc61f9c280f77.jpg

And last on the list, made a slight modification to the AFR gauge. The LED display was a bit too bright for my liking, so I bought some small sample pieces of window tint and applied that to the clear plastic over the front of the gauge. When the gauge is off, it looks completely black, nice and stealthy

IMG_20170319_103011.thumb.jpg.617a675a38e11ae7f47599340dd5f180.jpg

Edited by jimnastic
  • Like 2
On 3/31/2017 at 5:01 PM, Humbla said:

Nice, i have an r33 that's been my daily for 15 years ,mods higher boost. If there looked after they go for a long long time. emoji3.png

Yeah it seems like it'll keep going forever, I hope I'm right! It's had a pretty easy life while I've had it, only occasionally pushed hard on a nice curvy back road here and there

  • Like 1

Been a bit busy recently so I've fallen behind with the updates, but this is pretty close to where it's at now

So far, I've just used what limited knowledge I have of tuning to just keep it running nice and safe, but now that I've got all the performance related bits that I want, it was time for a proper tune. Had the car booked in at Unigroup, where it made 265awkw @ 18psi, not a bad result :D

While it could have made a bit more power, it was being held back by the clutch beginning to slip (an Exedy NSK-7172 OEM replacement, changed a few years ago), and some weakness in the ignition system was starting to show. So at this stage, I'm considering replacing the clutch with a Nismo Coppermix twin plate, and possibly an upgrade to LS2 coils, but neither of these will be happening for a while as I'm quite happy with the power it's making now. I'm happy to hear any suggestions or recommendations if anyone is following along

Since a post without pictures is kind of boring, here's a picture of the engine bay not long after I bought it, and one from a bit more recently (still not current though, will get some new pics soon)

IMG_20121211_175656.thumb.jpg.8b537b2e0924e1be6574ef209b08c441.jpg

IMG_20161125_151534.thumb.jpg.d1902a19130868494094ab7d7cd4d3e6.jpg

  • Like 8

I've been focusing my attention recently on tidying up the engine bay. There's no way I'll ever be able to get it as clean as I want it, but every little bit counts

While I was in there scrubbing away at everything, I also hit a few bits with some black paint

The bonnet stand

IMG_20170407_164456.thumb.jpg.b9d4c2a836c38095db07ec083d0db184.jpg

These mounting brackets

IMG_20170407_164641.thumb.jpg.137da4cd072c3d98613764ae4033e0e1.jpg

The top of the headlights, and the coolant and washer bottles. I actually have new replacement bottles on the way, but I just wanted to see what they look like black

IMG_20170407_164634.thumb.jpg.6238122c332e3378d8e36b8d6a783dc7.jpg

I also got some pictures of a few miscellaneous bits that I hadn't covered previously

The interior. The shifter and handbrake boots looked better when they were new, but I don't like how they've faded. They're on the to do list

IMG_20170407_164839.thumb.jpg.31a72207305363dc6761c2cfc8eb26c5.jpg

I've posted about the wideband before, but I didn't get a picture of the data IO cables, which are run through where the little glass window was in the ash tray

IMG_20170408_174802.thumb.jpg.99b184ee0d88d6a81c078ab7918a4e9a.jpg

The drivers side window switch wasn't quite working properly, which I think is a common thing on the R33s. With a little bit of fabrication work, I swapped the broken window buttons out for buttons from a Hilux, which seem to feel a lot sturdier

IMG_20170407_164937.thumb.jpg.d542be65e9af8a8d9785d601d584d5dd.jpg

This is just a close up of where I've tucked the injector ballast and boost solenoid plugs back in to the fuse box. Makes this whole area look a lot neater than just leaving the unused plugs hanging out

IMG_20170408_105844.thumb.jpg.87371343fa19b510c5086eb8a6ac6060.jpg

This is the Nismo dash I bought and fixed, with the aftermarket immobiliser LED connected to the A-LSD light. Nice and factory looking

IMG_20170408_175219.thumb.jpg.daff5a7056d9d97822fed1e7092c1876.jpg

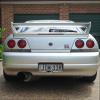
And finally, I haven't really put up any decent pictures of the car itself, so here's one from the weekend

IMG_20170409_115237.thumb.jpg.e6fc3544ca287e8cfd1540643ea9e735.jpg

  • Like 3
  • 3 months later...

Since the last update, my partner and I have moved down to Canberra due to her job, so I've unfortunately had to restrain myself from spending too much money on the GTR until I start working again. I did however receive some parts from Japan that I ordered just before the move.

A (fake) Garage Defend style carbon cooling panel. Couldn't justify the price of a genuine one, as I only wanted it so it would cover all the ugly stuff behind the front grill and lights, but it's surprisingly good quality, just took a bit of persuasion to get it to fit properly

IMG_20170502_160216.thumb.jpg.cebf74a63f5a6c67d86a09d3070dd3fa.jpg

IMG_20170502_162904.thumb.jpg.465f09566bf1f9b77cb89b33bf53c1f4.jpg

Also received some various bits from Japan, including new coolant overflow and washer bottles

IMG_20170528_144749.thumb.jpg.afd30b6e41e2536c4470b1987a27c651.jpg

IMG_20170528_145554.thumb.jpg.78ddb150520584151df36b4b630722a9.jpg

Edited by jimnastic
  • Like 2
On 3/31/2017 at 8:34 AM, jimnastic said:

A few updates from earlier this month:

After putting up with a crappy battery for quite a few years, I finally replaced it with a nice new Optima yellow top (D51R-T1). I can now leave the car for more than a couple of days, and it will still start, amazing!

Good choice of battery, my 10 year old yellow top has finally given up last week with plenty of warning, pretty impressed with the long life

  • Like 1
  • 5 weeks later...
  • 2 weeks later...

Thanks for the positive comments, keeping it clean and tidy has been my goal with everything, so I'm glad it comes through in the photos :91_thumbsup:

Recently fitted a GReddy oil filter relocation kit. I avoided doing this for a long time as I really didn't want anything in the engine bay that didn't look stock, but I was a bit over fighting with the location of the filter every time I do a service

IMG_20170829_170604.thumb.jpg.9450d6a9ff9bf77fdf31cf97998b7874.jpg


Since getting the car tuned, I've been doing some homework on upgrading the ignition system, and decided on an upgrade to R35 GTR coil packs. I got the coil bracket from Platinum Racing Products in Sydney, the coils are Splitfire SF-DIS-103, and the harness was found on ebay. The engine cover is staying off for now, as it will need a bit of modification to clear the rear coil

IMG_20170826_160922.thumb.jpg.66acec90a56c45a82a71112a585b3bb2.jpg

IMG_20170826_160913.thumb.jpg.55ff446487bfbdb3775a77f953511dd1.jpg

IMG_20170829_170629.thumb.jpg.6cab05af052e8d90fe81a13dab3b28c1.jpg

  • Like 3
  • 4 weeks later...
  • 10 months later...

Things got real busy between now and my last update, bought a house, got married, all of that stuff that keeps you occupied. Very excited to have a garage now, so the GTR finally has a roof over it's head, and I've got plenty of room for bigger projects (possibly a friend for the GTR soon?)

Anyway, here's a small update to start things off - New handbrake and shifter boots. Bought these from redlinegoods.com, very happy with the quality of these compared to the cheaper ebay ones I had before, hopefully they hold up a bit better

IMG_20170913_171911.thumb.jpg.9459171e24546f7592f666f219e5a6b1.jpg


  • Like 2

As mentioned earlier, the clutch was a bit unhappy with the new tune. Coppermix twin plate was purchased along with a few other bits to change while the gearbox is out (parts breakdown in an upcoming post)

IMG_20180117_161133.thumb.jpg.6e6125f3f0ee72888af857242f4e0695.jpgIMG_20180117_162123.thumb.jpg.c144623c3126674c9f2105323a7c68cf.jpg

Rear camber arms from Hardrace to hopefully stop the rear end from eating tyres

IMG_20180516_164526.thumb.jpg.608911edbe123b7edd924c9f18a60b07.jpg

Found this stock stereo going for a good price. Planning to install a bluetooth module and replace the existing JVC unit

Screenshot_20180211-212255.thumb.png.aa119bb333b7af583fcc3563a0c9868f.png


  • Like 1

Minor update between buying the clutch and fitting the clutch


Got these Behrman replacement headlight lenses from rhdjapan. Only problem is they're too nice to put on the car. Looking into what options there are to protect them, at this stage thinking of covering them with clear vinyl wrap or something

IMG_20180430_200014.thumb.jpg.036711f15cdac01ddbcb524cfbf05e0e.jpg

Here's a little project I've been working on. I've developed this weird obsession with getting the power window switches to feel nicer and work better. Bought a VW window switch, which turned out to be way more complicated than a switch needs to be. Programmed an Arduino to translate input from the switches, and then send that information back to 1995 so the car can understand. Very rough looking prototype installed in the car while I continue tweaking it, but it works... some of the time.

IMG_20180318_165911.thumb.jpg.676f212c9c254c4ee0a277291cea6201.jpg

IMG_20180329_212502.thumb.jpg.9371be7cb2fad98b22a351f80bc01b58.jpg

  • Like 1

Wow that's insane!

Yes I must admit all the buttons, switches, resistive door locks gives me a boner each time I drive the Tiguan (and DSG farts lol). Getting into the time machine aka Skyline hurts, until you press the loud pedal :)


Haha similar situation with the wife's Polo. Will take crappy switches and RB soundtrack any day

Also been thinking of doing something to replace the awful headlight/key buzzer sound with that nice VW 'ding ding ding'. Maybe it would be easier to just swap the RB into the VW at this rate

Create an account or sign in to comment

You need to be a member in order to leave a comment

Create an account

Sign up for a new account in our community. It's easy!

Register a new account

Sign in

Already have an account? Sign in here.

Sign In Now


  • Similar Content

  • Latest Posts

    • Even more fun, leave all the ADAS stuff plugged in, but in different locations, hopefully avoid any codes!   And honestly, all these new cars with their weird electronics. Pull all the electronics out Duncan, and just shove an aftermarket ECU and if needed a trans controller in, along with a PDM. Make it run basic but race car styled!
    • To follow up a question from earlier too since I had the front bar off again (fking!) This is what is between the bumper and the drivers side wheel And this is the navigator side, only one thing but its a biggy! So basically....no putting coolers in the wheel arches without a lot of moving other stuff. Assuming I move to properly race prepping this car I'll take that job on and see how the computers respond to removing a whole bunch of ADAS modules
    • So I prepped the car for another track day on Wednesday (will be interesting to see coolant temps post flushing out and the larger reservoir, with a forecast of 3-14 being 20o cooler than last time I took it out). Couple of things to mention; since I am just driving the car and not taking a support vehicle, I took the rear seats out and just loaded the back up Team Trackday style. Look at all that space! To cover off removing the rear seat....it is weird (note the hybrid is probably different because it wouldn't have folding rear seats) Basically, you remove the lower seat base, very similar to a r series but it is a clip that pulls forward to release the base rather than it being bolted down. Easy Then, you need to remove the side section of the rear seat on each side. There is a 14mm head nut at the bottom of the side piece, the it slides upwards off a hook at the top to release; you also need to unhook the seatbelt from the loop at the top. Then the centre piece is weird. You need to release/fold the seats forward with the tab in the boot on each side From there, there are 2,x12mm headed bolts holding the rear of each seat to the folding bracket, under the trim between the rear seat and the boot (4x christmas tree clips there, they suck). The seat is out but you can see where the bolts attach to the bracket
    • As discussed in the previous post, the bushes in the 110 needed replacing. I took this opportunity to replace the castor bushes, the front lower control arm, lower the car and get the alignment dialled in with new tyres. I took it down to Alignment Motorsports on the GC to get this work done and also get more out of the Shockworks as I felt like I wasn't getting the full use out of them.  To cut a very long story short, it ended up being the case the passenger side castor arm wouldn't accept the brand new bush as the sleeve had worn badly enough to the point you could push the new bush in by hand and completely through. Trying a pair of TRD bushes didn't fix the issue either (I had originally gone with Hardrace bushes). We needed to urgently source another castor arm, and thankfully this was sourced and the guys at the shop worked on my car until 7pm on a Saturday to get everything done. The car rides a lot nicer now with the suspension dialled in properly. Lowered the car a little as well to suit the lower profile front tyres, and just bring the car down generally. Eternally thankful for the guys down at the shop to get the car sorted, we both pulled big favours from our contacts to get it done on the Saturday.  Also plugged in the new Stedi foglights into the S15, and even from a quick test in the garage I'm keen to see how they look out on the road. I had some concerns about the length of the LED body and whether it'd fit in the foglight housing but it's fine.  I've got a small window coming up next month where I'll likely get a little paint work done on the 110 to remove the rear wing, add a boot wing and roof wing, get the side skirt fixed up and colour match the little panel on the tail lights so that I can install some badges that I've kept in storage. I'm also tempted to put in a new pair of headlights on the 110.  Until then, here's some more pictures from Easter this year. 
    • I would put a fuel pressure gauge between the filter and the fuel rail, see if it's maintaining good fuel pressure at idle going up to the point when it stalls. Do you see any strange behavior in commanded fuel leading up to the point when it stalls? You might have to start going through the service manual and doing a long list of sensor tests if it's not the fuel system for whatever reason.
×
×
  • Create New...