
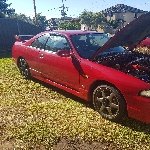
Skyline R33 series 1 no start
Announcements
-
Similar Content
-
-
Latest Posts
-

By R34_GT to Turbo · Posted
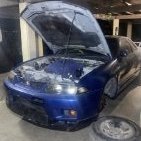
Ok so will run the piping over that radiator and no plenum it is. Put that money towards a Haltech and see what suits. Any ideas something like an elite 2000 or 2500 right? My long term goal is 300kw e85 and manual swap and that’s a dream come true. For now will be 200kw and auto the stock rb25det neo intake isn’t too expensive with throttle body. If I was to have the port matching done, Would that be better than the stock de intake as the det has bigger holes plus has the spots for sensors etc? And suit more long term? appreciate the advice? -
 You understand AFR is not the only thing that contributes to it pinging yeah? Funnily, what the AFR gauge will tell you when it likely is pinging, is going to make you think things are really safe and good.
 -
Run the piping how we all have for decades. Also the duel runners with the +T setup dramatically helps it gets on boost quicker. Yes, chase huge power it'll become a problem, but you're a long way off when you're already saying an aftermarket ECU is out of the budget. You also say NisTune as it's simple, and then immediately say it'll be painful, meaning... It won't be simple. It will likely cost you a lot more stuffing around with a Nistune, than just putting a Haltech or similar in.
-
 I’ll order an afr gauge to keep an eye on it. Then will get a haltech soon
 -
By R34_GT to Turbo · Posted
TD05 or maybe pulsar PSR2867r Gen 2? id love a garret but it’s quite out the budget for now and I’m not chasing crazy power. yeh fuel pump haven’t looked into but whatever works, kind of last on my list. Nistune because it’s simple but Ik it’s a lot of pain especially as I’m auto +t with the whole seperate TCM etc still investigating that. Haltech id love but once budget tight for now atleast. finally the reason I’m trying for a plenum instead of the stock intake is I already have a standard Intercooler mounted etc. so the ports are on both sides so trying to not have to go over the clutch fan radiator etc. trying to find a good deal return flow if I don’t than this will do for now I guess. btw any ideas with that, apparently some people have to cut blades to reduce it from hitting the Intercooler piping over the radiator ? Thanks
-


Recommended Posts
Create an account or sign in to comment
You need to be a member in order to leave a comment
Create an account
Sign up for a new account in our community. It's easy!
Register a new accountSign in
Already have an account? Sign in here.
Sign In Now