Jump to content
SAU Community

Recommended Posts

  • Replies 215
  • Created
  • Last Reply

Top Posters In This Topic

Top Posters In This Topic

Posted Images

Dan i don't know if you've been told or have heard but Boaty is trying to get numbers up for a prctice on Friday night at Mallala. It's not gonna be a DA or SD only practice but for anyone who wants to. I belive Mallala is trying to have it on at 5-9pm on this Friday. If you can make it, I'd suggest calling Boaty and showing interest. Could be some VERY valuable prctice time for you!

Great news mate, congrats. It's all coming together now.

My mate and I will be driving there and towing his car. His name's Rob and he drives a white 180SX with a Cosmo 13B in it. F**king crazy.

Ah,,,Roto Power gotta love it.

Possum,,,just in the nick of time. So we both will have a great weekend. Poor Duncan he'll have to sit at home renovating Ha Ha Ha.

Neil.

Well Guys,

Car is painted, Everything is on bar the side skirts, do that this morning... Decals will be applied in a NOT WINDY AREA once we arrive.

Getting tune this morning and we are off... I can't believe that it is done, I am stoked... and the paint looks AWESOME!!!!

I'll give a run down on the last week when I get back... Until then Kids, Stay Sideways.

PS. Did I mention that the whole build has been documented for the documentary being made on me... so who would watch the program?

Dan.

PPS. Neil, have fun this weekend mate, and good luck!

Hey Guys... Well the build is I guess done... but I am thinking I might continue this thread while I develop the car also...

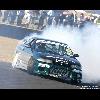
We had HUGE weekend... even if I did only do 15 laps all weekend... As Neil said, I qualified 8th, which was fantastic, and even though I was giving Denzo a hard time, I Spun and finished 18th... either way I am happy that I made it down, qualified, competed and brought back a working car!

Thanks for all the well wishes and support... I had a massive last month getting the car ready.

Don't forget to watch the footage on Speedweek on the 11th of June.

Cheers Guys,

Dan.

Pic Attached courtosey of www.speedshots.com.au

post-49-1149681259.jpg

Create an account or sign in to comment

You need to be a member in order to leave a comment

Create an account

Sign up for a new account in our community. It's easy!

Register a new account

Sign in

Already have an account? Sign in here.

Sign In Now


  • Similar Content

  • Latest Posts

    • My apologies. I forgot we were talking about weird beard M series stuff. Had been talking elsewhere with someone about an R33 with similar subject and got confused.
    • Nope, I don't like the look of ND RF, or any ND really, I don't like their faces or arses, why, because of their "modern" lines, the NC, whilst "modernish" has a more rounded shape that I like Well, that's how my overly judgemental eyes see it anyway  
    • Should be more than fine, especially the overall fuel pressure would never exceed 3.5bar (assuming that thing never gets more than 0.5bar of boost in stock form). According to the chart, it's 11amps.
    • I definitely know the first rule here, look first, ask second. I've seen many people get roasted 😂 I found a few diagrams for the RB, but I'm yet to come across one for the VQ. From what I have read, the pump gets the +12v along with the FPCM, and it's the negative wire that gets passed through the resistor to regulate the voltage. So I assume I can just ground the negative wire at the pump to eliminate the FPCM control. But I really wanted to see the VQ circuit diagram first to make sure I understood it correctly. Once the new pump is in I'll do some testing to see how it behaves, and in the meantime, I'll keep looking for a wiring diagram. Thanks for your help mate, your time is greatly appreciated.    
    • Maybe? I have the Supercheap ToolPro low thingo. It has a somewhat smaller diameter lifting "bowl" than you would expect on a workshop grade trolley jack, and a split rubber pad to suit that diameter. It clears the "N1" style skirts I have. Probably wouldn't if the jack's bowl and a suitably larger rubber block were in use. Having said that though.....you only need the rubber block to exist on the inner side of the pinchweld, so could carve away any rubber that fouled the skirt, leaving some there for "insurance" </simples>
×
×
  • Create New...