

Announcements
-
Similar Content
-
-
Latest Posts
-

By TurboTapin · Posted
2.8L Stroked S1 RB25 Fully built block (Spool&CP) and head (Ferrea & Kelford 272's). Hydro lifters. Precision 6466 Gen2 1.00 T4 Divided. 2x 40mm Turbosmart open dump gates. DW 1200cc injectors 2x AEM 320LPH Pumps Haltech Elite 2500, IC7, WB1, TC8, Etc. 4" Downpipe, 3.5" Catback. 94AKI (101.5ron) Pump gas + WMI (2x 1000cc nozzles) 463rwkws @ 27psi on a mustang roller dyno. -
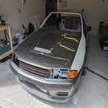
By TurboTapin · Posted
I finally got it on the dyno today and luckily it stayed in one piece! It wasn't without its dramas though. First off, sent my power steering belt to the moon around the third pull. Scared me half to death. Tuner laughed and mentioned that often happens with RB's... I may need to look into adding the Ross power steering idler, or something a long those lines. Second issue that came up was about 2 hours in, we realized the VCT wasn't working and had to go back through the timing and knock threshold once it was fixed (I had botched setting up VCT). That waisted a good hour or so. I was surprised to see that with VCT working, we saw a ~38rwkw difference across the powerband. More then I would of expected. Without further ado, made 463rwkw@27psi. Not the numbers I originally set out after, but still more then enough to kill myself and I'm very happy. Mustang roller dyno's are known to be heart breakers compared to other dyno's. Two things that limited me, first was the hydraulic lifters/7600rpm cut. Tuner was adamant that I was losing out on a lot of power up top because of it. Second was the pump gas & WMI. He wasn't 100% comfortable tuning with WMI, and was honest about it. He stated he's more confident on E85/Race gas. I look at this as a positive as it leaves me a lot of room for improvement. All in all, very happy! I need to see what I can do about that rev limiter... I use to rev my stock RB20 to 8000rpm and now I have a fully built head that I only rev to 7600... It's bugging me. Don't mind my fantastic picture/filming skills. RB28 - Dyno (1).mp4 -
-
 Wow mate that's huge, congrats. Glad you found better people to deal with and all seems like it's going in the right direction.
 -
 The best setting for street is what gives the best tyres wear for your driving style Different tyres like different camber You want the whole surface of the tread to wear flat, if the inside of the tyre is wearing more than the outside reduce camber settings For toe, have the minimum amount to give the handling you want Caster, from my experience if you can adjust it, is as much as you can get without clearance issues And while -2.5° of camber on the front might work well with good tyres for "spirited" cornering, it may be too much for a street car Lots of front camber will effect braking Just like to much rear camber will effect rear traction (rwd), and braking When I set my Bogan Cruise Ship (VX SS) up for drags I tested how much tyre width I actually had in the rear by doing a hard launch (skid), it originally had -1.5° in the rear, and you could see that the tyre wasn't putting down alot of the tread, I maxed out the settings to get as little camber as I could with the OEM adjustment and some camber bushings and got it down to just under -0.5° with 0 toe, that gave me a fair bit more "rubber on the road" and helped it hook up for my 60' and my 0-100kph And with -1.5° in the front the big old boat handles fine on the street and my tyre wear is nice and even on both front and rear tyres (currently Hankook RS4's) As for semi slicks at the track, again, it depends on alot more IRT the suspension, the track and lots of other things, so, I'll leave that up to people who have more experience, especially with a AWD In saying this, street settings are pretty easy, just look at the tyre wear Meh, Necro thread, it's late at night, and I has been drinking beer
-


Recommended Posts
Create an account or sign in to comment
You need to be a member in order to leave a comment
Create an account
Sign up for a new account in our community. It's easy!
Register a new accountSign in
Already have an account? Sign in here.
Sign In Now