Jump to content
SAU Community

Recommended Posts

I have purchased a Sliding Performance RB25 hiflow for RB20 and will be installing it on my RB20det over the weekend and thought as there was no results on them with RB20det's I will post all my results here.

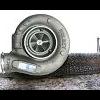
The turbo arrived as soon as Aaron promised and my first opinions are it is a good quality product. The machining and finish is very high quality and the CHRA came filled with fully synthetic oil. Both the compressor and turbine are new as well as the whole shaft, bearings and carteridge.

Here are some photos.

100_1180.jpg

100_1179.jpg

100_1178.jpg

100_1177.jpg

100_1176.jpg

100_1175.jpg

100_1174.jpg

100_1173.jpg

The turbo will be going on a mildly modified RB20det with approx 100,000K's and the following

RB20 turbo wastegate

BOS importing split dump/front pipe

3" meatalcat

2.75" kakimoto JASMA approved catback (will be upgrading to 3" later)

TRUST tube and fin FMIC

GTR 444cc injectors

GTR fuel pump

Remapped factory ECU

pneumatic/mechanical turbotech boost controller

NGK copper plugs gapped to 0.9 (factory coils still in good condition)

Stock cams, airbox, BOV, panel filter.

Other modifications to come will also be 1.5 way mechanical diff and brass button clutch.

I will not have a chance to dyno the car and make adjustments to the timing and fuel map untill next Thursday but will post the results once done. currently I estimate the car is making around 140RWKW. I am hoping for 210RWKW once installed.

Will keep you all posted :(

Cheers

  • Replies 231
  • Created
  • Last Reply

Top Posters In This Topic

yeah it's funny. I think it is because the snout is tapered it actually looks a lot more bored than it actually is. There is a good bit of meat left on the snout. it just looks super thin in the photos :(

I may have ot re estimate my initial power estimate after calculating the flow of the 2.75" exhaust compared to a 3". I worked out it will flow 19% less than a 3"

If I am wrong please feel free to correct me. but I think it will be a fairly large restriction and I will not have the time or money to replace it untill after the dyno is done.

but we will see how it goes.

Edited by CEF11E

I think you will reach 200rwkws (all depends on the boost you run I guess) with all the mods you have said. You will need to sort out your ecu as you menioned and once thats done I dont see why you cant get what you want even with the 2.75 " exuast. Anymore than about 200-210rwkws you will need to add a z32 as the stock afm will be running out of resolution.

I have the very same turbo, and am equally impressed with the finish and quality of the product.

I just installed it on my RB20 with similar mods but stock ecu. Suppose to be getting a dyno and remap tomorrow but this isnt happening now, so im going to run a remap ecu from a similar turbo until i can get to a dyno.

its pretty laggy on a stock ECU map i can say that much!`

I'm very interested in doing this turbo thing too. Also got a cef, so quite eager to see the results.

Without trying to hi-jack the thread, what do you call 'pretty laggy' simon?

haha arent all rb20's laggy. I had a 2530 on mine in the old sil80 and damn it felt laggy in comparison to a mates sr with a 2530. Pissed me off cause i hate sr's. RB's FOREVER :)

Im guessing full boost by about 4500??

lol, mine hopefully is being milled up today :P

hope to get it installed onto the Stagea within the next few weeks, but we'll have to see what I can get organised - healing from the patellectomy so cant drive for a while yet. :laugh:

Not sure about the oil feed yet. I am going to take mine off first thing saturday morning and head over to pirtek with it and the 2 banjo bolts. will either get a nre braided one made up or mod mine to suit. The banjo bolts have to be drilled out to 6mm and the banjo fittings need to be drilled out to 5mm.

I do have the tools but would rather a pro did it. :laugh:

Interesting to hear about your braided line pricing/specs if you go for that option :)

I want a new turbo too - but dam the delay from Sliding :D:P :P

Just grab another turbo, I have a spare waiting for the hi-flo treatment. Perfect working order, swapped a set of stock R33 wheels for it ;)

wasnt able to get to the dyno today, so i had Jeff from The Speed Lab put my cefiro remap that was suited to the KKR 430 onto my r32, while not perfect its still better then running the stock map with this turbo.

the ceffy remap was tuned for 16-17 psi, but for safety until i get the car onto the duyno, im running 1 bar.

Im getting full boost at over 4000 rpm but before 4500. from then on it pulls extremally hard,

Comparing to my cefiro, which had 200 rwkw, this feels slightly quicker.

The downside is that offboost and while its trying to build boost down low in the rpm range its bloody slow lol.

Create an account or sign in to comment

You need to be a member in order to leave a comment

Create an account

Sign up for a new account in our community. It's easy!

Register a new account

Sign in

Already have an account? Sign in here.

Sign In Now


  • Similar Content

  • Latest Posts

    • Hi, is the HKS  Tower Bar still available ? negotiable ? 🤔
    • From there, it is really just test and assemble. Plug the adapter cables from the unit into the back of the screen, then the other side to the car harness. Don't forget all the other plugs too! Run the cables behind the unit and screw it back into place (4 screws) and you should now have 3 cables to run from the top screen to the android unit. I ran them along the DS of the other AV units in the gap between their backets and the console, and used some corrugated tubing on the sharp edges of the bracket so the wires were safe. Plug the centre console and lower screen in temporarily and turn the car to ACC, the AV should fire up as normal. Hold the back button for 3 sec and Android should appear on the top screen. You need to set the input to Aux for audio (more on that later). I put the unit under the AC duct in the centre console, with the wifi antenna on top of the AC duct near the shifter, the bluetooth antenna on the AC duct under the centre console The GPS unit on top of the DS to AC duct; they all seem to work OK there are are out of the way. Neat cable routing is a pain. For the drive recorder I mounted it near the rear view mirror and run the cable in the headlining, across the a pillar and then down the inside of the a pillar seal to the DS lower dash. From there it goes across and to one USB input for the unit. The second USB input is attached to the ECUtec OBD dongle and the 3rd goes to the USB bulkhead connected I added in the centre console. This is how the centre console looks "tidied" up Note I didn't install the provided speaker, didn't use the 2.5mm IPod in line or the piggyback loom for the Ipod or change any DIP switches; they seem to only be required if you need to use the Ipod input rather than the AUX input. That's it, install done, I'll follow up with a separate post on how the unit works, but in summary it retains all factory functions and inputs (so I still use my phone to the car for calls), reverse still works like factory etc.
    • Place the new daughterboard in the case and mount it using the 3 small black rivets provided, and reconnect the 3 factory ribbon cables to the new board Then, use the 3 piggyback cables from the daughterboard into the factory board on top (there are stand offs in the case to keep them apart. and remember to reconnect the antenna and rear cover fan wires. 1 screw to hold the motherboard in place. Before closing the case, make a hole in the sticker covering a hole in the case and run the cable for the android unit into the plug there. The video forgot this step, so did I, so will you probably. Then redo the 4 screws on back, 2 each top and bottom, 3 each side and put the 2 brackets back on.....all ready to go and not that tricky really.      
    • Onto the android unit. You need to remove the top screen because there is a daughterboard to put inside the case. Each side vent pops out from clips; start at the bottom and carefully remove upwards (use a trim remover tool to avoid breaking anything). Then the lower screen and controls come out, 4 screws, a couple of clips (including 3 flimsy ones at the top) and 3 plugs on the rear. Then the upper screen, 4 screws and a bunch of plugs and she is out. From there, remove the mounting brackets (2 screws each), 4 screws on the rear, 2 screws top and bottom and 3 screws holding in the small plates on each side. When you remove the back cover (tight fit), watch out for the power cable for the fan, I removed it so I could put the back aside. The mainboard is held in by 1 screw in the middle, 1 aerial at the top and 3 ribbon cables. If you've ever done any laptop stuff the ribbon cables are OK to work with, just pop up the retainer and they slide out. If you are not familiar just grab a 12 year old from an iphone factory, they will know how it works The case should now look like this:
    • Switching the console was tricky. First there were 6 screws to remove, and also the little adapter loom and its screws had to come out. Also don't forget to remove the 2 screws holding the central locking receiver. Then there are 4 clips on either side....these were very tight in this case and needed careful persuading with a long flat screw driver....some force required but not enough to break them...this was probably the fiddliest part of the whole job. In my case I needed both the wiring loom and the central locking receiver module to swap across to the new one. That was it for the console, so "assembly is the reverse of disassembly"
×
×
  • Create New...