Jump to content
SAU Community

Recommended Posts

Any suggestions on how to bolt up the top water line?

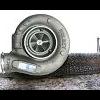
Its a tight fit............. trying to get the washer on, the line, then the bolt with the other washer, and its all just very very tight. My thought is to stick the first washer to the turbo.

Got everything for the turbo bolted up and ready, just need to get this water line on, and add the new fluids. Wont get to the brake kit at this stage. Those who say here on the forums that the turbo-off is a 1hr job must be kidding themselves. That is simply untrue. :) Been aropund 8hrs so far I think.

  • Replies 231
  • Created
  • Last Reply

Top Posters In This Topic

Small dab of grease to stick washer to turbo or banjo .

Join the club , many hours spent R/R turbos - just not for fun . Also the reason why propper Jap kits give ALL the fiddly bits and usually bolt up reasonably easy - for a turbocharger .

Hi Tangles.

lol I know it can be a biauch of a job mate.

If you mean the inside of the turbo closest to the engine...

follow the line to the block and loosen the banjo bolt to within a couple of threads so you have side to side movement. that will allow you to line uo the bolt with the carteridge easier. Also use grease like somone else sugested to hold the washers on there.

Taking the turbo off is really hard if you do not have the right tools. you need a good socket set with different length extension bars.

you also need a good set of ring/open neded spanners.

As for further results,

I may have posted earlier but my tune has been redone and new coilpacks and plugs and running 18psi. boost is coming on faster with the leaner tune and producing more power everywnere. I am only estimating but it would be putting out 230kw now.

I will have the car dynoed in the next 2 weeks. I am very happy with the power and delivery.

Cheers :)

Cheers all, Im sure a little dab of grease to stick the washer to the turbo will do the trick. Its actually the outside water feed line that faces away from the engine. Musta just been late last night and we were tired. Was dark, lol. Pretty fidley, without the right tools youd have no hope.

Everything is bolted back up except this one water feed. Fluids go in and thats that. Will report back. :)

Cheers all, Im sure a little dab of grease to stick the washer to the turbo will do the trick. Its actually the outside water feed line that faces away from the engine. Musta just been late last night and we were tired. Was dark, lol. Pretty fidley, without the right tools youd have no hope.

Everything is bolted back up except this one water feed. Fluids go in and thats that. Will report back. ;)

Hi Tangles. I had the same problem with this line it was actually hitting the housing and looked

like i had no hope of getting it. We took of a support bolt near the rear of the block and with a

bit of slight bending and plenty of swearing finally got it. I thought maybe it was hitting because

of the VG30 rear housing being bigger, but not sure of this? Anyway all is good now and it's been

running on the car now for about three weeks. Will be getting tune done soon. :miner:

Hi Tangles. I had the same problem with this line it was actually hitting the housing and looked

like i had no hope of getting it. We took of a support bolt near the rear of the block and with a

bit of slight bending and plenty of swearing finally got it. I thought maybe it was hitting because

of the VG30 rear housing being bigger, but not sure of this? Anyway all is good now and it's been

running on the car now for about three weeks. Will be getting tune done soon. :D

Hey mate.... yeah exactly same deal, took off that support bolt and with bending it fits ok. I havent got the vg30, just a R33 stnd highflow from Aaron (Slide), I believe :)

The oil line I had made up from Pirtek cost me under $70, but the actual fitting at the turbo end was a bit lumpy, and the first tightened seal wasnt good enough. Turned it over for first fire up and oil started bubbling, with a damned quick shut down :P

Had to adjust the angle of the feed, and did up the bolt REAL tight. I'll have a go in a cple days time at tightening it a little more.

Anyways its all on, and Ive already gone on past 10psi. Ran that sweetly, pressed the 12psi button and wow she zips! Im really impressed. Really impressed. Stnd turbo tuned at 12psi had 160awkw, Im sure this would have a fair bit more then that at the moment. Lol, without a doubt! Got plenty of power getting to the 4wheels, maybe over 175awkw at 12psi at the moment? This will definately see my power target of 200awkw at 1bar. She'll tune up nicely, Im sure.

Auto, heavy Stagea, AWD, Slide turbo, fmic, cai pod, z32, fpr, 040 pump, 3in exhaust, ebc, safc, sitc

plus all the suspn goodies etc etc etc :)

So how does it spool?

My knee is really sore from the patellectomy 3 weeks ago, really swolen from being on my feet for 2 days........ so I havent driven it too much, just 20mins worth. It spools up nicely, not that far 'behind' standard, but as soon as she is into positive boost pressure she skips her heals and really picks up.

Exactly what I expected I suppose, and what I wanted. Heavy Stagea will be nice in city traffic, and a beast when unleashed. Id definately recommend the VG30 highflow for your car Cubes. Would bring a smile to your friendly face for sure :P

with the emulator i havent been able to get it to properly connect with liveedit but using a software that updates the emulator on the fly it seems to work well with romedit.

the unit does support maptrace but ive yet to find software that will allow me to do it that doesnt cost an arm and a leg.

My knee is really sore from the patellectomy 3 weeks ago, really swolen from being on my feet for 2 days........ so I havent driven it too much, just 20mins worth. It spools up nicely, not that far 'behind' standard, but as soon as she is into positive boost pressure she skips her heals and really picks up.

Exactly what I expected I suppose, and what I wanted. Heavy Stagea will be nice in city traffic, and a beast when unleashed. Id definately recommend the VG30 highflow for your car Cubes. Would bring a smile to your friendly face for sure :laugh:

sorry to be a lazy tard and not read the whole thread....but did u get ur turbo hiflowed with the bush or ball bearings?

the under 1k mark does sound interesting as it seems that i might have to get my turbo done pretty soon...how long did it take? ...dont think i can bear being without my car for 2 weeks :D

Those who say here on the forums that the turbo-off is a 1hr job must be kidding themselves. That is simply untrue. :) Been aropund 8hrs so far I think.

took me around 45mins.

8hrs is a bit much dude.

It all depends if you have the right tools I suppose.

When I did the rb25 turbo swap it took me and a mate about 4 hours but we had to manufacture a few spanners.

1st time is always the ahrdest.

Lol, backyard mech and me having fun :mellow:

all at mates rates, you know how it is. little space to move and ran into a few obstacles too.

but everything is perfect and thats the way it should be.

including a service and change of most fluids, turbo install, and brakes arranged for another day, cost me bugga all.

thats what I like about it :O

How is it all going Tangles?

I am now running 19psi and it's a lot of fun. I am used to the lag compared to the stock turbo now. I have noticed it takes a while to reach 9psi. but as soon as 9 is reached it is only a split second till 19psi.

I need some wider tyres, better diff and I am sure gearbox and clutch will not be far off. just finding all the bits at the right price is the hard part.

hey dude, how does the stock internals on the rb20det hold up to 19psi? what mods have you done...looking at one of these for my rb20 but just a little concerned that with out internals being touched itll explode lol...just got ca18det injectors, fuel pump and 300zx afm

Create an account or sign in to comment

You need to be a member in order to leave a comment

Create an account

Sign up for a new account in our community. It's easy!

Register a new account

Sign in

Already have an account? Sign in here.

Sign In Now


  • Similar Content

  • Latest Posts

    • From there, it is really just test and assemble. Plug the adapter cables from the unit into the back of the screen, then the other side to the car harness. Don't forget all the other plugs too! Run the cables behind the unit and screw it back into place (4 screws) and you should now have 3 cables to run from the top screen to the android unit. I ran them along the DS of the other AV units in the gap between their backets and the console, and used some corrugated tubing on the sharp edges of the bracket so the wires were safe. Plug the centre console and lower screen in temporarily and turn the car to ACC, the AV should fire up as normal. Hold the back button for 3 sec and Android should appear on the top screen. You need to set the input to Aux for audio (more on that later). I put the unit under the AC duct in the centre console, with the wifi antenna on top of the AC duct near the shifter, the bluetooth antenna on the AC duct under the centre console The GPS unit on top of the DS to AC duct; they all seem to work OK there are are out of the way. Neat cable routing is a pain. For the drive recorder I mounted it near the rear view mirror and run the cable in the headlining, across the a pillar and then down the inside of the a pillar seal to the DS lower dash. From there it goes across and to one USB input for the unit. The second USB input is attached to the ECUtec OBD dongle and the 3rd goes to the USB bulkhead connected I added in the centre console. This is how the centre console looks "tidied" up Note I didn't install the provided speaker, didn't use the 2.5mm IPod in line or the piggyback loom for the Ipod or change any DIP switches; they seem to only be required if you need to use the Ipod input rather than the AUX input. That's it, install done, I'll follow up with a separate post on how the unit works, but in summary it retains all factory functions and inputs (so I still use my phone to the car for calls), reverse still works like factory etc.
    • Place the new daughterboard in the case and mount it using the 3 small black rivets provided, and reconnect the 3 factory ribbon cables to the new board Then, use the 3 piggyback cables from the daughterboard into the factory board on top (there are stand offs in the case to keep them apart. and remember to reconnect the antenna and rear cover fan wires. 1 screw to hold the motherboard in place. Before closing the case, make a hole in the sticker covering a hole in the case and run the cable for the android unit into the plug there. The video forgot this step, so did I, so will you probably. Then redo the 4 screws on back, 2 each top and bottom, 3 each side and put the 2 brackets back on.....all ready to go and not that tricky really.      
    • Onto the android unit. You need to remove the top screen because there is a daughterboard to put inside the case. Each side vent pops out from clips; start at the bottom and carefully remove upwards (use a trim remover tool to avoid breaking anything). Then the lower screen and controls come out, 4 screws, a couple of clips (including 3 flimsy ones at the top) and 3 plugs on the rear. Then the upper screen, 4 screws and a bunch of plugs and she is out. From there, remove the mounting brackets (2 screws each), 4 screws on the rear, 2 screws top and bottom and 3 screws holding in the small plates on each side. When you remove the back cover (tight fit), watch out for the power cable for the fan, I removed it so I could put the back aside. The mainboard is held in by 1 screw in the middle, 1 aerial at the top and 3 ribbon cables. If you've ever done any laptop stuff the ribbon cables are OK to work with, just pop up the retainer and they slide out. If you are not familiar just grab a 12 year old from an iphone factory, they will know how it works The case should now look like this:
    • Switching the console was tricky. First there were 6 screws to remove, and also the little adapter loom and its screws had to come out. Also don't forget to remove the 2 screws holding the central locking receiver. Then there are 4 clips on either side....these were very tight in this case and needed careful persuading with a long flat screw driver....some force required but not enough to break them...this was probably the fiddliest part of the whole job. In my case I needed both the wiring loom and the central locking receiver module to swap across to the new one. That was it for the console, so "assembly is the reverse of disassembly"
    • But first....while I was there, I also swapped across the centre console box for the other style where the AV inputs don't intrude into the (very limited !) space.  Part# was 96926-4GA0A, 284H3-4GA0B, 284H3-4GA0A. (I've already swapped the top 12v socket for a USB bulkhead in this pic, it fit the hole without modification:) Comparison of the 2: Basically to do the console you need to remove the DS and PS side console trim (they slide up and back, held in by clips only) Then remove the back half of the console top trim with the cupholders, pops up, all clips again but be careful at the front as it is pretty flimsy. Then slide the shifter boot down, remove the spring clip, loose it forever somewhere in the car the pull the shift knob off. Remove the tiny plastic piece on DS near "P" and use something thin and long (most screwdrivers won't fit) to push down the interlock and put the shifter down in D for space. There is one screw at the front, then the shifter surround and ashtray lift up. There are 3 or 4 plugs underneath and it is off. Next is the rear cover of the centre console; you need to open the console lid, pop off the trim covering the lid hinge and undo the 2rd screw from the driver's side (the rest all need to come out later so you can do them all now and remove the lid) Then the rear cover unclips (6 clips), start at the top with a trim tool pulling backwards. Once it is off there are 2 screws facing rearwards to remove (need a short phillips for these) and you are done with the rear of the console. There are 4 plugs at the A/V box to unclip Then there are 2 screws at the front of the console, and 2 clips (pull up and back) and the console will come out.
×
×
  • Create New...