Jump to content
SAU Community

Recommended Posts

  • Replies 812
  • Created
  • Last Reply

Top Posters In This Topic

yeh, but you have to run a divider plate between the engine and the bonnet over the radiator support.

dont worry Jase, you will see... :banana:

wouldn't that suck major hot air unless there was a cold air feed?

hmmmm, yes, very nice. The Carbon Fibre is a bit overkill though, and tune lenght intake runners will be expensive i dare say. Harrop do one also but 12k

Hey Stu, go get some Kleenex for cleanup. You're gonna need them.
hmmmm, yes, very nice. The Carbon Fibre is a bit overkill though, and tune lenght intake runners will be expensive i dare say. Harrop do one also but 12k

Harden the f**k up. Here's the same manifold with Al tubes.

LS7Xram_AlumTubes_4web.jpg

my s13 needs an ls1 just so i can fit that manifold.

But i reckon i can make the throttle linkage more complicated :ph34r:

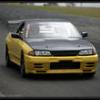
Very interested to see how this car goes. You only need to better a 1:07.9 at wakefield and you are quicker than my old r32. I reckon your car has 6's in it without too much trouble, probably quicker with a bit of seat time.

yes, im all over it brother, Aaron has already quized him on runner lengths which will blow your mind.

they are also doing me some CnCd rocker covers which are trick.

Stu, I would quiz Jamie from NRE on how these are set up. They do the ones for Ingall etc.

_products.htm

Edited by BezerkR32
yes, im all over it brother, Aaron has already quized him on runner lengths which will blow your mind.

they are also doing me some CnCd rocker covers which are trick.

Saw pics of the covers on the PRI show website. Awesome!

post-695-1227042708_thumb.jpg

not heaps to report. have been chipping away at the long list of little fidly jobs like mounting ECU and com port, fitting temp senders, gear shift boot, tow hooks, etc. heaps fidly and time consuming but has to be done. have some second hand rubber on those rays datonas and they look good. scored some second hand semi slicks of one of the brut utes. the biggest i can fit on the front is a 235. have a 245 comfortably on the rear. going to get wired soon. even put engine oil in it today so very close.

A little more done. I have fitted the LS1 wiring harness and ran it into the car to the ECU which is mounted on the passenger floor. Mounted com port plug in pasenger air vent. modified the harness and moved the position of the o2 sensor plugs as they were mounted further down the exhaust before, now they are in the headers.

brakes are bled, clutch also. fluids in engine, trans & diff.

Modified the steering knuckle a little just to get a bit more clearance. had to relieve passenger engine mount also. had to pump the trans tunnel around the shifter opening also.

Radiator, thermo fan and hoses all plumbed. Temp sender was fitted in cylinder head.

Tow hooks fitted front and rear.

Fitted diff pineapples, waiting for front & rear sway-bars to arrive.

Thats about it, going to get wired this week, then doing the tin work and fabbing a catch can and recovery tank and some ducting. Should get her back after Christmas.

post-20078-1228132129_thumb.jpg

post-20078-1228132219_thumb.jpg

Looks like you are soon finihed, and it is looking great! :rofl:

You must upload more photos and video clip from first startup... I want to hear it roar!! :laugh:

Do you have more pictures from the engine bay and interior? :no:

only whats already been posted, nothing much else has changed.

Looks like you are soon finihed, and it is looking great! :thumbsup:

You must upload more photos and video clip from first startup... I want to hear it roar!! :D

Do you have more pictures from the engine bay and interior? :)

Does look great, though looks wierd not having anything hanging out through the opening in the bar. May have to glass it back to teh radiator so you dont see light through there.

Tell me where to write a 10k checque for the conversion and i will post it off....only i know it woudl cost way more then 10k ;)

All it needs to be truly toss worthy is a close ratio box and a big silly cam to make the thing nice and peaky and make good top end. LOL, i seem to like spending money making cars slower ;)

Create an account or sign in to comment

You need to be a member in order to leave a comment

Create an account

Sign up for a new account in our community. It's easy!

Register a new account

Sign in

Already have an account? Sign in here.

Sign In Now


  • Similar Content

  • Latest Posts

    • Hi...so a "development" here aswell The swap is "done" and car went "test drive" BUT it seems the clutch(maybe gearbox?) is a little bit sad? I bought this clutch kit https://justjap.com/products/xtreme-heavy-duty-organic-clutch-flywheel-kit-nissan-skyline-r31-r32-r33-push-type "Problem" is that the first gear is hard to put into and it seems that the clutch is not disengaged. It was not the problem with the old clutch...(or like sometime the first gear would not get as easy specialy when the fluid was cold) So? Can it be like...bad "install" or is the clutch wrong ((it should not have been) i done research to get the right one) Or is this "normal" with new clutch and needs to be break in? 
    • @Duncan I can try  and thanks i did not thought about VIN and part numbers for 33/34. @GTSBoy yeah it looks like iam gonna do that  
    • Forgot to include this but this is the mid section of my steering rack that looks like it has a thread/can be turned with that notch mentioned in the post:
    • Hey everyone, Wanted to pick some brains about this issue I'm having with rebuilding my 33 rack (PN is 49001-19U05). All of the tutorials/videos I've seen online are either R34 or S Chassis racks which seem to be pretty straightforward to disassemble but this process doesnt carry over to my rack. Few of the key differences that I've noted The pinion shaft on the other racks bolt on with 3 torx bolts: Whereas my rack bolts on with 2 allen head bolts: These changes are pretty inconsequential but the main difference is how you pull the actual rack out of the housing. The other skyline/s chassis racks can be taken out by tapping the rack out of the body with a socket and it just slides right out. I'm unable to do that with my rack because there's a hard stop at the end that doesn't let the seal/shaft be tapped out. Can also see a difference in the other end of the rack where mine has a notch that looks like you're able to use a big wrench to unthread 2 halves of the rack whereas the other racks are just kinda set in with a punch. My rack: Other racks: TLDR; Wanted to know if anyone has rebuilt this specific model of steering rack for the R33 and if there were any steps to getting it done easier or if I should just give this to a professional to get done. Sorry if this post is a bit messy, first one I've done.
    • I would just put EBC back on the "I would not use their stuff" pile and move on.
×
×
  • Create New...