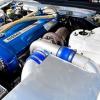
Nytsky's Engine Build
Announcements
-
Similar Content
-
Latest Posts
-
By joshuaho96 · Posted
GCG is a good company, they're a major distributor for Garrett in Japan as well. -
Nah, OEM washer bottle and brake fluid reservoirs are fine I don't know what it is with the plastic that Mazda used, some plastics, like the washer bottle and brake fluid res are fine, and still look new after 20 years use, where as the coolant expansion tank, and PS reservoir, that I replaced with new OEM items when I first got the car, turned yellow and started getting brittle a few years later If the dirty yellow stained plastics didn't trigger me there wouldn't be an issue, but they did, much like the battery bracket....... Meh As for going back to work full time to support car stuff, nope, why, because I own a Mazda NC MX5, not a Nissan R series Skyline 🤣
-
I've never heard of CJ-motor, so can't advise you on them. I'd just go straight to GCG for a GCG highflow though. Seems no point to use a middleman. I'm somewhat surprised that the price on the CJ site is lower than the GCG retail price. Even though CJ would get a discount of some sort, you would hardly expect them to give up so much margin. Maybe the price is out of date? Having said that "I'd go to GCG"...when I did my highflow, I went to Hypergear. I did this https://hypergearturbos.com/product/rb25dethighflow/#tab-dyno-results with the R34 OP6 450HP profile. With the BB centre (extra $400) and intially with the standard boost actuator, but I eventually got him to send me the high pressure one when I got to the point of being able to actually use it. Ends up costing the same sort of money as the GCG highflow, but this is, of course, the turbo that I KNOW has a shorter length core and so moves the comp cover rearwards. The GCG apparently doesn't do that. My mechanic also swears by the GCG highflow, given that we have another turbo rebuilder who does something essentialy the same as theirs, using Garrett wheels. He says it stands up at really low revs and makes good power. I haven't pushed my HG highflow past ~240-250rwkW yet (should have a little more in it, but unclear how much) and it does have a fairly gentle boost ramp. OK, it's much better now that I have gotten my boost controller tuned up on it. A lot of my earlier unhappiness was because I couldn't keep the wastegate flap as closed as it needed to be (including some mechanical issues). I'd still prefer it to boost up nearly as quickly as the stocker, and it certainly a bit slower than that. So maybe the GCG one is worth the first look (for you).
-
Ok thanks 🙂 I will higly consider this. Any "known" company for a good reviews and experience to send that off? Is that CJ-motor good one? Or go straight to GCG site? I need to use VPN to even find some of those "shops" let alone access them 🙂
-
You can literally put in as much WMI as it takes to quench the combustion totally (and then back it off a little, obviously), and it will keep making more and more power. The power comes from the cooling effect of the water (and the meth) and the extra fuel (the meth, which also has massive octane). It is effectively exactly like running E85. One might be slightly better than the other, but they are damn close. But with either you can lean on the boost or the timing (or both) waaaay more than with just petrol and the results are similar. Here's the first thing I googled for an anecdotal bit of evidence. Can't access the attachment without being a gold member, but it is there for the getting if able to, or searched up elsewise perhaps. https://www.hpacademy.com/forum/general-tuning-discussion/show/wmi-vs-e85/
-


Recommended Posts
Create an account or sign in to comment
You need to be a member in order to leave a comment
Create an account
Sign up for a new account in our community. It's easy!
Register a new accountSign in
Already have an account? Sign in here.
Sign In Now