Jump to content
SAU Community

Recommended Posts

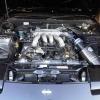
bonnet's finally finished, it took two bonnet's to make. Cutting the induction hood out one and grafting it to the other. Kreative in windsor did all the welding work. dan's place (also in windsor) did the prep and painting (he also seem welded the some of hood again, the welder was worried about warping). it's a little warped on the front at the sides but a little persuasion on seans part seemed to fix that.

post-38774-1282645276_thumb.jpg

post-38774-1282644600_thumb.jpg

post-38774-1282644568_thumb.jpg

post-38774-1282643846_thumb.jpg

post-38774-1282643833_thumb.jpg

post-38774-1282643786_thumb.jpg

Edited by farch
  • 5 weeks later...

these pics are what the car looks like now with bonnet complete and engine bay pretty much complete as well. only thing left are new custom front sway bar and calibrate the speedo and put a converter in the dash to get the 4 banger tachometer to display a v8 signal correctly. then engineering!

post-38774-1285218802_thumb.jpg

post-38774-1285218843_thumb.jpg

post-38774-1285218876_thumb.jpg

post-38774-1285218902_thumb.jpg

if i had my way there would be no bonnet bulge at all. one day i might put a new intake manifold on it. runs pretty quiet when part at throttle, very unassuming until you put the hammer down then every knows whats in it. The noise coming from the engine is louder then the exhaust, a lot louder. I drove it down the road to try and get a pink slip for a unrego'd vehicle temporary license, and I'm quite amazed at the result. It's not a stupid amount of acceleration, its linear. speedo looks like tacho when accelerating from about 50km/hr in fifth gear, goes up faster then it feels. guess I've gotten used to boost. Sean thinks it'll go faster with taller diff gears to make better use of the torque cause it's currently got the tomei 2 way 4.363 from the ca18, might have to drop it to about 3.9.

Edited by farch

Thanks for the kind words!

Yeah, a lot of time and effort spent on it too!

Hows Canberra going for you?

Read a bit about you project on DRN motorcars folder too, and loved how people did not have a clue what engine you had!

hey guys

I was so impressed when i first heard about this, glad to see it has come together nicely! can't wait to see it around time and i better get an invite to the track if you end up going down for a few test laps! hehe.

been doing some research on my diff ratio. which is currently the ca18det manual trans ratio of 4.363 which means, assuming that 7000 rpm is my red line and the 300zx gear ratio's are:

1st 3.214

2nd 1.925

3rd 1.302

4th 1.000

5th 0.752

this should mean each gear maxes out at:

1st 60km/hr

2nd 100km/hr

3rd 146km/hr

4th 191 km/hr

5th 254km/hr

and at 100km/hr in 5th gear the rpm should be 2750rpm. (quite high for a v8)

or the other other option is using the ca18 auto trans diff ratio of 3.9 which is:

1st 66km/hr

2nd 111km/hr

3rd 164km/hr

4th 214km/hr

5th 285km/hr

and at 100km/hr in 5th gear the rpm should be 2500rpm.

worried if i go any lower in the ratio I'll loose out on too much acceleration.

or i use a 4.11 out of an sr20 s13:

1st 63km/hr

2nd 104km/hr

3rd 156km/hr

4th 203 km/hr

5th 270km/hr

and at 100km/hr in 5th gear the rpm should be 2600rpm.

I'm thinking the 4.11's what does everyone think?

unfortunately those calculations you made dont factor in aerodynamic drag the car has to overcome.

Either way, my hat goes off to you boys. I been following this and its very very impressive!

Whats the plan for the car? What will be its duties? That will influence diff choice too.

Id be waiting till you get wider rubber then see how traction is before you go changing diffs

  • 3 weeks later...
unfortunately those calculations you made dont factor in aerodynamic drag the car has to overcome.

Either way, my hat goes off to you boys. I been following this and its very very impressive!

Whats the plan for the car? What will be its duties? That will influence diff choice too.

Id be waiting till you get wider rubber then see how traction is before you go changing diffs

drag is a factor of the power needed to overcome it, the ratio tells me with enough power what maximum speed the car is capable of. the main point of it is to calculate the cruising rpm of highway driving.

the plan for the car is mainly street performance will see the odd track day and drag strip. hence the Na con-fig and 5 speed manual. the diff ratio will probably end up as 3.9 to get the best out cruising and acceleration with out too many draw backs in either one.

by the way the custom front sway bar is fitted, same diameter as the white-line adjustable that it replaces.

Awesome build! that bonnet kind of makes it look like an old 300zx..

As far as diff ratios go..

I did something similar with the RB30DET, it didn't rev it as much so lost speed in each gear (made me slower than a stock RB20).

Going from 4.3 to 3.9 made better use of the abundance of torque and while being a bit less brutal, it was much nicer to drive.

  • 2 weeks later...

looks awesome but dont change the diff, if you are spinning the wheels just get some semi slicks and youll never look back, the lower the diff ratios the better as it = more tractive torque at the wheels at pretty much every speed.

engine noise is very loud, doesn't sound normal, my mate has a vh41 that wasn't anywhere near that loud, is it possible the valve train is all gummed up with oil?

Edited by Rolls

Create an account or sign in to comment

You need to be a member in order to leave a comment

Create an account

Sign up for a new account in our community. It's easy!

Register a new account

Sign in

Already have an account? Sign in here.

Sign In Now


  • Similar Content

  • Latest Posts

    • So stock ECU does not like anything above 10 psi?  That Nistune one is just for "try" if it will be any different, I know it need to be tune for that. I know but YOU may know about these problem but i/we dont. They few little Skylines here let alone people who know anything about tham so that is why iam asking here  
    • So now we have a radiator with no attachments whatsoever. It lifts up with a particularly tight spot between the drivers side air box mount and the lower radiator outlet, but if you've got this far you will sort that too. This is the lower mounts with the rad out so you can see where the rubber bushes go, it is a straight shot upwards Done! Assembly is the reverse of disassembly, with blood less likely to be shed.
    • Right, onto the second last trick. The Air Con condenser is mounted to the front of the radiator and stays in the car when the radiator is removed. There are 2x 10mm headed self tappers holding the top of the condenser to the radiator, remove those The bottom of the condenser is attached to the radiator with clips. You need to lift the condenser out of those clips and clear (up, then forward). f**ked if  could work out how to do that last bit with the front bumper on. I hope you can, and you share the trick.  Bumper removal probably deserves its own thread one day once I've recovered the will to live, but basically you need to remove the wheels, front inner guard liners (clips and 10mm headed bolts), the self tapper between the guard and the bumper at the rearmost point of the bumper (same as an R32 that bit), any remaining clips at the top/front of the grill, an absolute bastard design with a plate that holds the top of the bumper above the headlight each side (only 1 bolt which is tricky to get to, but the plate catches 2 places on the bumper and must be removed....carefully!) and push clips between the bumper and guard under the headlight. If you've done all that you will be faced with wiring for the fog lights on both sides and in ADM Q50 RS at least, 4 nasty tight plugs on the driver's side for the ADAS stuff. So, the clips at the bottom look like this on drivers side (looking from the front) And on the passenger side (also from the front), you can see this one is already out Clearance on both of these are super tight; the condenser needs to move up but the upper rad support mount prevents that, and the radiator can't move down far because it is (rubber) mounted. Once you achieve the impossible and drop the condenser off those mounts so it does not stop the rad moving, you are good to go
    • OK, next the shroud needs to come off and there are a couple of tricks. Firstly, there is a loom from near the passenger side headlight to the fans, coolant temp sensor etc and there is no plug to undo.  In my case I was OK to leave the shroud on top of the engine so I just undid the passenger side fan plug and about 10 of the clips which gave enough free wire to put it aside. The fan plugs were super tight, the trick I used was a small falt screwdriver to push down on the release tab, then a larger flat screwdriver to lever the plug out of the fan unit....be careful with how much force you apply! If you need to remove the shroud altogether for some reason you will have to deal with all the plugs (tight) and clips (brittle)....good luck. I removed all of the clips and replaced them with cable ties that I will just cut next time. Also, in the Red Sport / 400R at least, the intake heat exchanger reservoir hose is bolted to the shroud in 2 places with 10mm headed bolts; so remove them (the hose stays in the car; no need to undo it at the t fittings down at the radiator lower mount. Once you've dealt with the HX hose and the wiring loom, there are 3x 10mm headed self tappers holding the top of the shroud to the radiator; remove those.   The shroud then lifts out of the bottom mounts where it sits on the radiator, up and onto the engine out of the way. Simples
    • Ok, disregard my “rate them” comment, sorry for my unrealistic input
×
×
  • Create New...