Jump to content
SAU Community

Recommended Posts

Hey guys,

After installing my new front mount, the front bar requires some fairly decent modification, which

i expected. However, i was wondering what the best tool would be for the job? I was thinking an

angle grinder with a really fine cutting blade, but just thought before i do that id see what everyone

else uses...

Cheers

Link to comment
https://www.sau.com.au/forums/topic/281728-cutting-front-bar/
Share on other sites

i don't know about anyone else who has used an angle grinder, or if the stagea front bars are made of the same material as standard 180sx front bars, but the plastic melted with the heat from the cutting disk and made a stringy fairy floss like mess :devil:

kinda cool though

a fine bladed hacksaw! or an airsaw if you have one, will make the job easier. but you migth have problems making round edges with it......

Was thinking a fine bladed hacksaw would be the best bet... but those sharp edges :D

i don't know about anyone else who has used an angle grinder, or if the stagea front bars are made of the same material as standard 180sx front bars, but the plastic melted with the heat from the cutting disk and made a stringy fairy floss like mess :devil:

kinda cool though

Problem solved!! ;)

Edited by iamhe77

the only fmic install i've done was in an s13 silvia. i cut the reo with an angle grinder and the plastic bumper with a dremel.

i don't know about anyone else who has used an angle grinder, or if the stagea front bars are made of the same material as standard 180sx front bars, but the plastic melted with the heat from the cutting disk and made a stringy fairy floss like mess :devil:

kinda cool though

watch out for this ^^^ lol. when i took to mine with the dremel, i had to set up a fan to blow the smoke away. it's toxic, smells like shit and burns your eyes. plus you get the fairy floss effect all over your dremel :D

Just do it with the angle grinder, it cuts through it like a hot knife through butter and if you careful you can get it pretty neat. You may wish to give the edges a bit of a hand sand once your done though. Also you might want to tape up the painted areas your not cutting for a bit of protection just in case anything happens. Tape is heaps cheaper than a new paint job :P

I've always just used a hacksaw blade and shaved off the fuzzy bits at the end with a scraper blade or stanley knife blade.

Hacksaw blade allows you to take your time, but you still need a steady hand.

Definitely tape the edge of your cut though, straight edge gives a nice guide and you won't mark surrounding paint accidentally.

Good luck!

Hahahahaha, I wonder if that spaghetti string-like mess trailing in the breeze would add to the illusion of speed when Alex is driving around. :)

HEY! There is no illusion of speed required thank you very much!

Go easy on that Days front bar, I went too far!!!

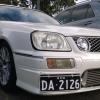
Yeah im basically gonna lose the whole number plate thingo in the middle,

as well as the two vertical parts that come down to each side.

I think im going to go the thin cutting blade on the grinder, with the really

thin ones they go through pretty quickly....thanks for everyones ideas :P

HEY! There is no illusion of speed required thank you very much!

Yeah im basically gonna lose the whole number plate thingo in the middle,

as well as the two vertical parts that come down to each side.

I think im going to go the thin cutting blade on the grinder, with the really

thin ones they go through pretty quickly....thanks for everyones ideas :)

:) the wife's stag has the dayz front bar and i think we'll end up doing the same :( it's probably the only kit i've seen on a car that i've liked :(

G`Day All iam now in middle of modding my Front Bar stock,i have found another nissan bar to cut up & replace the crap in centre of the bar i shall take Photo`s as i go,but iam one for STANLEY KNIFE Tape all that your going to cut so you can follow LINE`S,I did price someone else to mod bar & when told $300/$350 i said thank`s will try it my self,cheer`s chuckie.

How thick is intercooler?

My Greddy 75mm fits with slats (even thou i cut 'em :happy: )

Keep The Vertical slats!

It's just over 80mm, but also where the slats are is where the silicone hose

kinda buldges out, so they have to go...

HEY! There is no illusion of speed required thank you very much!

Yeah im basically gonna lose the whole number plate thingo in the middle,

as well as the two vertical parts that come down to each side.

I think im going to go the thin cutting blade on the grinder, with the really

thin ones they go through pretty quickly....thanks for everyones ideas :thumbsup:

How thick is intercooler?

My Greddy 75mm fits with slats (even thou i cut 'em :) )

Keep The Vertical slats!

Create an account or sign in to comment

You need to be a member in order to leave a comment

Create an account

Sign up for a new account in our community. It's easy!

Register a new account

Sign in

Already have an account? Sign in here.

Sign In Now


  • Similar Content

  • Latest Posts

    • What does it look like with highway driving? And yes, I had a similar thought as Duncan. It looks quite similar in my Stagea and I have made myself accept it as normal. Might have to look into it some day  
    • While I was waiting for the new parts to come in for the charge pipe and radiator I decided to do some turbo modification. The drive pressure (exhaust backpressure) was a lot higher that I thought it should be. For 32lbs of boost drive was 55lbs. The turbine housing is a 1.10AR and my turbo builder has suggested to go to a 1.25AR. To test if a larger AR would do anything to reduce drive pressure AND not spend any money I decided to hog out the divider in my current housing. I removed it from the inlet and the whole way through the housing.  After reassembly and testing it doesn't look like this modification did anything for reducing drive pressure or requiring more fuel (making more power). Oh well, it was worth a shot. We'll get some data at the track if it makes it past the 60ft. I also machined a $7 shift knob off Amazon to fit my Stillway shifter since I didn't like the Stillway shift knob. Next on the list was the radiator replacement and fabrication of a new intercooler tube that had no silicon coupler. No pictures of this - I was short on time each night after work to get this done and didn't stop to take pictures.  Next was to get the clutch disks out and replaced. Previously when installing the dogbox I had ordered a set of the same sintered iron disks I had been running because I switched to the 26-spline input shaft. I thought it was odd that they didn't have any markings or brand name on them like all my old disks had but installed them anyway. At the track I could not get the clutch to lock up using my normal strategies. After two track nights I reached out to the clutch manufacturer and ask their thoughts. They said they had to switch the material out because they were having trouble getting the original material and that this new material would not take to being slipped very well.  So out with the first set of 26-spline disks and in with the correct material 26-spline disks. While I had the trans out I added an inspection/service hole. I've wanted one of these for a while. Now I can have a look at things and change the front cover shimming when needed (clutch wear). I hustled and got the clutch change done in a few hours on a Saturday. Hopped in the car and drove home. On the way home I did a 1-3 pull. When shifting from 2nd to 3rd the core plug in the back of the cylinder head popped out and dumped all the coolant. Thankfully I was only 30 seconds from home and coasted it there. Datalog showed nothing unusual and 2.5psi of coolant pressure. That plug has been in there since 1992 but I guess it worked its way out. Pulled the trans AGAIN and replaced the plug, JB welded it in, and made a brace. Also deleted the head drain I had added in during the bearing issue fiasco.  I am currently changing my boost control plumbing to make it cleaner. After that is done I'll make another attempt at getting past the 60.
    • Are you 100% sure this isn't tune related?
    • 140-150 across the board. At this point hoping the grounding harness fixes it. My grounds are all tied to the chassis and none to the battery. For SR and KA that’s never been a problem for me but had a few other guys here and Reddit who told me RB really like a very solid ground setup tied to the battery so going to try that next, I’m stumped if that doesn’t do it. Never had a car have spark and fuel and not fire off before. Only thing I can think is the spark is intermittent/weak because of grounds nothing else really makes sense at this point 
    • I am having close to the same issue. Can you help me with what wire you grounded to get your pump to trigger?
×
×
  • Create New...