Jump to content
SAU Community

Recommended Posts

Hey guys,

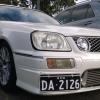
After installing my new front mount, the front bar requires some fairly decent modification, which

i expected. However, i was wondering what the best tool would be for the job? I was thinking an

angle grinder with a really fine cutting blade, but just thought before i do that id see what everyone

else uses...

Cheers

Link to comment
https://www.sau.com.au/forums/topic/281728-cutting-front-bar/
Share on other sites

i don't know about anyone else who has used an angle grinder, or if the stagea front bars are made of the same material as standard 180sx front bars, but the plastic melted with the heat from the cutting disk and made a stringy fairy floss like mess :devil:

kinda cool though

a fine bladed hacksaw! or an airsaw if you have one, will make the job easier. but you migth have problems making round edges with it......

Was thinking a fine bladed hacksaw would be the best bet... but those sharp edges :D

i don't know about anyone else who has used an angle grinder, or if the stagea front bars are made of the same material as standard 180sx front bars, but the plastic melted with the heat from the cutting disk and made a stringy fairy floss like mess :devil:

kinda cool though

Problem solved!! ;)

Edited by iamhe77

the only fmic install i've done was in an s13 silvia. i cut the reo with an angle grinder and the plastic bumper with a dremel.

i don't know about anyone else who has used an angle grinder, or if the stagea front bars are made of the same material as standard 180sx front bars, but the plastic melted with the heat from the cutting disk and made a stringy fairy floss like mess :devil:

kinda cool though

watch out for this ^^^ lol. when i took to mine with the dremel, i had to set up a fan to blow the smoke away. it's toxic, smells like shit and burns your eyes. plus you get the fairy floss effect all over your dremel :D

Just do it with the angle grinder, it cuts through it like a hot knife through butter and if you careful you can get it pretty neat. You may wish to give the edges a bit of a hand sand once your done though. Also you might want to tape up the painted areas your not cutting for a bit of protection just in case anything happens. Tape is heaps cheaper than a new paint job :P

I've always just used a hacksaw blade and shaved off the fuzzy bits at the end with a scraper blade or stanley knife blade.

Hacksaw blade allows you to take your time, but you still need a steady hand.

Definitely tape the edge of your cut though, straight edge gives a nice guide and you won't mark surrounding paint accidentally.

Good luck!

Hahahahaha, I wonder if that spaghetti string-like mess trailing in the breeze would add to the illusion of speed when Alex is driving around. :)

HEY! There is no illusion of speed required thank you very much!

Go easy on that Days front bar, I went too far!!!

Yeah im basically gonna lose the whole number plate thingo in the middle,

as well as the two vertical parts that come down to each side.

I think im going to go the thin cutting blade on the grinder, with the really

thin ones they go through pretty quickly....thanks for everyones ideas :P

HEY! There is no illusion of speed required thank you very much!

Yeah im basically gonna lose the whole number plate thingo in the middle,

as well as the two vertical parts that come down to each side.

I think im going to go the thin cutting blade on the grinder, with the really

thin ones they go through pretty quickly....thanks for everyones ideas :)

:) the wife's stag has the dayz front bar and i think we'll end up doing the same :( it's probably the only kit i've seen on a car that i've liked :(

G`Day All iam now in middle of modding my Front Bar stock,i have found another nissan bar to cut up & replace the crap in centre of the bar i shall take Photo`s as i go,but iam one for STANLEY KNIFE Tape all that your going to cut so you can follow LINE`S,I did price someone else to mod bar & when told $300/$350 i said thank`s will try it my self,cheer`s chuckie.

How thick is intercooler?

My Greddy 75mm fits with slats (even thou i cut 'em :happy: )

Keep The Vertical slats!

It's just over 80mm, but also where the slats are is where the silicone hose

kinda buldges out, so they have to go...

HEY! There is no illusion of speed required thank you very much!

Yeah im basically gonna lose the whole number plate thingo in the middle,

as well as the two vertical parts that come down to each side.

I think im going to go the thin cutting blade on the grinder, with the really

thin ones they go through pretty quickly....thanks for everyones ideas :thumbsup:

How thick is intercooler?

My Greddy 75mm fits with slats (even thou i cut 'em :) )

Keep The Vertical slats!

Create an account or sign in to comment

You need to be a member in order to leave a comment

Create an account

Sign up for a new account in our community. It's easy!

Register a new account

Sign in

Already have an account? Sign in here.

Sign In Now


  • Similar Content

  • Latest Posts

    • Had I known the diff between R32 and R33 suspension I would have R33 suspension. That ship has sailed so I'm doing my best to replicate a drop spindle without spending $4k on a Billet one.
    • OEM suspension starts to bind as soon as the car gets away from stock height. I locked in the caster and camber before cutting off the kingpin. I then let the upright down in a natural (unbound) state before re-attaching it. Now it moves freely in bump and droop relative to the new ride height. My plan is to add GKTech arms before the car is finished so I can dial camber and caster further. It will be fine. This isn't rocket science. Caster looks good, camber is good, upper arm doesn't cause crazy gain and it is now closer to the stock angle and bump steer checks out. Send it.
    • Pay careful attention to the kinematics of that upper arm. The bloody things don't work properly even on a normal stock height R32. Nissan really screwed the pooch on that one. The fixes have included changing the hole locations on the bracket to change the angle of the inner pivot (which was fairly successful but usually makes it impossible to install or remove the arm without unbolting the bracket from the tower, which sucks) and various swivelling upper arm designs. ALL the swivelling upper arm designs that look like a capital I (with serifs) suck. All of them. Some of them are in fact terribly unsafe. Even the best one of them (the old UAS design) shat itself in short order on my car. The only upper arm that works as advertised and is pretty safe is the GKTech one. But it is high maintenance on a street car. I'm guessing that a 600HP car as (stupidly, IMO) low as you are going is not going to be a regular driver. So the maintenance issues on suspension parts are probably not going to be a problem. But you really must make sure that however your fairly drastically modded suspension ends up, that the upper arms swing through an arc that wants to keep the inner and outer bolts parallel. If the outer end travels through an arc that makes that end's bolt want to skew away from parallel with the inner bolt, you will build up enormous binding and compressing forces in the bushes, chew them out and hate life. The suspension compliance can actually be dominated by the bush binding, not the spring rate! It may be the case that even something like the GKTech arm won't work if your suspension kinematics become too weird, courtesy of all the cut and shut going on. Although you at least say there's no binding now, so maybe you're OK. Seeing as you're in the build phase, you could consider using R33/4 type upper arms (either that actual arm, OEM or aftermarket) or any similar wishbone designed to suit your available space, so alleviate the silliness of the R32 design. Then you can locate your inner pivots to provide the correct kinematics (camber gain on compression, etc).
    • The frontend wouldn't go low enough because the coilover was max low and the upper control arm would collapse into itself and potentially bottom out in the strut tower. I made a brace and cut off the kingpin and then moved the upright down 1.25" and welded. i still have to finish but this gives an idea. Now I can have a normal 3.25" of shock travel and things aren't binding. I'm also dropping the lower arm and tie rod 1.25".
    • Motor and body mockup. Wheel fitment and ride height not set. Last pic shows front ride height after modifying the front uprights to make a 1.25" drop spindle.
×
×
  • Create New...