Jump to content
SAU Community

Recommended Posts

lol awwwwwwwwwww cute kent

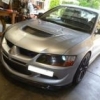
yeah i think this cars alright, uncle did the usual accelerate hard tests n brake hard etc.

previous owner before this one was 80 years old....

lol 80 years old. lol. right.

anyways, my purchase for the day... for the golf:

47063_x300.jpg

Front Suspension Refresh Kit - Stage 3 (lol @ americans and their "stage" concept)

109800_x300.jpg

TT Short Shift Kit - With Shifter Cable End

78208_x300.jpg

Complete air ride system with AutoPilot Digital air management system

103133_x300.jpg

ECS Adjustable Sway Bar End Link Set

47007_x300.jpg

ECS Ultimate 2.0L Timing Belt Kit

626_x300.jpg

ECS Urethane Rear Coil Spring Isolators

w00t. there goes half of my tax return :happy:

really wanna see pics of this golf

looks like shit atm. gimme 2 months to put all the shit on it.

the guys birthdate is on the previous rego papers.. 1936 :happy:

i'll bet money that it's the shop owner's old man's details. it's a common trick used to transfer rego by shops. there's a tax loophole and vicroads loophole involved, which I'm not gonna discuss on here.

nothing illegal, and perfectly within the dealer's rights, so don't worry and lose any sleep.

Hmm very interesting purchases Shan. Unfotunetly not much stuff to buy from the U.S for 33's because there is f**k all there. Unless you have sites that you can share with me? I wanna spend money :happy:

hahah..+1..cant find what i want...hate when that happens...

ufff exhaust and turbo coming off tomorrow. Then to rewire factory AFM and pray to god they dont find my injectors as that is game over my friend...

anyone have a factory r32 AFM plug? I chopped mine off when connecting the z32 and lost it :happy:

Won't your injectors run shit on a stock ecu, affecting your emissions?

reprogramming the eprom in the ecu with the injectors corrected. If that fails, I will solder the chip directly onto the board, then they cant say shit.

lol awwwwwwwwwww cute kent

yeah i think this cars alright, uncle did the usual accelerate hard tests n brake hard etc.

previous owner before this one was 80 years old....

did you just fkn call him cute? and did he just let that slide? what the hell is going on in here?

congrats btw

so i decided a little while ago to bolck off my bov for a leak finding exercise....

long story short, i noticed that my car runs the same whether the bov is blocked or not

many people report that blocking the bov makes the car have aids (with the stalling and what not)

people that complain about stalling etc usually have a very very mildly modified car

people with properly modified cars have a standalone ecu that normally ditches the closed loop 02 sensor

so my theory of the day is that blocking the bov only affects cars with the closed loop switched ON

yes? no?

did you just fkn call him cute? and did he just let that slide? what the hell is going on in here?

congrats btw

cute has kinda become part of a bromance dictionary here in the north.. dont know whats going on in the east..

Why did you go Auto?

because im lazy

Any chance you got a CAD drawing of them? Might pass them onto the toolmakers at work to make up a set :)

I got my rings from speedy wheels

http://www.speedywheels.com.au/

Sent them an email telling them the ID and OD required and it cost me like $20 incl postage for all 4

i had some basic drawings of them. but ur better off doing them urself.

mine were done to my coils ID, the urethane bushes i had (superpro) and the bilstein shaft OD. the design is pretty basic.

DSCN26592.jpg

100_4968.jpg

100_4967.jpg

100_4966.jpg

from here i just drilled holes, counter-sunk the holes, then fit some bolts up through there. and yes the bushes are in the wrong way.

i also created some spacers to space down the bump stop to make sure the bump stop was what was bottoming out, not coil bind. this is done by taking basic measurements and getting the scrag figures for your coil (hyperco and eibach both have these in their catalog i believe)

Very nice.

What was your reason for the hats? Looks to me like you can achieve a lower setup without dropping down the circlip? This would mean more suspension travel without hitting the bump stops?

lol, it's easy man... just get 15mm bolt on spacers, and run smaller tyres.... get generic ones that have hub rings on them and then get some adapter that close the gap between the ring on the spacers and the oversized hole in the professors :wub:

run camber on the front and/or smaller tyres

i have 8" rims on my ksev and i run 195/50/15's

At least you make sense when you explain it :) Thanks man!

Now I just need to chew through my fresh tyres before I can buy smaller ones haha.

Guest
This topic is now closed to further replies.


  • Similar Content

  • Latest Posts

    • And now to the front.  No pics of the 3 nuts holding the front struts on, they are easy to spot. Undo 2 and leave the closest one on loosely. Underneath we have to deal with the wiring again, but this time its worse because the plug is behind the guard liner. You'll have to decide how much of the guard liner to remove, I undid the lower liner's top, inside and lower clips, but didn't pull it full off the guard. Same issue undoing the plug as at the rear, you need to firmly push the release clip from below while equally firmly gripping the plug body and pulling it out of  the socket. I used my fancy electrical disconnect pliers to get in there There is also one clip for the wiring, unlike at the rear I could not get behind it so just had to lever it up and out.....not in great condition to re-use in future.
    • Onto the rear lower shock mount. It's worth starting with a decent degrease to remove 10+ years of road grime, and perhaps also spray a penetrating oil on the shock lower nut. Don't forget to include the shock wiring and plug in the clean.... Deal with the wiring first; you need to release 2 clips where the wiring goes into the bracket (use long nose pliers behind the bracket to compress the clip so you can reuse it), and the rubber mount slides out, then release the plug.  I found it very hard to unplug, from underneath you can compress the tab with a screwdriver or similar, and gently but firmly pull the plug out of the socket (regular pliers may help but don't put too much pressure on the plastic. The lower mount is straightforward, 17mm nut and you can pull the shock out. As I wasn't putting a standard shock back in, I gave the car side wiring socket a generous gob of dialectric grease to keep crap out in the future. Putting the new shock in is straightforward, feed it into at least 1 of the bolt holes at the top and reach around to put a nut on it to hold it up. Then put on the other 2 top nuts loosely and put the shock onto the lower mounting bolt (you may need to lift the hub a little if the new shock is shorter). Tighten the lower nut and 3 upper nuts and you are done.  
    • You will now be able to lift the parcel shelf trim enough to get to the shock cover bolts; if you need to full remove the parcel shelf trim for some reason you also remove the escutcheons around the rear seat release and you will have to unplug the high stop light wiring from the boot. Next up is removal of the bracket; 6 nuts and a bolt Good news, you've finally got to the strut top! Remove the dust cover and the 3 shock mount nuts (perhaps leave 1 on lightly for now....) Same on the other side, but easier now you've done it all before
    • OK, so a bunch of trim needs to come off to get to the rear shock top mounts. Once the seat is out of the way, the plastic trim needs to come off. Remove 2 clips at the top then slide the trim towards the centre of the car to clear the lower clip Next you need to be able to lift the parcel shelf, which means you need to remove the mid dark trim around the door, and then the upper light trim above the parcel shelf. The mid trim has a clip in the middle to remove first, then lift the lowest trim off the top of the mid trim (unclips). At the top there is a hidden clip on the inner side to release first by pulling inwards, then the main clip releases by pulling the top towards the front of the car. The door seal comes off with the trim, just put them aside. The the lighter upper trim, this is easy to break to top clips so take it carefully. There is a hidden clip towards the bottom and another in the middle to release first by pulling inwards. Once they are out, there are 3 clips along the rear windscreen side of the panel that are hard to get under. This is what the rear of the panel looks like to assist:
    • Yes. Autos typically work from the speed sensor on the pinion shaft of the diff. I also think that even if you have a proper speed sensor for the bog manual in the manual box, that the signal it outputs is not compatible with the auto dash anyway. You should consult that manual (the book, not the gearbox).
×
×
  • Create New...